
Are you starting to online teach or are looking for a new way to do it? Whether this is a new part of your role or a leftover effect from the pandemic, online teaching has many different hurdles to overcome than in-person teaching. Luckily, there are many tools and different ways to stay connected and teach your students including Google Meet for online teaching.
Many platforms that are familiar to schools, like GSuite with Google Meet, can help you with this transition from in-person classes to online classes. If you already use Google Classroom, Google Meet for online teaching is an amazing resource. Let’s get started with this customized teacher guide to using Google Meet!
Step 1: Access Google Meet
To begin using, just log in to your Google or GSuite account. Google Meet with a GSuite account has more features than Google Meet with a regular Google account. Recording your class, live streaming, and having more participants in your class are all features of Meet when you use a GSuite account.
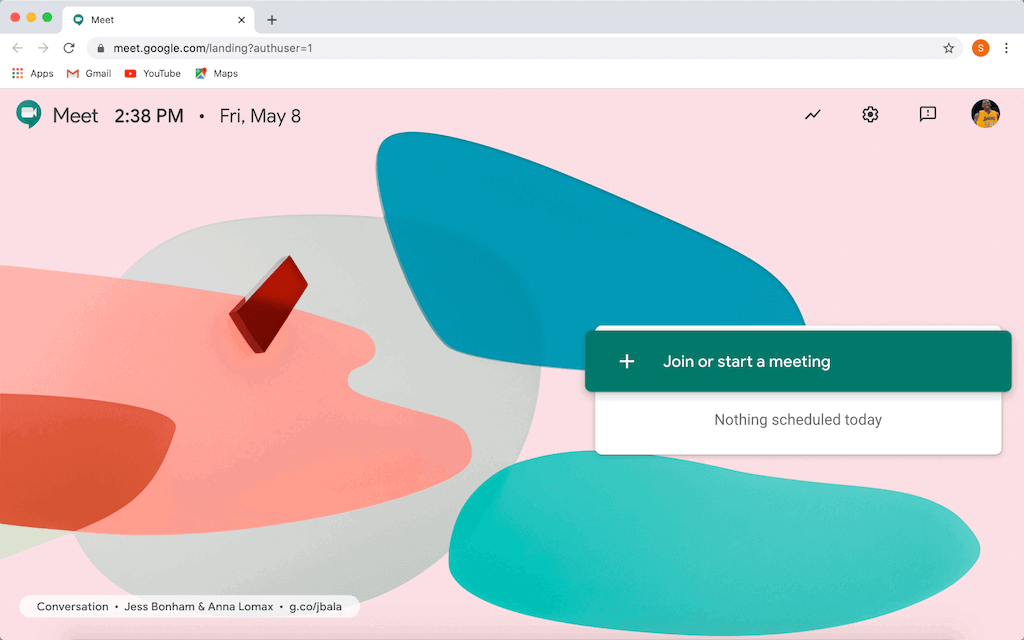
Google Meet is integrated into many of Google’s other software, like Gmail & Google Calendar. You can also access it from meet.google.com. Here, you can join meetings, start your own, and see your scheduled meetings.
If you don’t have a GSuite account yet, check out edu.google.com to see how your institution can get GSuite for free.
Step 2: Schedule a Class
There are two ways to create a class session with Google Meet. You can begin an instant meeting on the Meet homepage or schedule one within Google Calendar. We recommend scheduling your classes in advance so that all the setup is complete before your class begins.
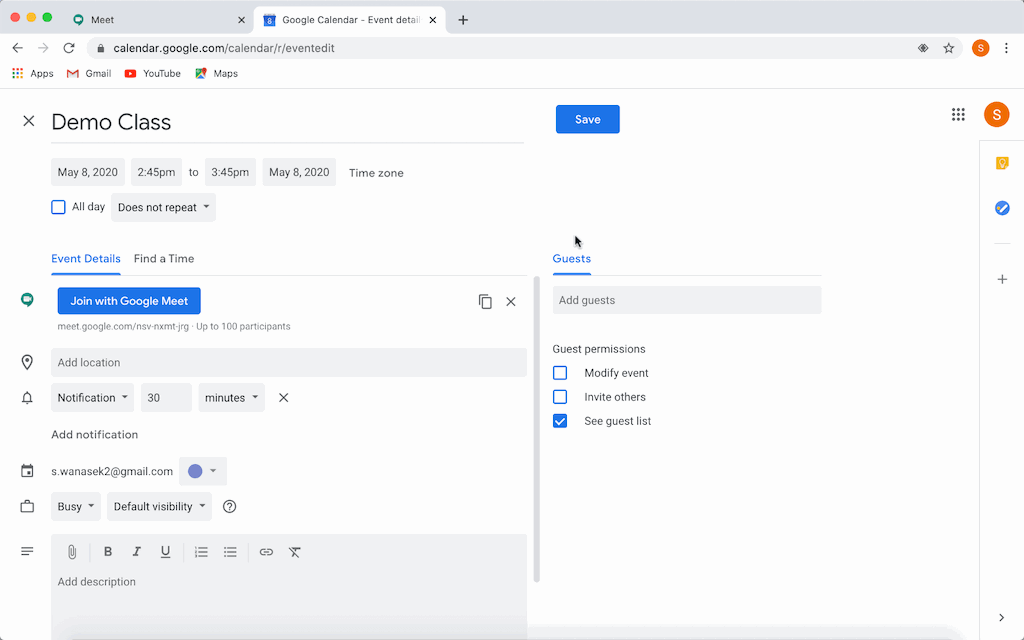
In Google Calendar, you can set up a new event like normal. After you’ve inserted the name, date, and time, just click the bar “Add Google Meet video conferencing.” Now, the event will be scheduled with Google Meet, and the URL to join the virtual meeting will appear. You can copy and paste this link to send to your students, or add your students in the Add Guests bar.
One last step before finishing your setup is in More Options. Here, you can uncheck the ability for your students to invite other guests.
Step 3: Start your Class
When it’s time to start class, either click the event in your calendar or join by inserting the Meeting ID on the Meet homepage. Before joining the meeting, you will have an entry screen with some different joining options. You can choose to begin presenting your screen right away or enter with your camera and mic on or off.
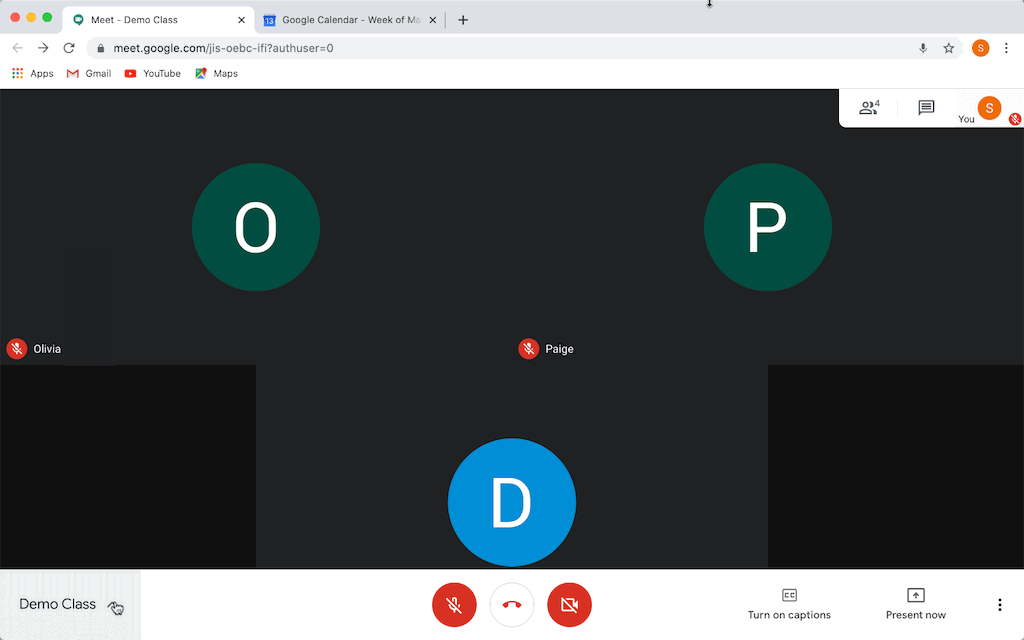
You will see a toolbar at the bottom of the screen with different buttons. The far left has your meeting information and any attachments that you added to your calendar invite. The three different buttons in the middle allow you to mute your mic, end the call, or turn off your video. When the mic and camera buttons are red, you know that those tools are turned off. When they are white, they are on and in action. Over to the right, there is a live caption button that transcribes what you are saying in real-time. The last menu button gives you some more customizable options for your call.
Step 4: Screen Sharing in Google Meet
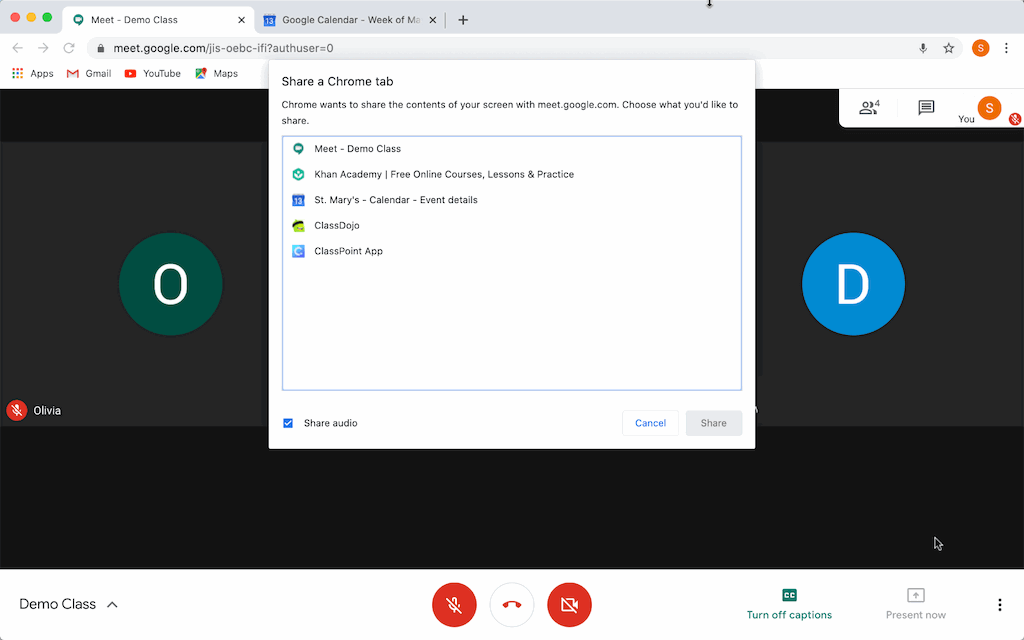
Share your whole desktop, a specific window, or a certain tab in Chrome. We recommend sharing your desktop so that your students can see everything you are doing. This way if you need to share more than one window, it can be a seamless transition.
At the top, in the Participant tab, you are able to mute the students’ mic. This is helpful so that there are no distractions to others while you are speaking. You can also open up the chat to communicate with your students during the call.
When you are ready to be done with the call, just click stop sharing and the call will resume back to your video full screen.
⚠️ Google Meet Restrictions ⚠️
Google Meet is a great online teaching tool for video conferencing because of its simple interface and integration with Google Classroom. But, because of its simplicity, the current version is lacking some security controls.
Students are able to share their screen whenever they want: Your students will able be able to present their screen with any window they like whenever they want – with no way for you to disallow this.
Teachers cannot unmute students: This can get pretty tiresome for you if a pesky student keeps turning on their mic and you have to repeatedly keep turning it back off.
Teachers cannot completely end a meeting: When you want to end a meeting completely, you must wait for all your students to leave the call, otherwise, students can rejoin at any time, even after you have left.
Nevertheless, Google Meet is still a great tool because of the ease of use, especially for GSuite users.
Related Topics
If you are looking for alternative platforms for online teaching, check out our tutorials for Zoom or Microsoft Teams.
In addition, if you need a student engagement tool to better simulate an in-person experience with your video calls, check out how Classpoint can be used right along with Meet, Zoom, or Teams.
Thanks for reading, and don’t forget to check out the links above!
