
Want to create professional-looking, custom shapes that can immediately elevate the appearance of your PowerPoint presentations? No, you don’t need advanced design tools like Adobe Illustrator, you can create unique and eye-catching shapes for your presentations in just a few clicks with PowerPoint merge shapes feature!
PowerPoint’s options to combine shapes into new ones can be used in so many unique and creative ways to help you create professional-looking presentations and leave a lasting impression in your audience easily.
If you are looking for a no-nonsense guide to merge shapes in PowerPoint, you are at the right place! PowerPoint has 5 different options for merging shapes, and in this blog post, we will share with you the exact steps and tips to use these PowerPoint merge shapes options. Additionally, we will give you 5 ideas to match! Let’s get started!
What is Merge Shapes in PowerPoint?
Merge Shapes in PowerPoint is a formatting feature that allows you to combine two or more shapes to create a new custom shape. This feature is particularly useful for adding visual interest and clarity to your presentations.
Here are just some ways it can be used in your presentations:
- Add depth and dimension to your slides
- Highlight specific areas of your presentation
- Create visually engaging diagrams, flowcharts, and timelines
- Transform your slide background
- Design custom graphics and icons
How to Merge Shapes in PowerPoint
It is actually very simple to merge shapes in PowerPoint! With just a few clicks, you can combine multiple shapes to create unique and eye-catching designs for your presentations. Here are the steps to get you started:
How to Merge Shapes in PowerPoint
Step 1: Select the Shapes You Want to Merge
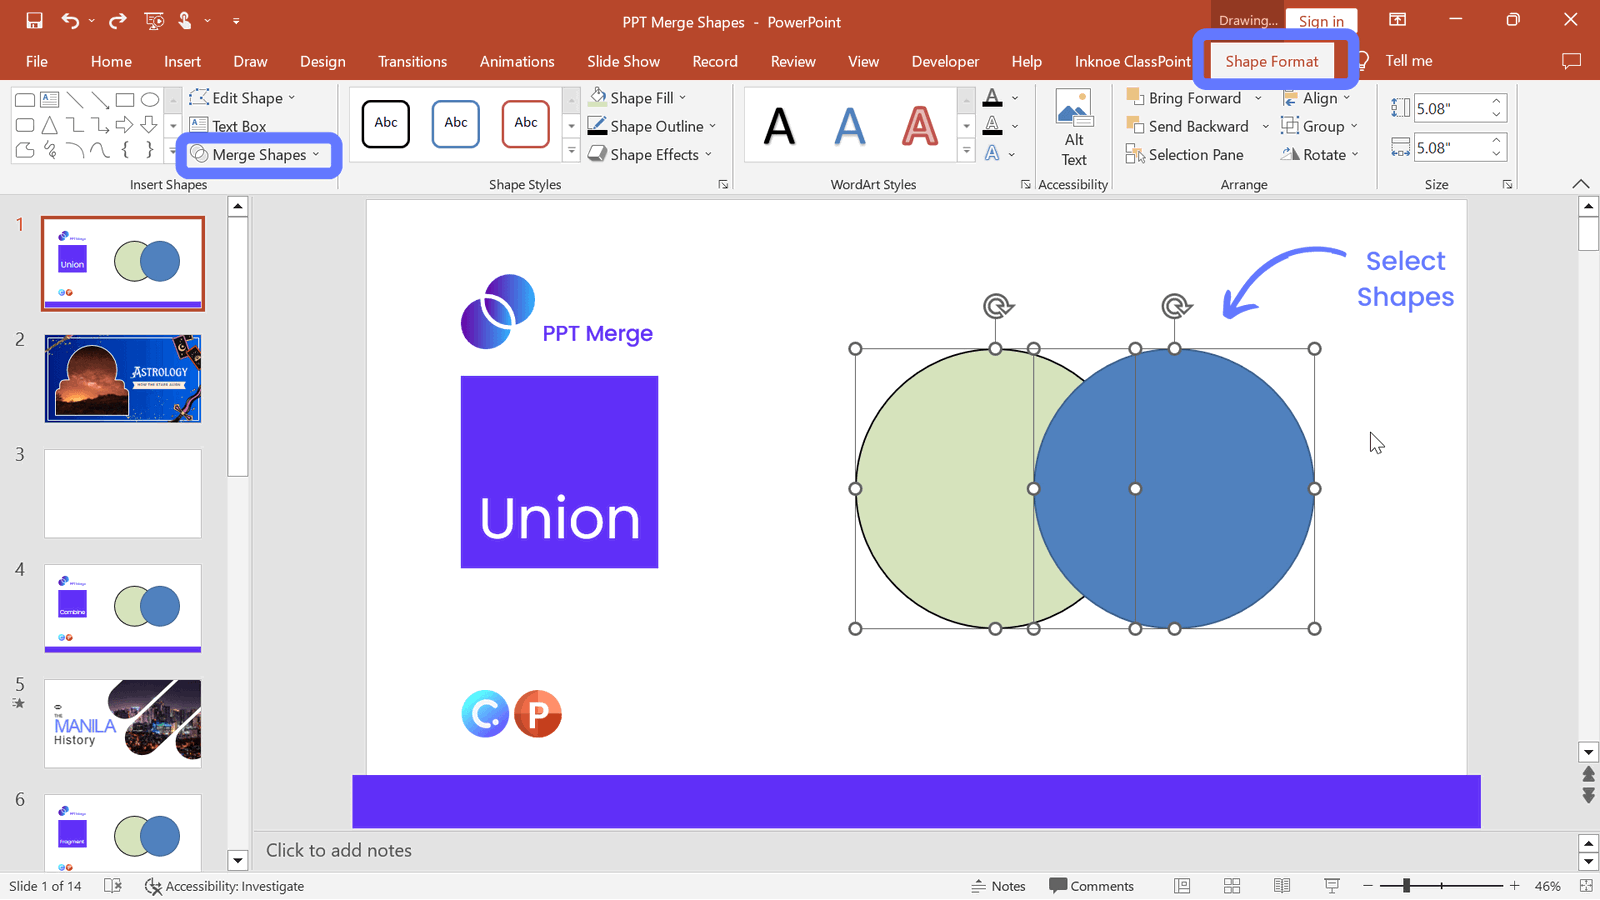
Hold down the Shift key while selecting the shapes you have created, to select more than one shape at a time. It is important to note the order in which you are sleecting the shapes. When merging shapes, whichever shape you select first, that formatting (fill color, border, etc) will be applied to the second shape you select.
Step 2: Choose the Merge Shape Types

Once the shapes are selected, navigate to the “Shape Format” tab and click on “Merge Shapes.” You will see the dropdown with 5 different options to merge. Here is a brief overview of each of the options. Keep scrolling to see these options in action:
Union: The easiest to understand, this option merges together 2 or more shapes into 1 big shape. Think of it as similar to grouping shapes together, but remember, the formatting of the 1st shape selected will be applied to the rest.
Combine: This option combines the parts of the shapes that don’t match. Basically, anywhere the shapes intersect, that intersection will be removed to make a new shape.
Fragment: Chop up your shapes into new pieces where they intersect or overlap, creating brand new shapes.
Intersect: Create a new shape out of the intersection points of the two or more shapes you have selected. Think of this as very similar to the Fragment option, but it will remove all the other parts of the shape so you are only left with the overlapping piece.
Subtract: Just as the name suggests, where the shapes overlap, this option subtracts one shape from the other.
Step 4: Click on “OK” to Apply the Changes to Your Shapes
Success! You know have a newly formatted shape, exactly as you designed. Now we begin using this in fun ways for your presentations.
5 Ways to Use Merge Shapes in PowerPoint
Now that you have learned how to merge shapes in PowerPoint, you are ready to take things to the new level! There are many ways to turn these 5 merge shapes options into professional-looking and stunning visuals!
Read on for various cool ideas and use cases for each of these PowerPoint merge shape options! Learn how to create your own custom shapes, cool title slides, puzzles, moving background texts, and even add windows into your slides!
🔥 Union: Create Unique-Looking Custom Shapes!
Use Union to merge multiple shapes into the exact shape you need. Perfect for adding visuals to any title slide.
For this example, we use a circle and two rounded rectangles to create a Fortune Teller ball. Here are the steps:
- Add the three shapes onto your slide from the Insert tab and click on the shape.
- Place the shapes in the desired location to make a new shape.
- Select all the shapes and in the Merge Shapes option, select Union.
- From here, further format the shape by changing the Fill to an image!
Here are 5 additional custom shape ideas you can create with PowerPoint merge shapes Union:

💙: 2 circles or ovals and a triangle (upside down).
⭐️: A circle and multiple triangles with their bases meeting at the center of the circle.
🌸: One or more ellipses or teardrop shapes.
☁️: Circles or rounded rectangles.
💬: A circle or oval with a triangle.
🔥 Combine: Create Cutout Effects!
Combine is great for creating cutout effect on title slides. For this example, we will create a moving background effect with PowerPoint animations and merge shapes.
- Start with an image as your slide background.
- Add a rectangle overtop and change to color and border to white.
- Add 3 rounded rectangles to the slide. Adjust the curve by moving the yellow markers on the shape.
- Move the rounded rectangle to your desired location for the cutouts.
- Select the three rounded rectangles and Combine them.
- Select the white rectangle that covers the whole slide, then select the new rounded rectangle shape and click Combine again.
- Further format or add the morph transition to take it up a notch!
🔥 Fragment: Build Interactive Puzzles!
Want to create fun activities, such as turning any image on your PowerPoint slide into a puzzle? Use PowerPoint merge shapes Fragment! Take an image, add squares overtop and Fragment it to get the puzzle look. To make it interactive during your presentation, enable drag on your squares to move them around! Then select all and click fragment and your pieces are made!
- Add any image onto your slide.
- Insert a square shape overtop and line it up to one of the corners of the image
- Select the image first, then the new shape, and Fragment.
- Repeat until the whole image is chopped into new shapes.
- Enable drag on these shapes with ClassPoint’s draggable objects to move them around on your slide during your presentation.
Here are 8 more exciting ways you can use ClassPoint’s draggable objects!
🔥 Intersect: Create Moving Background Title Slides!
Moving backgrounds on any slide help to keep the audience attention and make your slides more engaging. You can use the merge shapes in PowerPoint with videos too! For this example, we want to merge our video background with our title text.
- Add a video to fill your whole your slide.
- Insert your title text. Make it big!
- Click the video then the text.
- In the “Tell me what to do” search bar in your PowerPoint, type Merge.
- Select Intersect and ta-daa!
🔥 Subtract: Create Peekable Windows in Your Slides!
A great way to use the PowerPoint merge shapes Subtract is to highlight parts of your slide and create little windows into your slides. Use this to peek into images, diagrams, see new colors, or designs on any slide. For this example, we will use the morph transition to switch between Day and Night.
- Insert an image as your slide background.
- Add a rectangle overtop the whole slide, and extend it out to both sides.
- Add another rounded rectangle to create your “window”.
- Click on the big rectangle first, then the “window” and Subtract.
- Adjust the window to peek into where you would like on your slide.
- Duplicate the slide and adjust the window to peek into another part on the image.
- Add the Morph Transition on the duplicated slide to watch the seamless transition from day and night.
Create Your Own PowerPoint Merge Shapes!
Now that you have learned a bunch of cool ways to merge shapes in PowerPoint, it is time for you to put them into action! For your convenience, we have compiled all the above examples in a downloadable PowerPoint deck below. Simply download it to use straight away! 👇
Using Merge Shapes in PowerPoint is a powerful tool that can help you transform any ordinary presentation into stunning-looking ones with ease. From creating unique shapes and cutout effect to puzzles, the possibilities are endless! Let us know what you have created down in the comments! Have fun PowerPoint-ing! 😉
