
As one of the most popular presentation tools for teachers, creating PowerPoints could be a vital and necessary part of your job. With so many presentations to make for lessons throughout the year, this routine task can seem like a time-consuming one.
Luckily, many tedious tasks within Microsoft PowerPoint can be fixed or made quicker. These 10 tips will help boost your productivity in PowerPoint so that you are spending more time on what really matters – your students and their lessons.
Tip 1: Create & Use a Template
PowerPoint productivity tip number one is to take advantage of making your own templates. A template allows you to begin with the same design and simple layouts so that you do not have to start from scratch every time you create a new presentation. PowerPoint has a variety of pre-created templates whenever you open the application; however, if you don’t see any you like, you can create your own, or personalize one they already have.
To begin creating your own template start with either a blank slide, a theme that PowerPoint already has, or one of your own presentation files that you want to reuse over and over again. Start with changing fonts, colors, sizes, and backgrounds on all the slides. You can also insert any images, such as a logo, that you will want to have on your template along with any titles or content on the slides.
When all the changes have been made, save the presentation as a PowerPoint Template instead of a plain PowerPoint file. To do this, when saving your file, drop down the file type menu and change it to a PowerPoint template (.potx) file type. Then, the next time you open PowerPoint you can use this template again without having to recreate the same design.

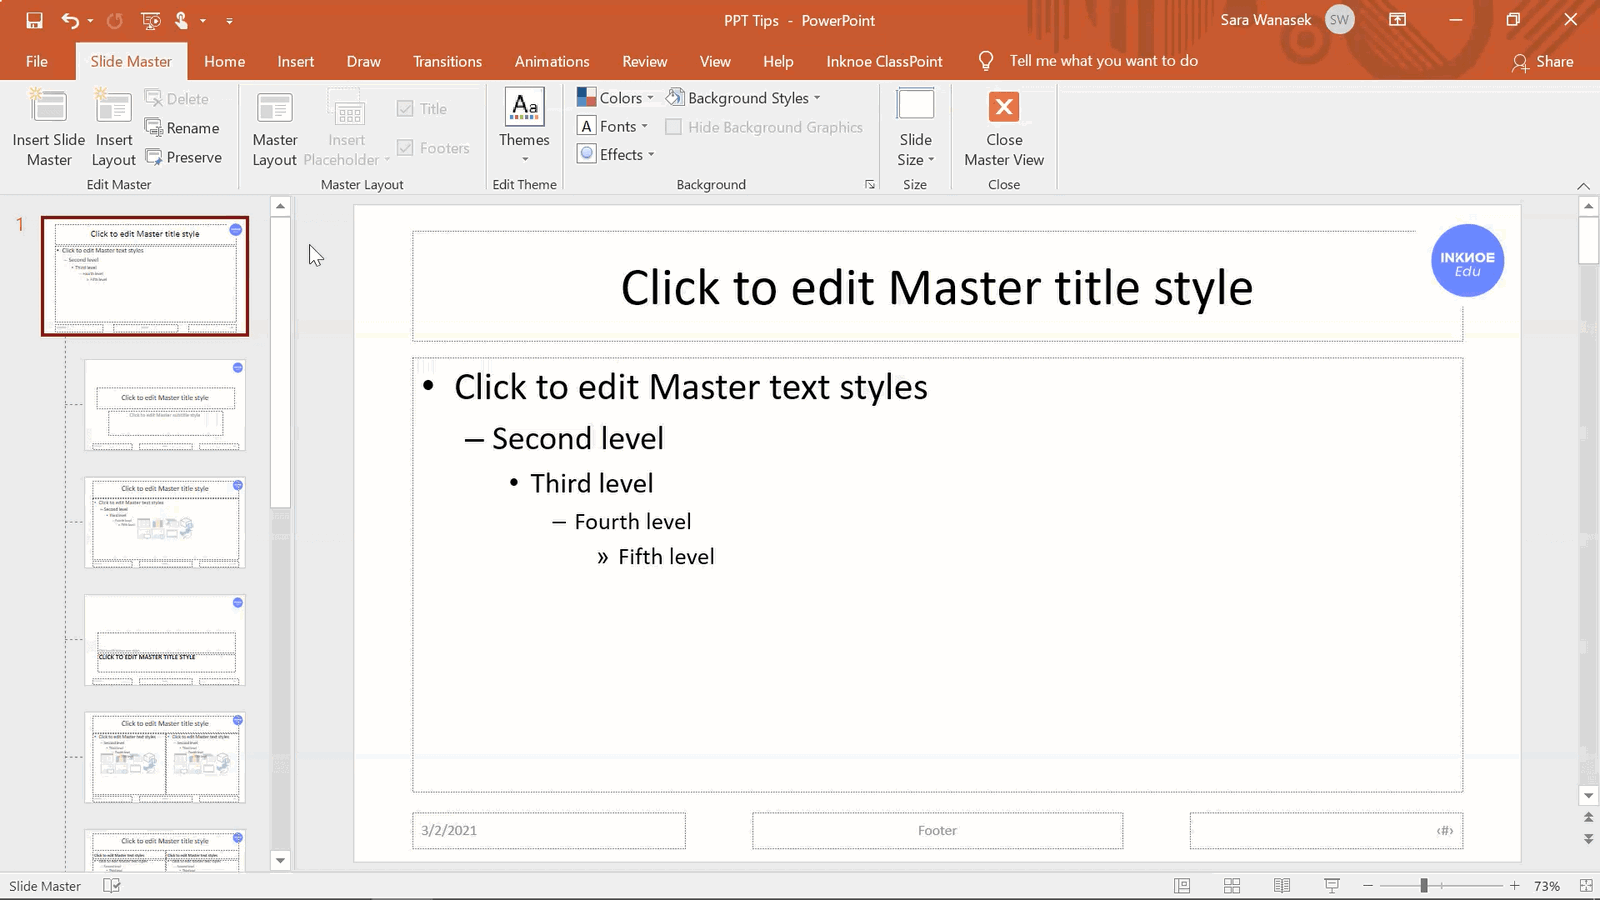
Tip 2: Design a Presentation with the Slide Master Template
Tips 1 & 2 are very similar; however, they differ because Tip 2 is a design template for just this particular presentation. Instead of copying and pasting something on every slide of your presentation, you only have to do it once – saving you plenty of repetitive actions. This is the easiest way to add a school logo, your name, or the course title to every slide in the same place.
Head over to the View tab on the PowerPoint ribbon, then click on Slide Master. The top slide is the Slide Master. Whatever formatting or items you place on this slide will then appear on every slide. If you only want to edit the design of one particular layout, scroll down to find it. When you’re ready to get back to your slides, just click on the Close Master View button.
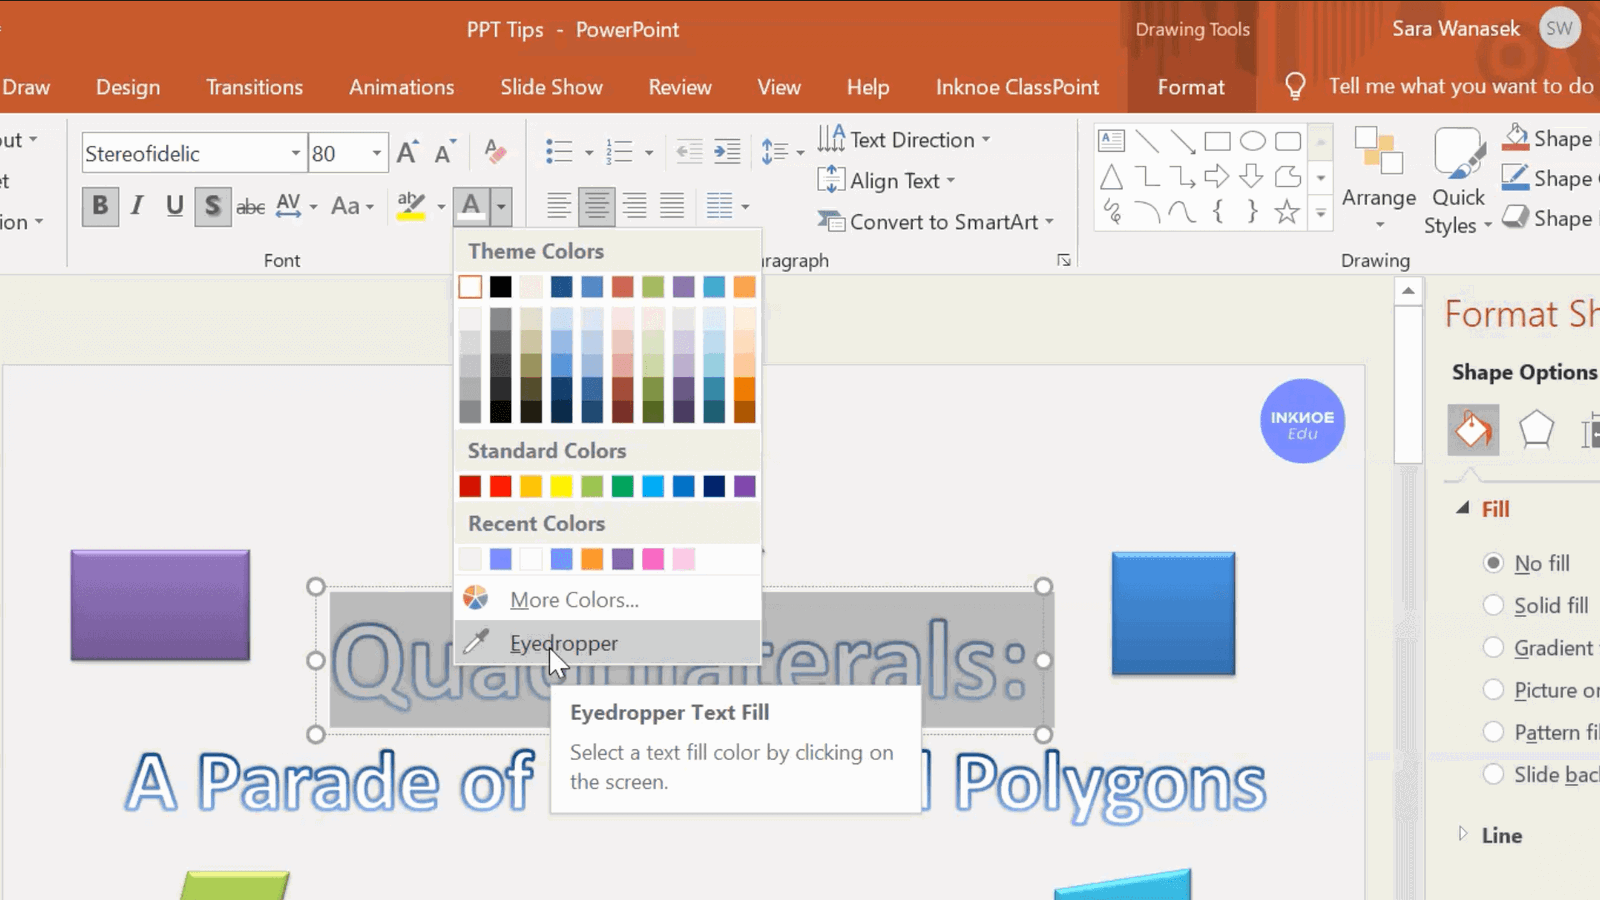
Tip 3: Match Colors with the Eyedropper
PowerPoint’s eyedropper tool allows you to exactly match any color on your slide with the click of a button. No more trying your best to get the exact shade need. The eyedropper can be used when changing the font color, background color, or shape colors.
Just click the Eyedropper from the bottom of the menu when changing the color of your item. An eyedropper will appear as your mouse, then hover over the color you want. You can take a color from any image or text on your slide. When you have the color you want, just click and the color will be applied.
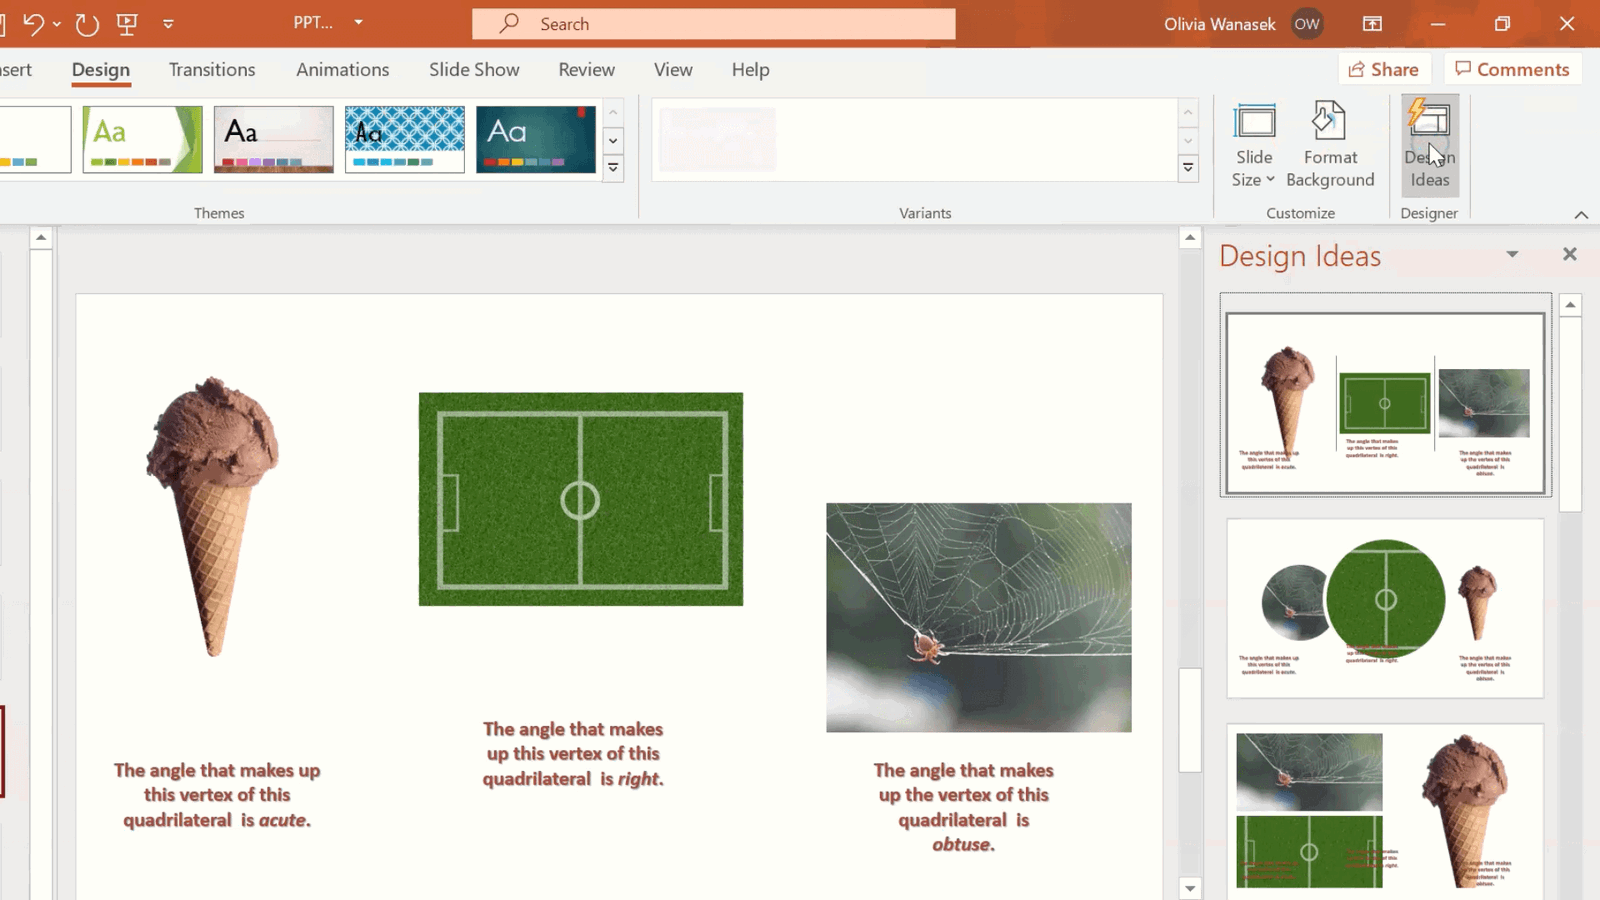
Tip 4: Take Advantage of Design Ideas
Struggling with your creativity when making your presentation? Rely on PowerPoint’s Design Ideas feature! This tool can give your presentation a total makeover with one click.
In the Design tab, click on the Design ideas icon. Then, scroll through the options and choose which design you like the best. PowerPoint will update the design of the current slide and any of the slides you already have in your deck with the matching theme.
Please Note: You must be an Office 365 user to have access to the Design Ideas feature.
Tip 5: Edit Faster with Keyboard Shortcuts
Keyboard shortcuts are the easiest and fastest way to boost your productivity. While you are creating your PowerPoint slides there are two significant shortcuts you should be using to speed up your editing process.
First, use CTRL+Drag to easily copy a shape or image. Second, hold down the “Shift” key to make perfect shapes.
There are many more PowerPoint shortcuts you can try using when creating and even while presenting your PowerPoint presentations.
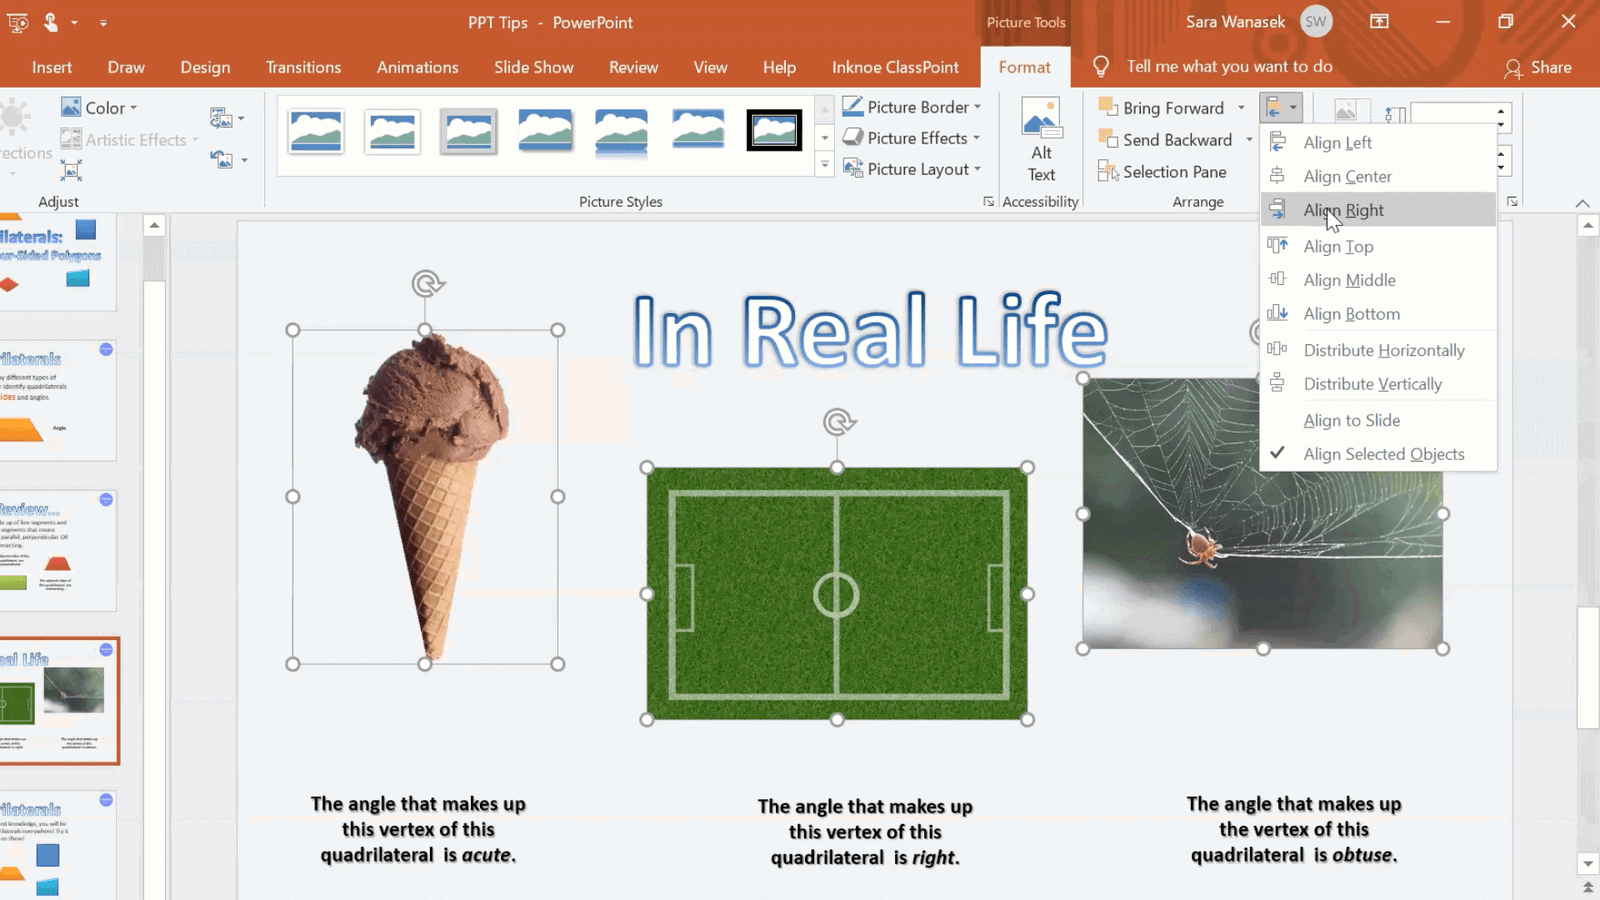
Tip 6: Align Objects Perfectly
Quickly and easily align all the different objects on your PowerPoint slide. If you have many objects, images, or text on a slide and you want it to be lined up properly, use the Align Tool.
First, click all the objects you will want to align. Do this by holding down the Shift key while clicking all the objects. Next, in the Home tab on the PowerPoint ribbon, click on Arrange, and then Align. You will see that you can align the objects left, right center, or top, middle, or bottom. There is also an option to horizontally and vertically align them. With just a couple of clicks, your slides will look nice and orderly!
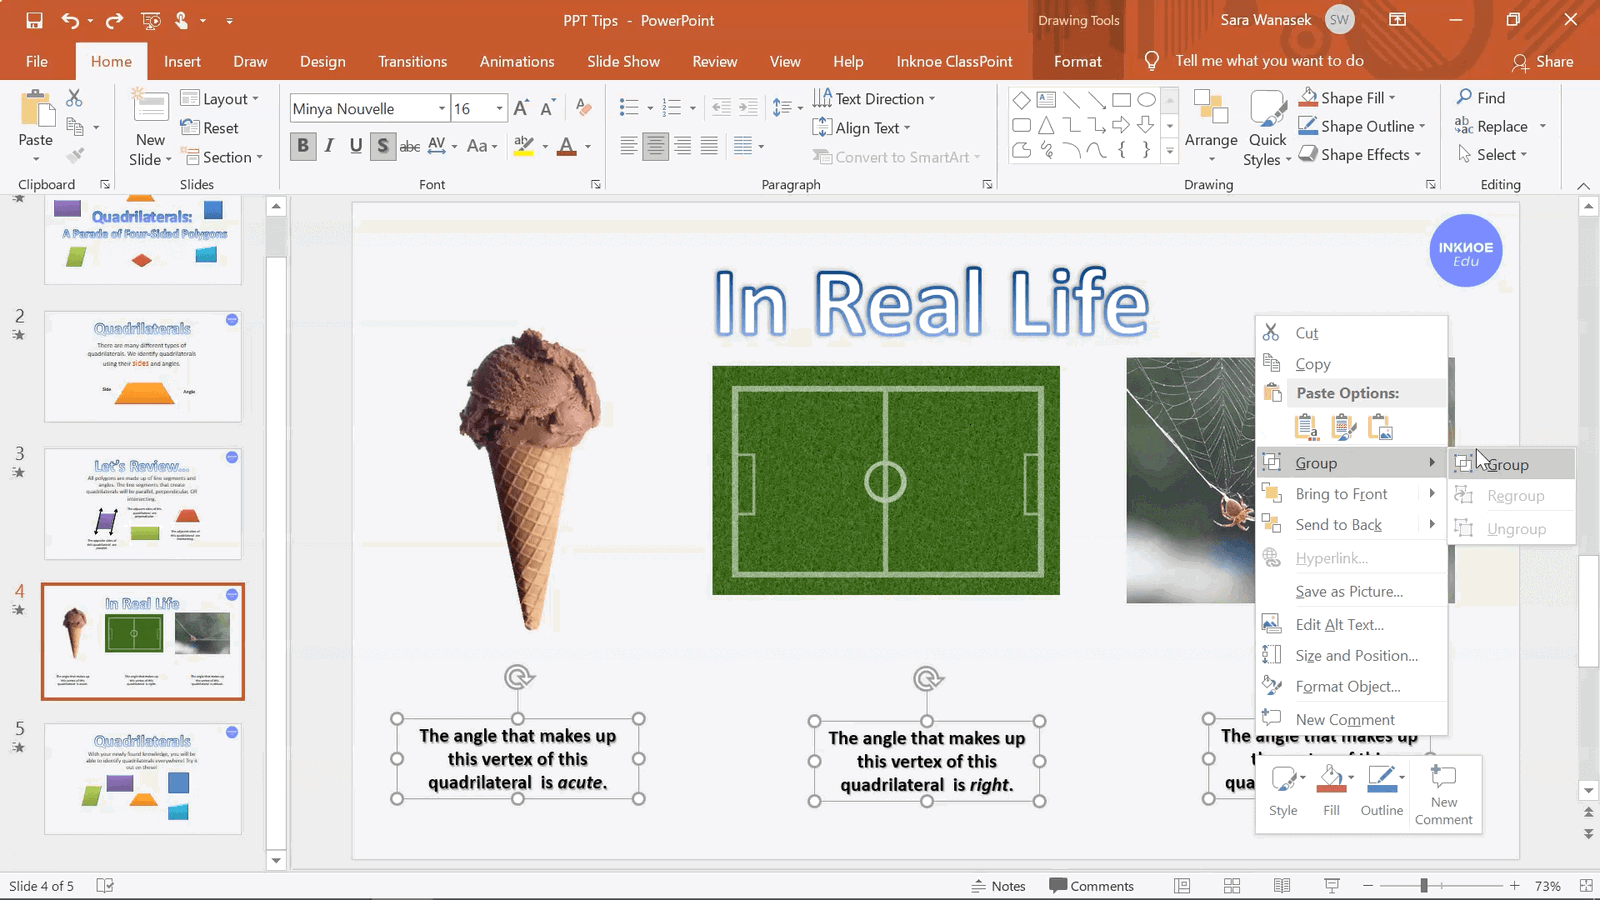
Tip 7: Move Multiple Objects by Grouping
Objects on your slide can be grouped together to make formatting changes, or just to move them at the same time. Any text, images, or a mix of the two can be grouped together.
To group objects together, hold down the Shift key while clicking the desired objects. Then, right-click. On the menu click Group and Group again. All the objects grouped can now be moved and edited together at once. To ungroup objects, right-click and choose Group and Ungroup.
Tip 8: Copy and Paste Text Format with Format Painter
Elevate your productivity in PowerPoint by matching the format of one text to another or the effects on an image to another image.
To use the format painter, highlight the text (or click on the image) that you want to copy the format of. Next, on the Home tab, click on the Paintbrush in the Clipboard section. The format is now copied. Paste this format on another piece of text by highlighting the new text (or clicking on the image) without clicking anywhere else first.
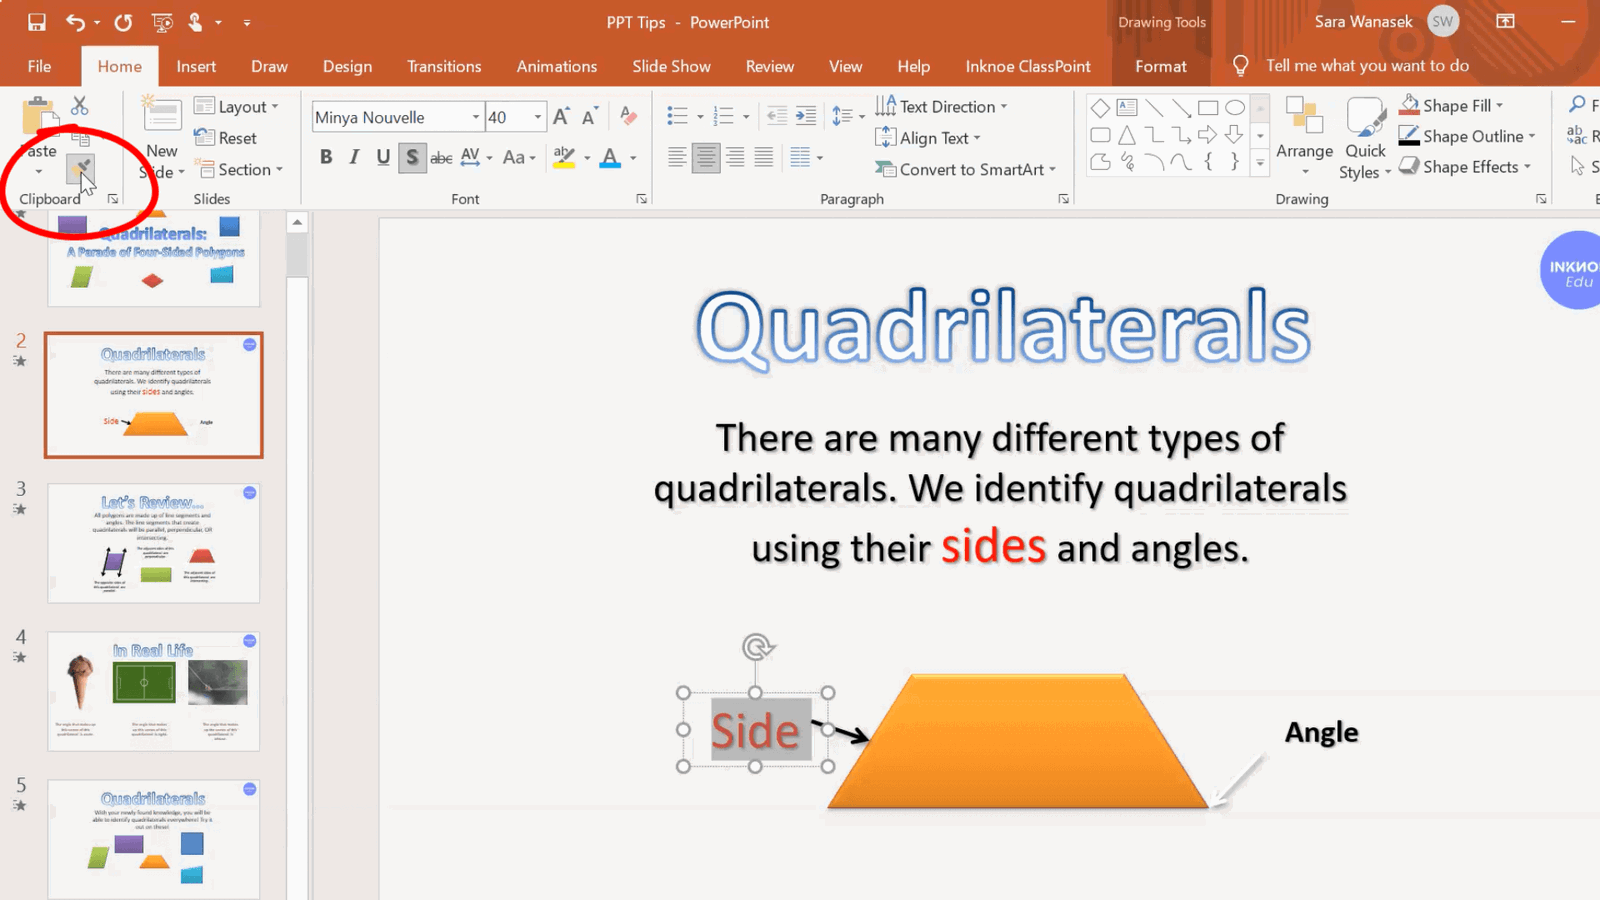
Paste the same format on many different pieces of text by double-clicking on the Paintbrush, then clicking on the text to paste the same format. Keep clicking on the different text to paste the format as many times as you would like.
Lastly, we must mention the keyboard shortcut for the Format Painter. To copy the format use “CTRL+SHIFT+C” and then to paste the format use “CTRL+SHIFT+V.” Now you can save yourself from having to click on the Paintbrush at all!
Tip 9: Reuse Slides from Old Presentations
This PowerPoint productivity tip allows you to use a slide from a previous presentation in the presentation you are creating. Use a slide from an older presentation that has information that is useful instead of rewriting the same information. PowerPoint can even match the design of the slide so it fits right into the new presentation!
To use, when you go to add a new slide in your presentation, instead of clicking on a layout option, at the bottom of the menu, click Reuse Slides. The side panel will open, and you can browse for the file that has the slide you want. Once you have chosen a file, the file will open in the side panel.
Then, you just need to choose the slide you want, and it will insert it into your presentation with the matching formatting. If you want to keep the original formatting, click the checkbox at the bottom that says “Keep Source Formatting.”

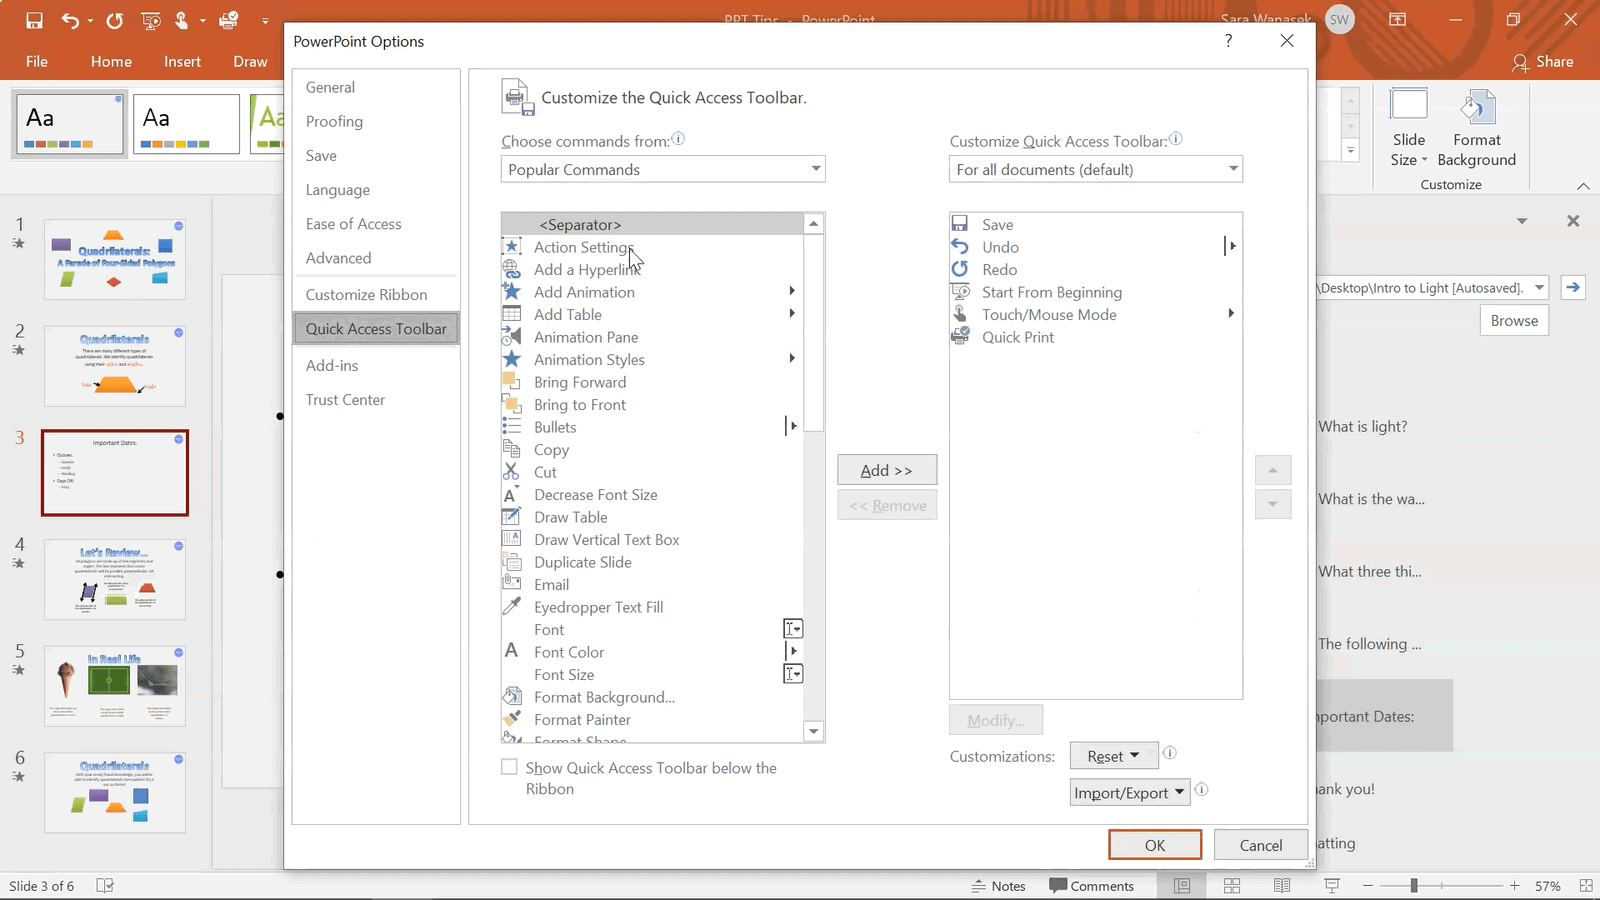
Tip 10: Customize the Quick Access Toolbar
Lastly, tip number 10 is your Quick Access Toolbar! This toolbar is located in the top left-hand corner and is available to you no matter which tab on the ribbon is open.
Customize this toolbar to add the tools you use the most. Many people use the presentation button to begin their presentation, but you can also add quick print, or take a look at any of the other commands PowerPoint offers. This convenient access will save you from opening a multitude of menus.
& those are the ten tips that you can start using to increase your productivity in PowerPoint! We know teachers have so much on their plate, so we hope you are able to implement some of these tips to help you spend time on what matters most.
For more Tips and Tricks to help you master PowerPoint, continue on with these PowerPoint articles:
- 5 Popular PowerPoint Add-Ins For More Engaging, Creative Lessons
- 4 Quick Tips To Create An Engaging PowerPoint Presentation
- How To Use The Morph And Enhanced Morph Transition In PowerPoint
- How To Create A Moving Background For Engaging PowerPoint Presentations
- How To Remove The Background Of An Image In PowerPoint
- 21 Best PowerPoint Shortcuts of Editing & Presenting
