A word cloud is only as strong as the people behind it. On its own, it is just a cluster of words. But when every participant adds their own response, the cloud becomes a living picture of the group’s thoughts. That collaboration is what gives it meaning.
This is why to create a word cloud in PowerPoint with ClassPoint changes the way participation happens. You ask a question, the audience sends in their words, and together they shape the cloud in real time. It is quick, it is simple, and the result is always unique because it reflects spot-on audience participation in the room.
In this blog, we will walk through the steps on how to create a word cloud in PowerPoint using ClassPoint. You will see how to set up your slide, collect live responses, and make the most of the results. Everything happens inside PowerPoint, so you can run your word cloud with no extra apps or distractions.
Step 1. Create your word cloud prompt slide
Open your PowerPoint deck and add a clean slide that will serve as your prompt. Write a short, clear question that invites one-word or short-phrase answers.
For example, you might ask: “One word that sums up today’s topic” or “Name one challenge in group projects.” The simpler the prompt, the clearer your word cloud will look once responses come in.
Step 2. Embed a Word Cloud question button
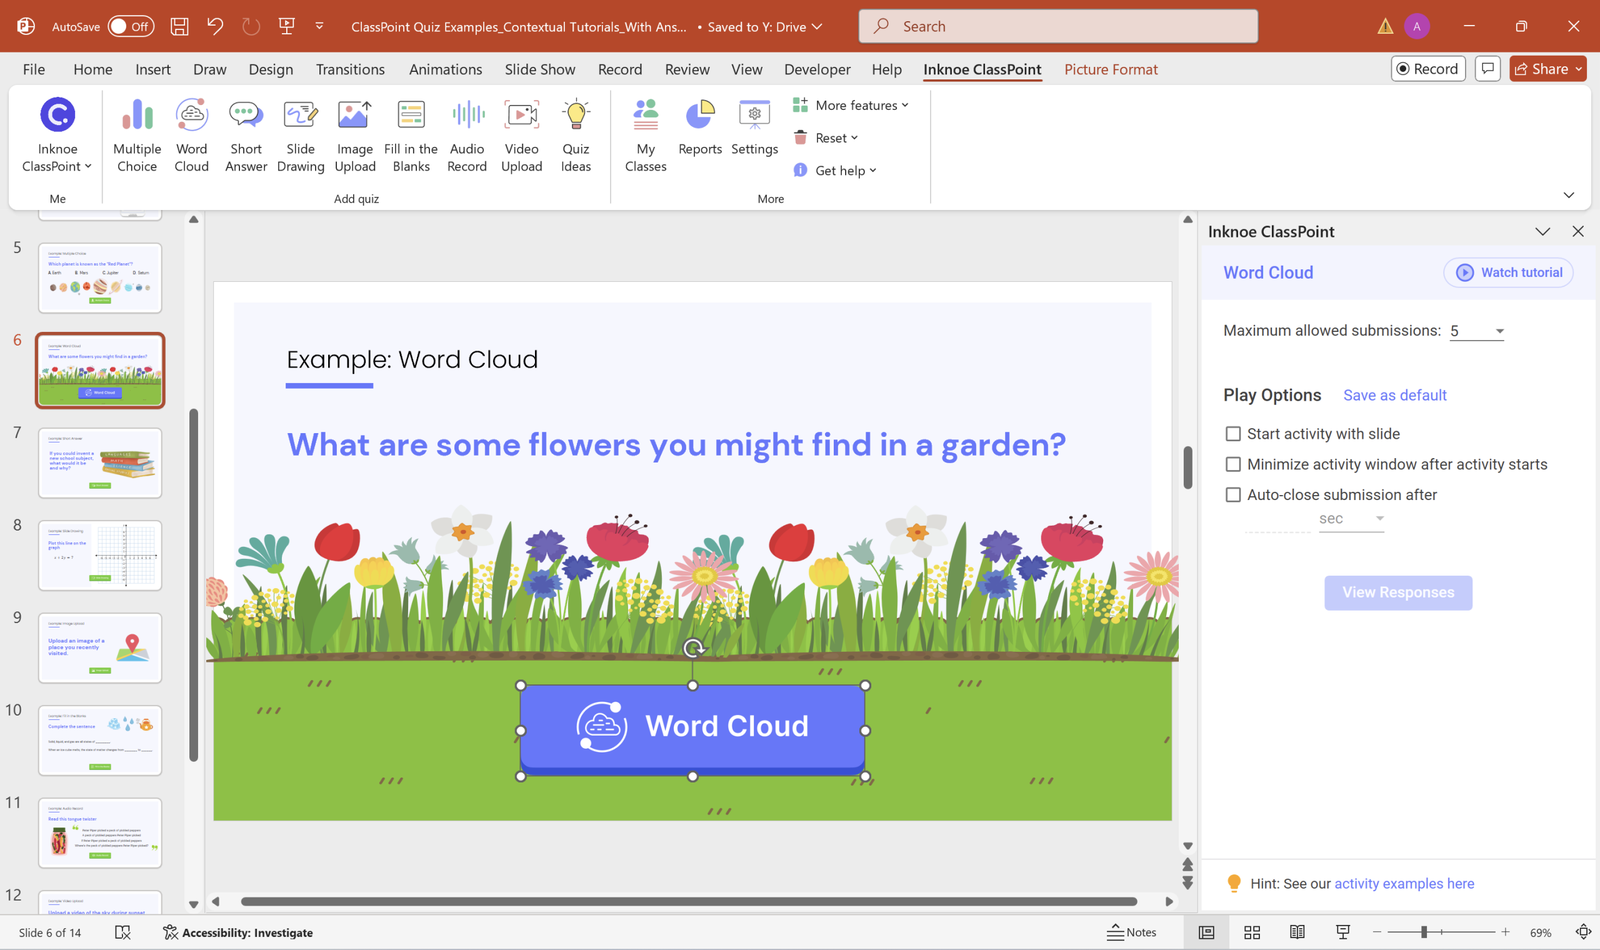
From the Inknoe ClassPoint tab on the PowerPoint ribbon, select Word Cloud. A Word Cloud button will be added directly to your slide.
This is what you will use later during Slide Show to activate the activity and start receiving answers.

Step 3. Set up word cloud settings
Upon adding a ClassPoint Word Cloud question button on your slide, a side panel appears. From there, you have the option to set:
- Maximum allowed submissions (up to 5)
- Start the activity when you open the slide
- Minimize the word cloud while responses are being collected
- Auto close submissions after a timer
These settings give you flexibility. You can keep the activity tight with a short timer or let responses flow while you guide the discussion.
Here's a quick, more in-depth breakdown of the different ClassPoint Play Options per question.
Step 4. Enter Slide Show and invite participants
When it is time to start building your word cloud in PowerPoint, switch to Slide Show mode.
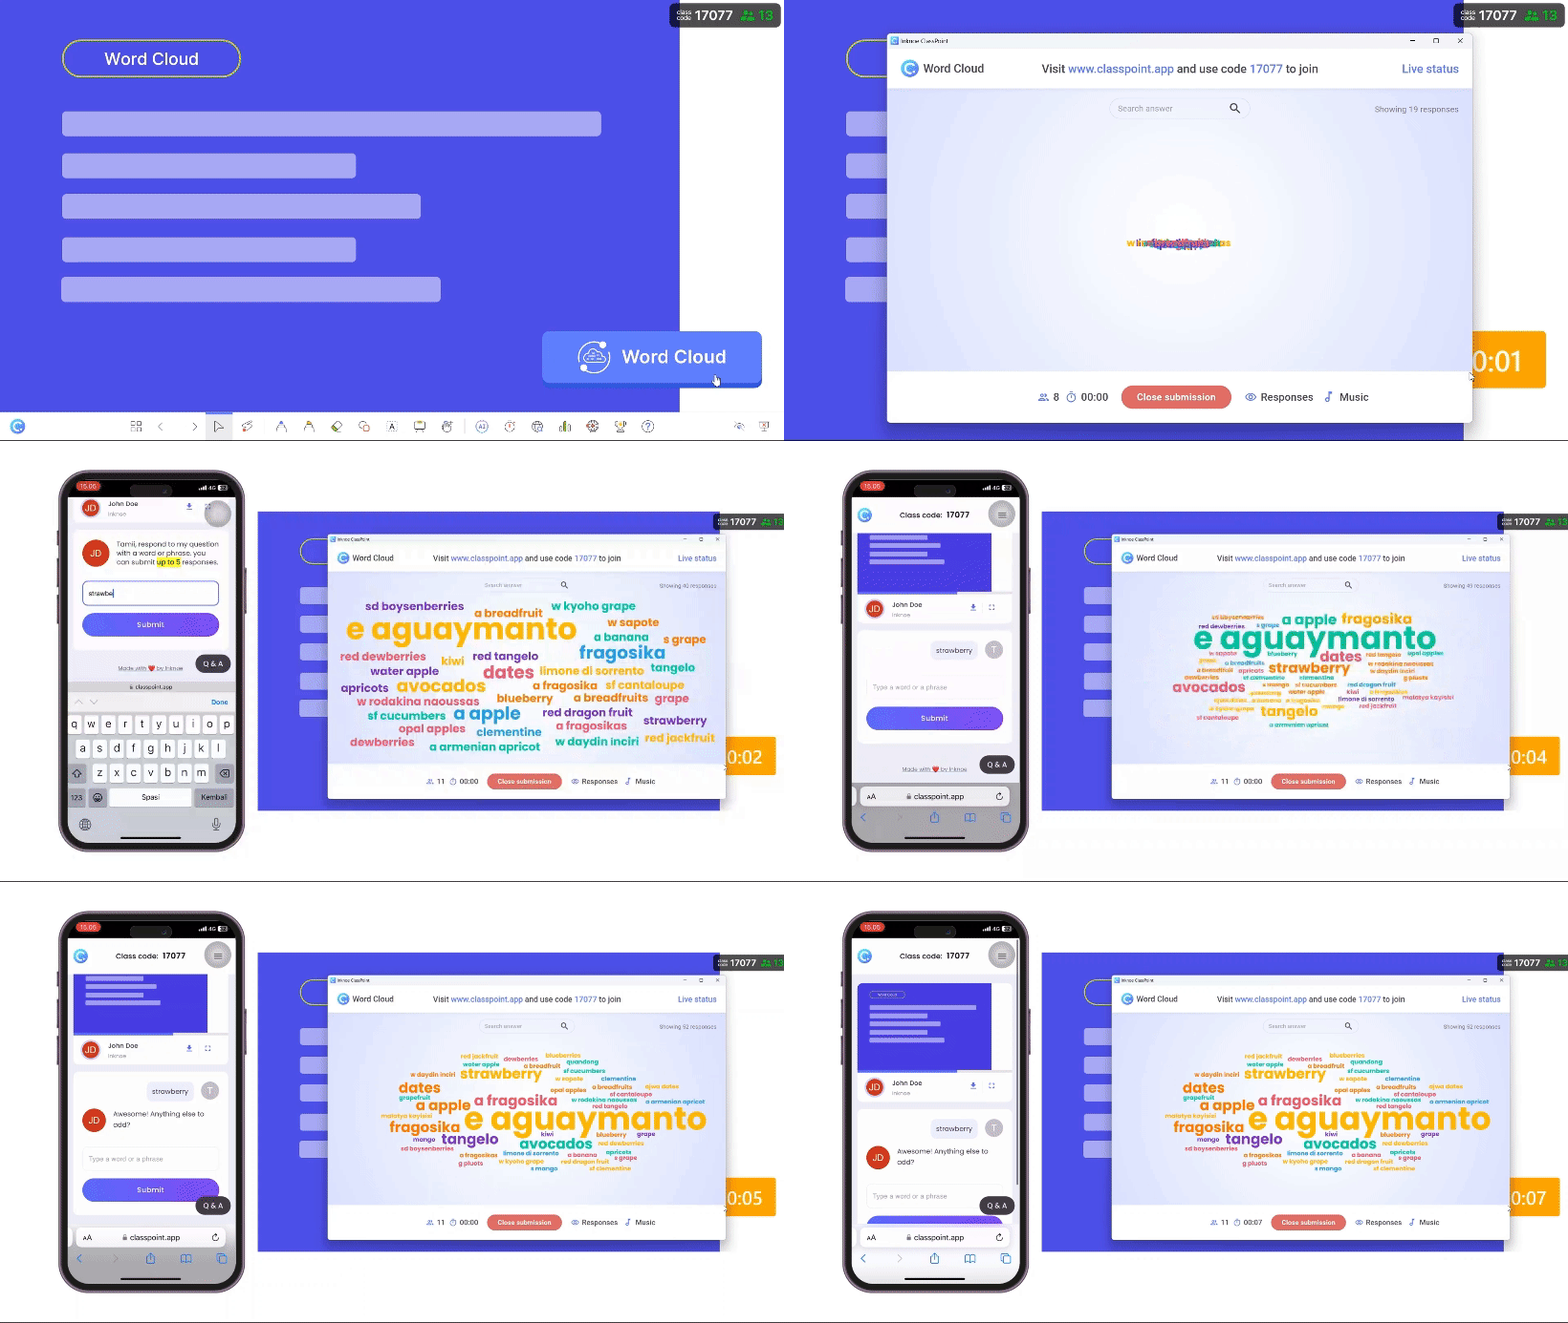
A class code will, then, appear on the upper-right of your screen. Invite participants to visit classpoint.app on their device and log in with the class code and their name. This is how they will send in their words to build the cloud.
Step 5. Run your word cloud in PowerPoint
While staying in Slide Show, click on the Word Cloud button you added earlier. This opens the activity and participants can begin submitting responses.
As words come in, watch the cloud form and grow in real time. The more a word is repeated, the larger it appears. This visual instantly shows the collective thinking in the room.

Step 6. Close submissions and do more with your word cloud
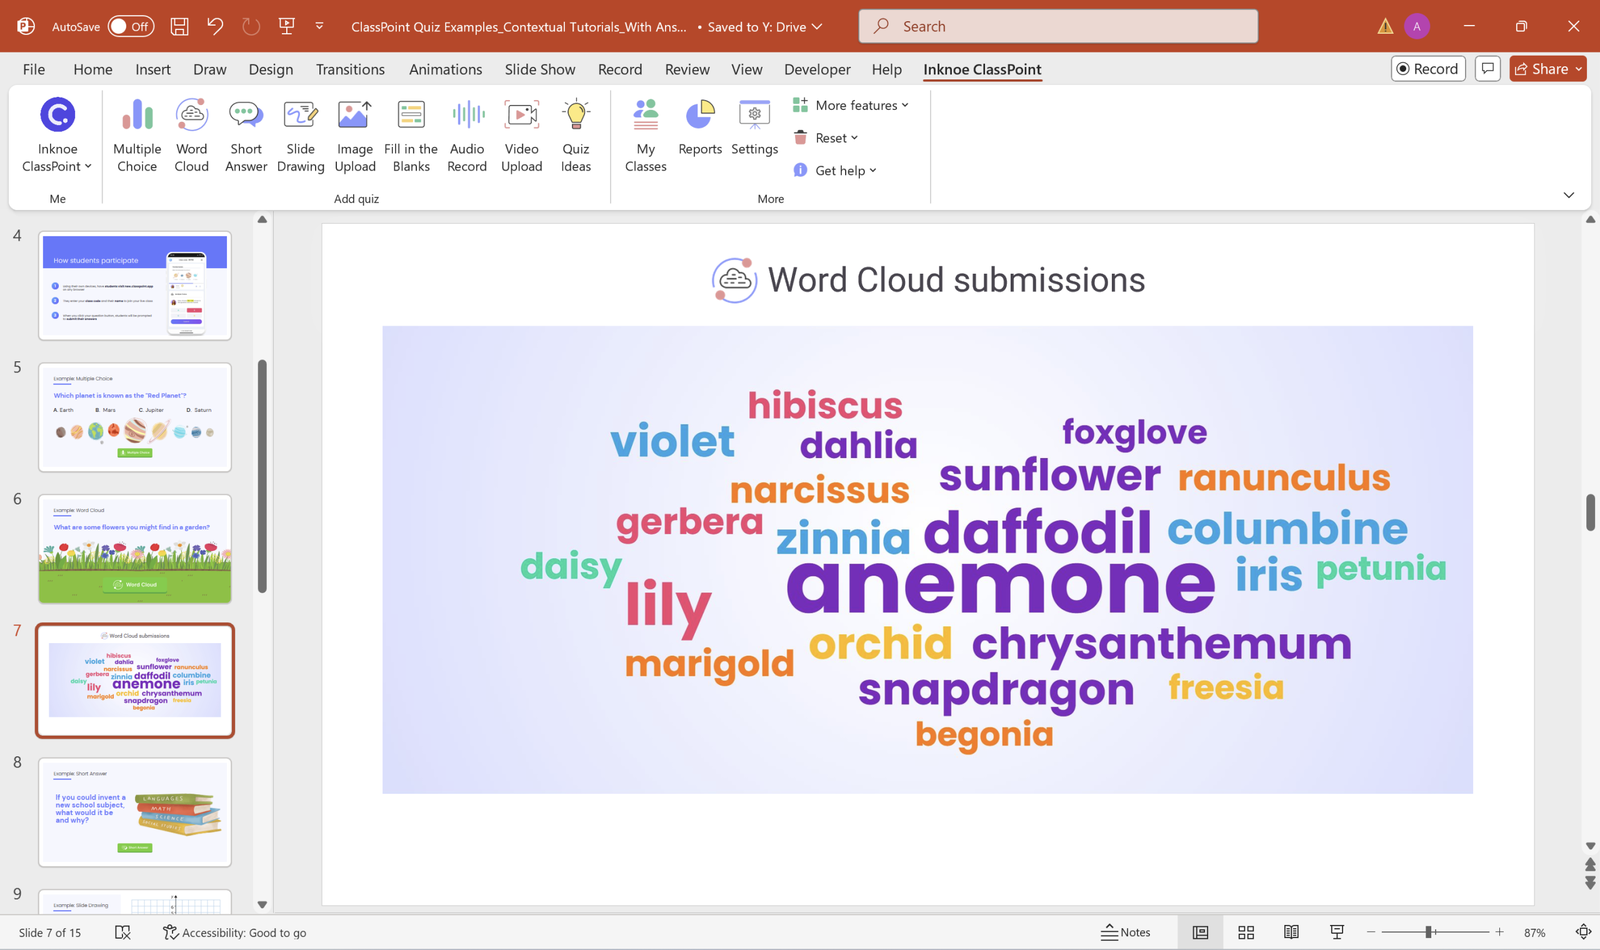
When you are ready to wrap up, close submissions. From there, ClassPoint gives you a few ways to work with the results:
- Power Search – Find specific keywords quickly to highlight related answers
- Insert as Slide – Save the word cloud into your deck for later reference or sharing
- Review after session – Once responses are collected, the ClassPoint Word Cloud button (first blue) turns green with results auto-saved. You can revisit them anytime within the same PowerPoint deck.

These options turn a live activity into a lasting resource. You can continue the discussion, use the cloud as review material, or analyze it post-session.
Take Your Word Cloud in PowerPoint Further with ClassPoint
A word cloud is an excellent spark for collaboration, but it should not end there. Once the cloud forms, you have a visual map of your audience’s thoughts. That moment of insight is the perfect chance to dig deeper, reward contributions, and guide the discussion in new directions.
ClassPoint gives you tools that work hand in hand with your word cloud in PowerPoint. These features let you highlight important words, encourage students to share more, and turn participation into an ongoing cycle of engagement.
Here are some ways to extend your word cloud in PowerPoint with ClassPoint:
- Award stars to participants whose words capture the theme or spark new ideas
- Leaderboard to celebrate top contributors and build a friendly sense of competition around the activity
- Name Picker to select a participant and invite them to explain their response
- Embedded Browser to instantly pull up a website or resource related to the most common words in the cloud
- Live annotation tools to circle key terms from the cloud or expand on them with quick sketches and notes
By pairing your word cloud with these tools, you transform a single slide into a complete learning experience, all while staying inside PowerPoint.
