
Creating a PowerPoint presentation is one thing; making it dynamic and interactive is another. Experimenting with animations and transitions can make or break your entire presentation, and it is crucial in keeping your audience engaged. On the other hand, excessive animation can lead to distraction, while a plain and basic presentation may fail to grab attention.
In this blog, we will share a valuable hack to transform your PowerPoint presentations into eye-catching, attention-grabbing experiences. Using a commonly discussed topic, we’re doing a current and voltage PowerPoint presentation animation for an idea you can take onto your next presentation. We’ll guide you through a step-by-step process, ensuring that you can effortlessly enhance your presentations with interactive animation.
As a bonus, we’ll introduce a unique drag-and-drop trick, allowing you to convert slide objects into live, moveable elements during your presentation.
Ready to electrify your next presentation? Let’s get started!
Current and Voltage PowerPoint Templates
Add some sparks and pizzazz to your PowerPoint today!
How to Create a Current and Voltage PowerPoint Presentation Animation
Step 1: Design individual info slides
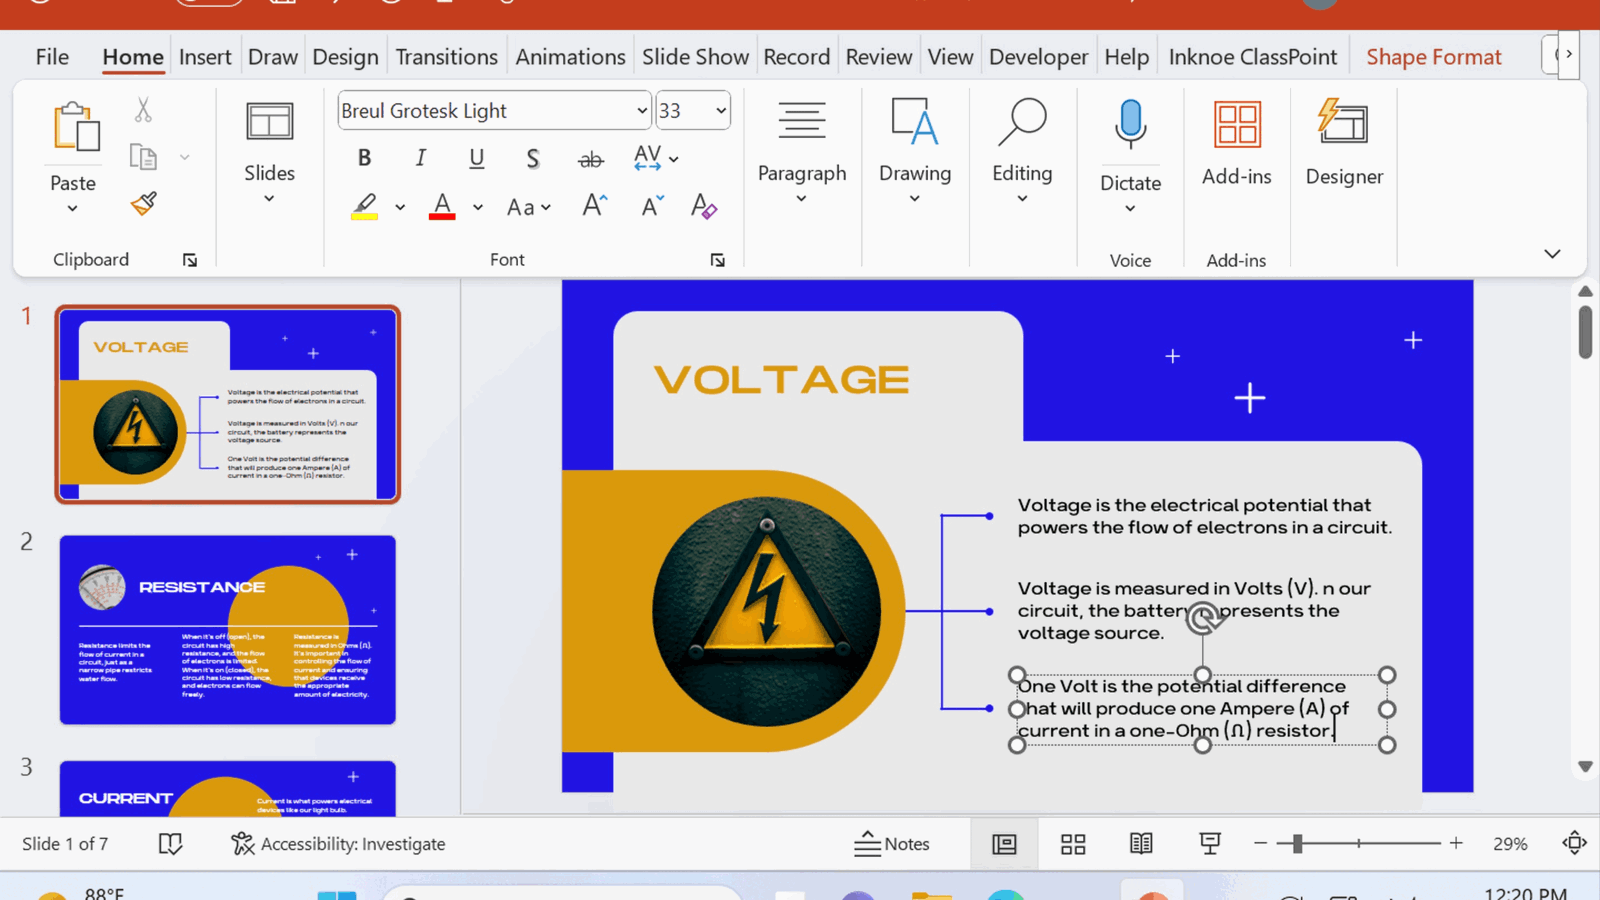
Starting on a blank PowerPoint deck, design separate information slides. On our case, we’re building slides about Voltage, Current, and Resistance. Be creative but be sure to be consistent with the themes so they look cohesive!
Step 2: Open up an empty first slide and add a background
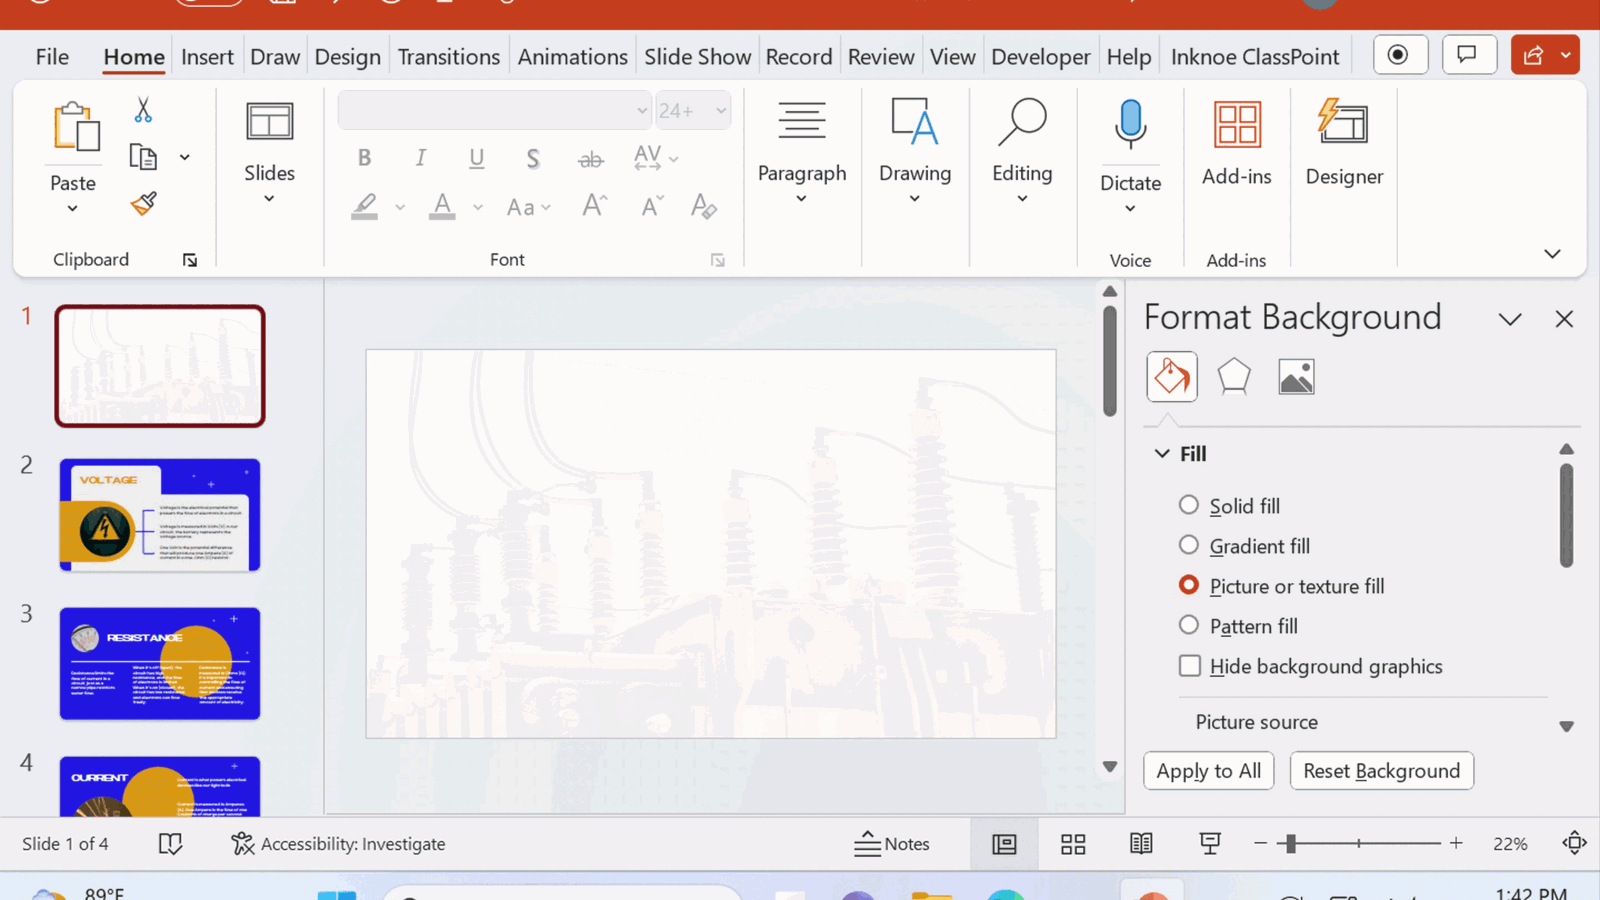
Once you’re done with the individual info slides, add an empty white slide and set it as the first slide. Here, right click anywhere and click Format Background. Fill the slide with a picture of your choice by clicking on the “Texture or picture fill” and set the transparency to 95% or depending on your contrast preference.
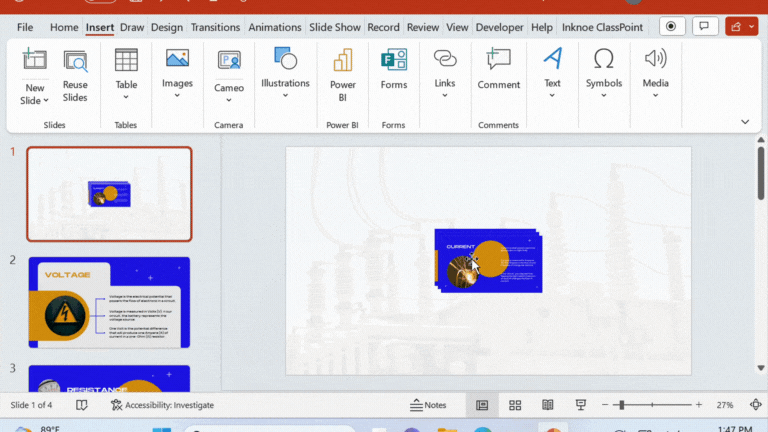
Step 3: Insert Slide Zoom
Onto the same slide, go to Insert ➡️ Link ➡️ Zoom ➡️ Slide Zoom (if you’re a Windows user) or Insert ➡️ Zoom ➡️ Slide Zoom (if you’re a Mac user). Select all of the individual info slides you previously prepared and hit Insert.
Step 4: Lay out your mini slides and change to images
To present a basic visual circuit, set your mini slides onto places where each component would fall into the flow. On our Current and Voltage PowerPoint presentation animation deck, we’re placing our components on a loop to show the relationship from first point (Voltage) up to the last point (Current) and back.
Once you’ve laid out your mini slides onto their places in the visual diagram you’re building, change them to images. To do this, right click on a mini slide and select Change Image. Insert a photo that best represents that component. In our example, I’m using a battery for Voltage, a light switch for Resistance, and a light bulb for Current.
You can go ahead and download high quality icons and illustrations from flaticon!
Step 5: Connect your components together and add a draggable object
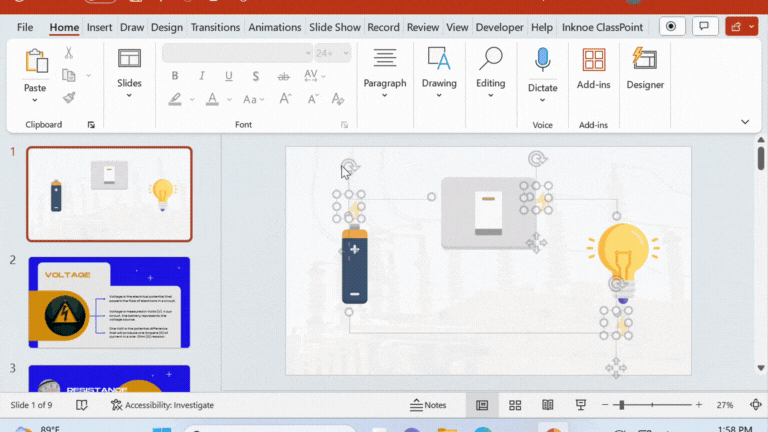
It’s time to piece together your components to make it more visual! Add connecting lines to show the relationship between Voltage, Resistance, and Current. To make this more fun, add an icon to represent flow of electricity at the ends of each component which we’ll turn into Draggable Objects. This way, we can visually present the circuit flow during presentation by dragging and dropping in slide show!
How to turn them into Draggable Objects, you ask?
Select the slide objects you want to convert, and head over the Inknoe ClassPoint tab from your PowerPoint ribbon. Here, click on the More Features dropdown and select Draggable Objects.
Once entered, a side panel will show up which would let you toggle on “Drag Enable” to turn your selected slide objects into Draggable Objects! This means that all converted slide objects can be used for drag & drop live during presentation. Yes, drag & drop without having to leave slide show!
If you don't have the Inknoe ClassPoint tab on your PowerPoint ribbon just yet, head over here to sign up for a free account. ClassPoint offers more than just Draggable Objects as it turns your PowerPoint into a hub of interactive activities, gamification, live slide show tools, and even AI!
Step 6: Final touch ups
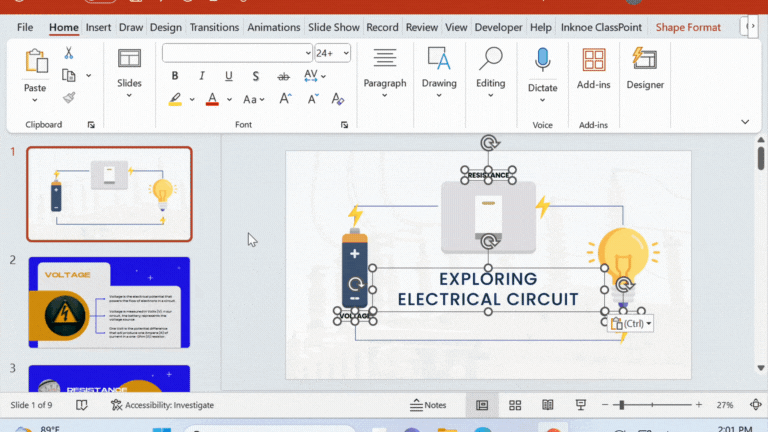
At this point, your slide is practically good to go! But, don’t forget to put in a striking title text to get that impression going for your visual diagram. Lastly, click on each mini slide (now turned to images), and make sure you click on the ‘Return to Zoom’ checkbox by the Zoom tab on your PowerPoint ribbon. This ensures that after clicking on each mini slide, your presentation view will go back to your main visual diagram instead of jumping onto the next!
Best Practices for Animated PowerPoint Presentations
Crafting an animated presentation is an art, and getting it just right requires a combination of creativity and practicality. Here are some best practices to ensure that your animated presentation not only engages your audience but also effectively conveys your message:
🎯 Start with a Clear Message
Before you embark on creating animated presentations, ensure you have a well-defined message or story you want to convey. Your animations should serve as a supporting tool to enhance and deliver that message effectively. Without a clear message, animations can become distracting rather than engaging.
🎨 Simplicity is Elegance
While animations add flair, avoid overcomplicating your slides. Prioritize clarity over complexity. Simplicity allows your audience to focus on your message, making your animations more impactful. Remember, sometimes less is more.
🖌️ Consistency Matters
Maintain consistency in your presentation design. Use a consistent color scheme, font choices, and graphical elements throughout your slides. This cohesiveness creates a visually pleasing and professional-looking presentation.
⏱️ Timing is Crucial
Carefully consider the timing of your animations. They should align seamlessly with your narration, neither rushing nor dragging. Properly timed animations can enhance comprehension and engagement.
📖 Storytelling with Animation
Leverage animations to tell a story. In your presentation, for instance, the flow from Voltage to Resistance to Current creates a narrative that helps your audience grasp the relationship between these concepts. A compelling story makes your content more memorable.
🧠 Engage Your Audience
Make use of interactive elements, such as drag-and-drop features, to turn your audience from passive viewers into active participants. Engaging presentations are not only informative but also memorable and impactful.
Food for thought
In this tutorial, we’ve taken a deep dive into the steps to create a Current and Voltage PowerPoint animation and the art of crafting dynamic and interactive presentations. From designing visually cohesive slides to perfecting the timing of your animations, you’ve gained invaluable insights into the world of effective presentation design. With the ability to tell engaging stories and incorporate interactive elements, you’re now equipped to create presentations that not only convey your message but also leave a profound impact.
As you embark on your journey to electrify your presentations, remember that simplicity, consistency, and audience engagement are your trusty allies. The skills you’ve acquired will not only enhance your message but also elevate your ability to captivate your audience. Armed with these newfound abilities, your presentations are poised to shine as compelling and unforgettable experiences.
Current and Voltage PowerPoint Templates
Add some sparks and pizzazz to your PowerPoint today!
