
Helping students learn and collaborate in diverse ways is crucial for fostering an enriching and learning environment as well as a well-managed classroom. One powerful strategy to achieve this is through the thoughtful grouping of students.
Whether based on skill levels, learning styles, interests, or other criteria, the benefits of strategic grouping extend beyond the classroom into students’ everyday lives.
Introducing students to new groups can be seamlessly incorporated into any lesson by grouping them in PowerPoint! In this blog, we will explore various types of student groups, effective strategies for successful grouping of students and collaboration, and how to create and utilize groups in your PowerPoint lessons.
Table of Contents
Grouping of Students: Types of Groups
Grouping of students offers various benefits that significantly contribute to their academic and social development. When your grouping aligns with the learning objectives and the specific task at hand, while also taking into account the individual needs of students, you pave the way for a positive learning experience and enjoy the following benefits:
- Enhanced Social Skills
- Diverse Perspectives
- Individualized Learning
- Increased Engagement
- Skill Development
- Peer Learning
- Time Management
- Increased Retention
- Preparation for Real-world Collaboration
There are numerous ways to group your students, offering a range of opportunities for them to collaborate with and learn from new peers, thereby achieving the aforementioned grouping benefits.
Furthermore, the choice of grouping strategy will depend on your specific goals, the individual needs of your students, and the desired outcomes of the lesson. Explore the various methods available for setting up groups in your classroom:

Skill Level
Group students based on where they are in the learning cycle. Those with similar knowledge level can work together on tasks fitting for their understanding.
When to Use This Grouping: Use this method to provide a more individualized learning environment and to enhance the specific strengths of your students.
Learning Style
Group students according to their distinct learning preferences and styles, whether it is visual, auditory, or kinaesthetic.
When to Use This Grouping: Use this method to ensure a personalized and effective learning experience, empowering students to work in ways that suit them best while collaborating with others.
Check out these 25 differentiated instruction strategies for modern classroom teaching.
Interests
Create groups based on shared interests or passions, enhancing motivation and engagement as students explore topics they genuinely find intriguing.
When to Use This Grouping: When you want to encourage better engagement with the peers.
Random Groups
Group students randomly without any specific criteria or intentional selection.
When to Use This Grouping: This method is useful for encouraging social interaction among students with diverse backgrounds and perspectives.
Heterogeneous Groups
Group students based on diverse abilities, skills, or characteristics. Compared to Random Grouping, this method is intentional, ensuring the student groups are diverse.
When to Use This Grouping: Use this method to facilitate peer learning and peer tutoring, allowing a vibrant learning environment through unique perspectives and insights.
Student Choice

At times, you would want to grant your students the autonomy to choose their own group members.
When to Use This Grouping: When you want to foster a sense of ownership and increased motivation.
Flexible Grouping
Dynamically group students based on task requirements or individual needs. As they collaborate, gather data on their progress, and reorganize groups as students develop skills at their own pace.
When to Use This Grouping: This method allows for flexibility and a responsive learning environment.
Jigsaw
This grouping method enables each student to specialize in one skill from the lesson that day. Subsequently, they can return to the group and share their acquired knowledge with the entire team.
When to Use This Grouping: Use this method to promote individual expertise and build students’ confidence, especially for shy students, while ensuring a holistic understanding of the overall subject through collaboration.
How to Create Student Groups in PowerPoint (3 Simple Steps)
To seamlessly integrate these student groups into your daily lessons and presentations, not just for larger projects, consider utilizing the PowerPoint add-in, ClassPoint. With ClassPoint, you can include your students in a class, enhancing engagement and facilitating live interaction during your presentations.
Additionally, this tool enables you to create groups directly within PowerPoint, promoting teamwork and collaboration. Follow the steps below to establish groups in PowerPoint:
Step 1: Create a Class in PowerPoint
In the ClassPoint tab of the PowerPoint ribbon, click on the My Classes button to create a class.
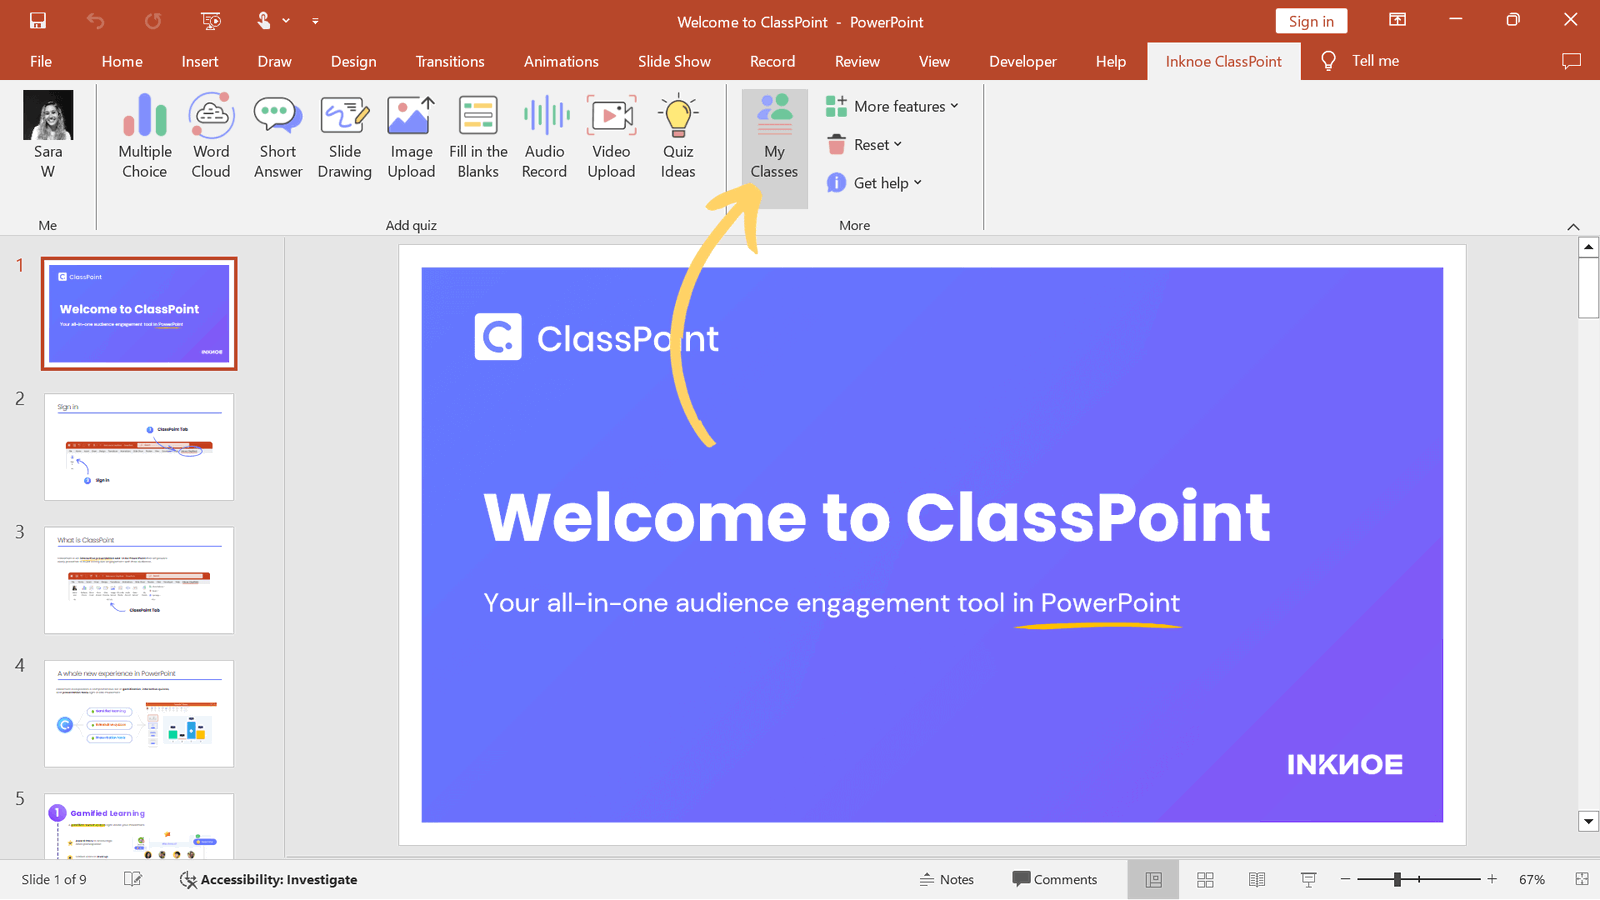
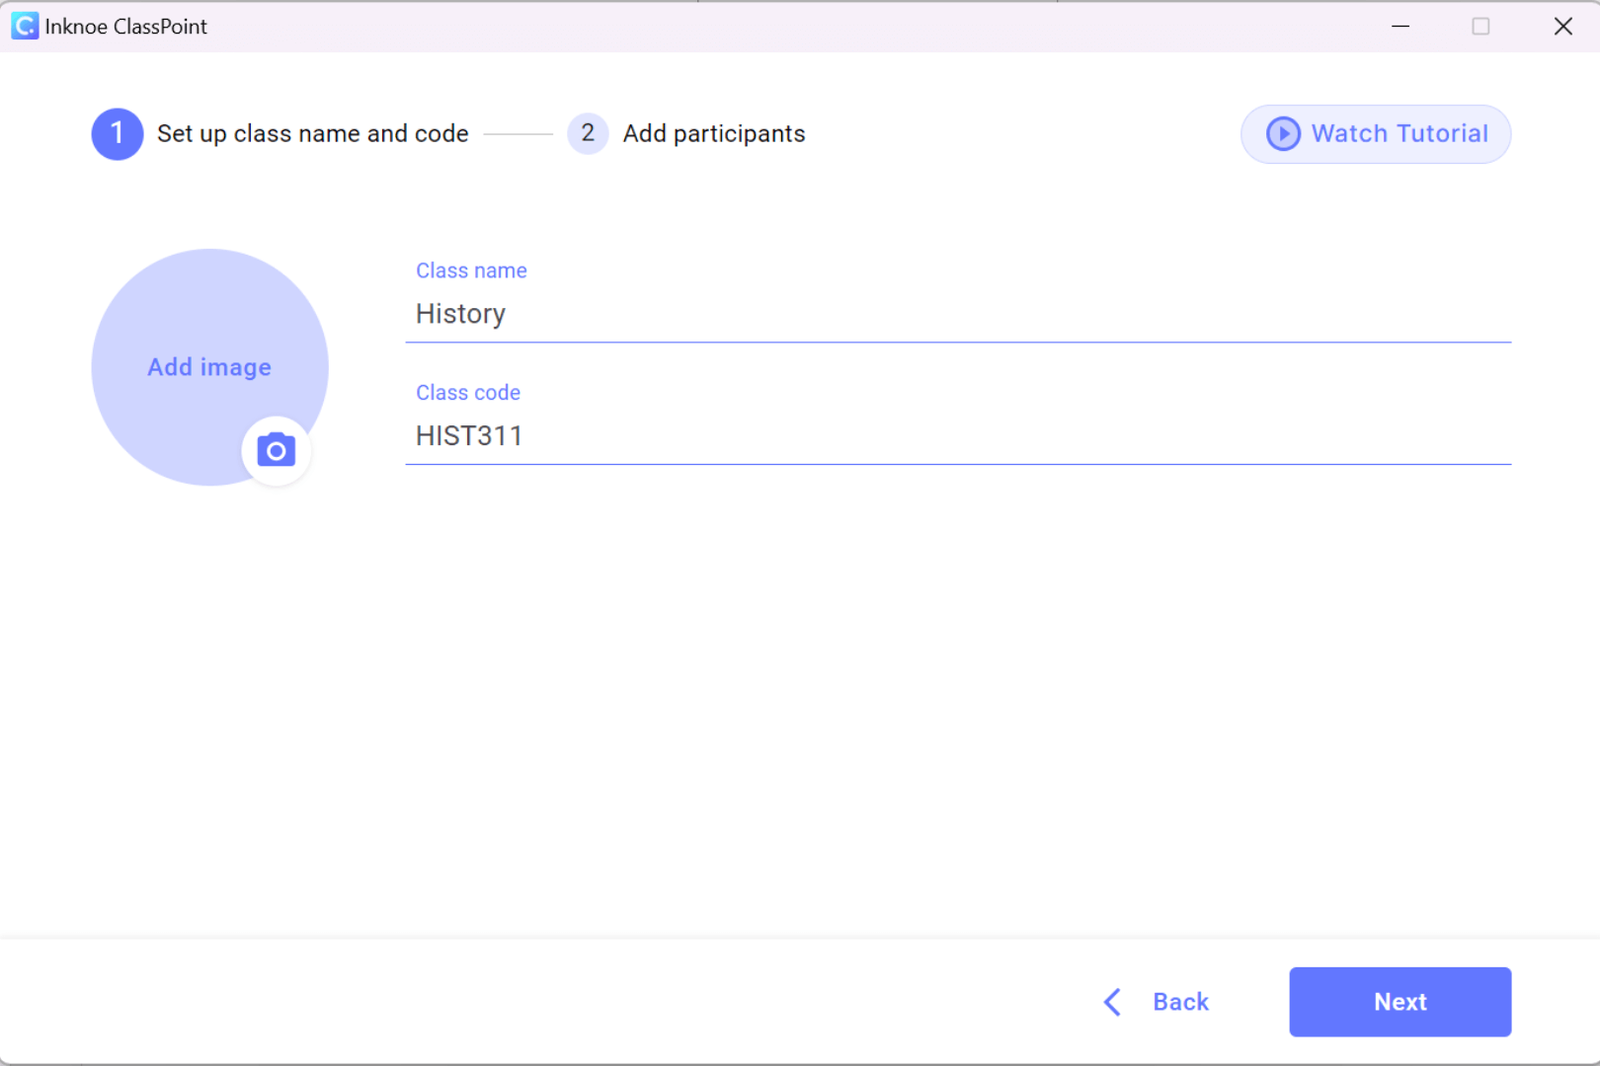
Add in a unique class code, name of your class, and an image.
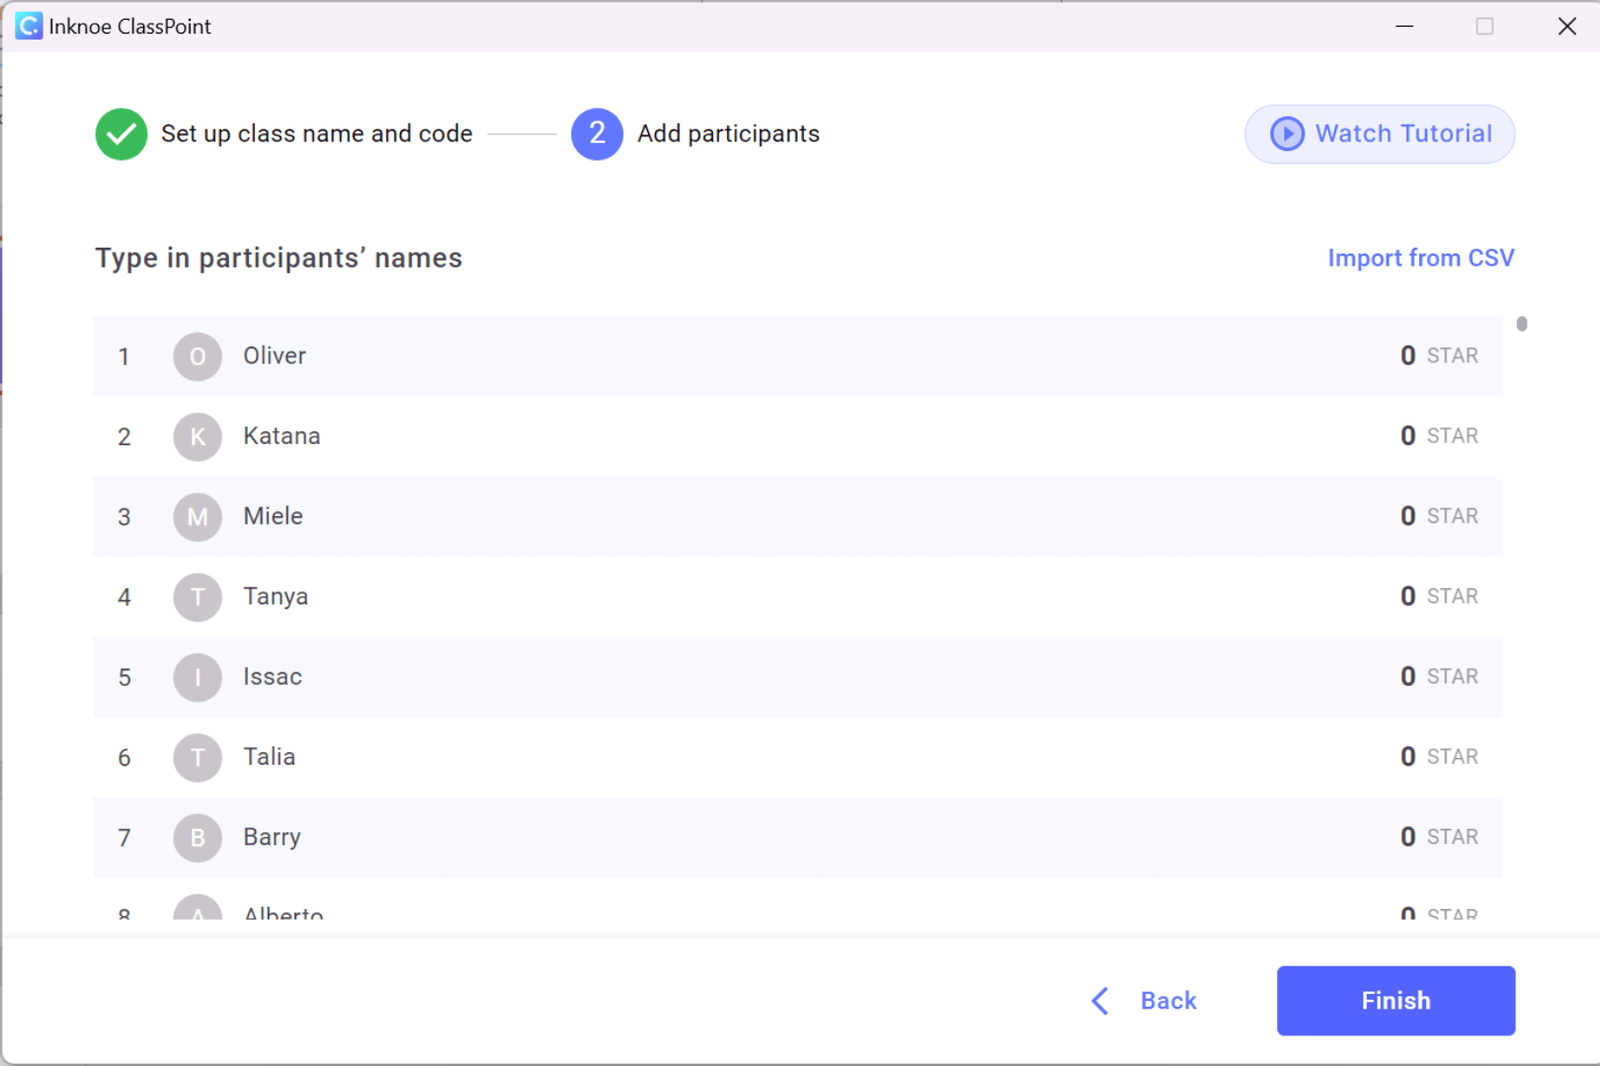
Then, you can add the names of your students by typing their names manually or importing a list of student names. Click Finish once you are done.
Don't have ClassPoint in your PowerPoint ribbon yet? Sign up now to download and install in your device!
Step 2: Create Groups of Students
Once you have created a new class in your ClassPoint tab, you can set up your student groups using the Group tab. There are two ways to create groups: Manually or Automatically.

Manually Create Groups
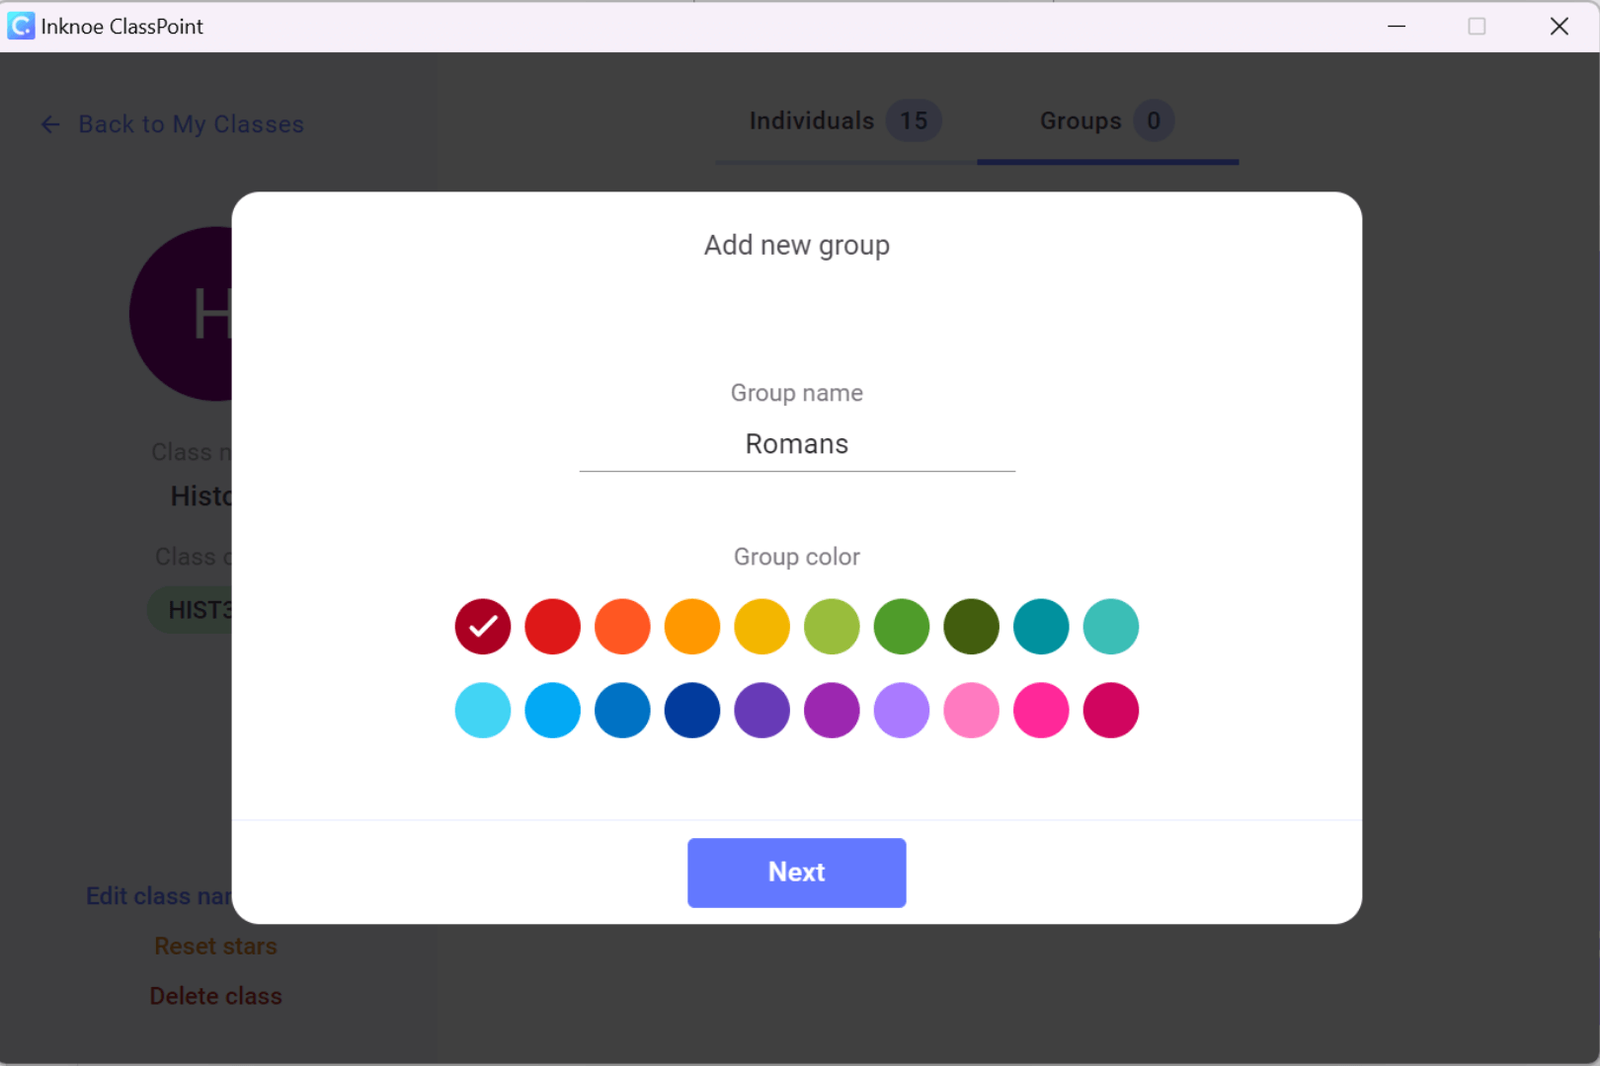
To manually select and add students to a group, choose the “Add New Group” option. Next, assign a name to the group and select an identifying color.
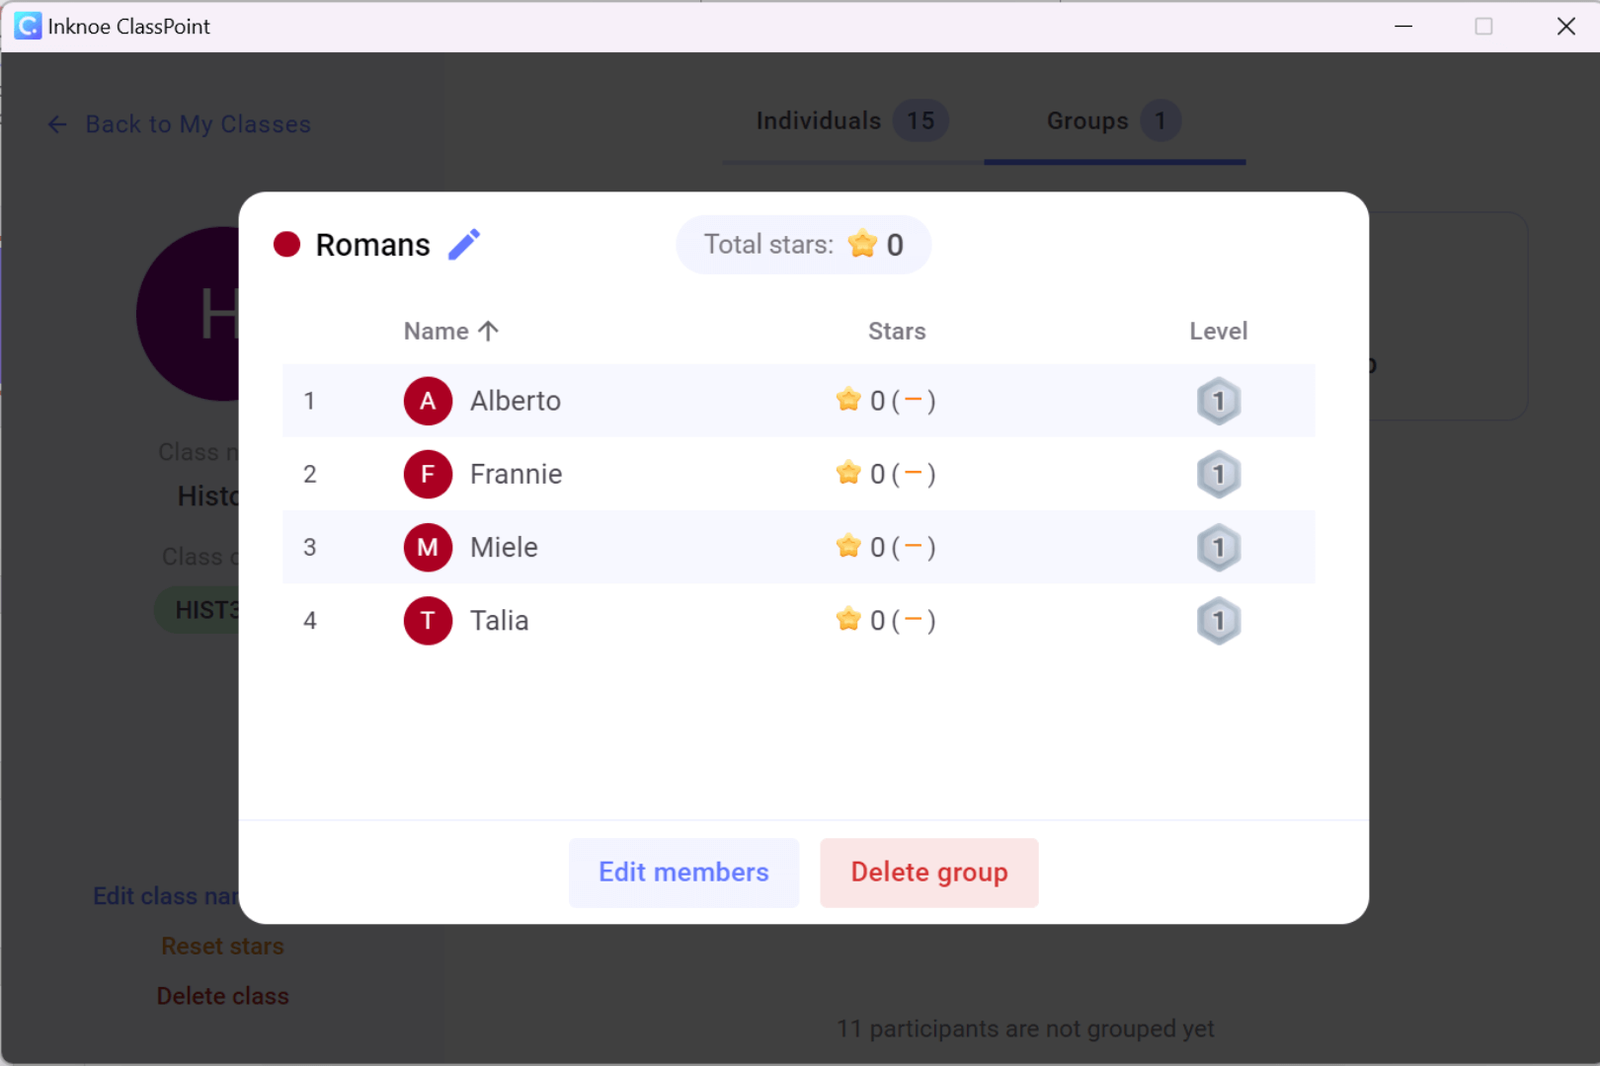
Next, select the students you want to be added into this group.

Continue adding new groups until all your students are assigned to a group. For any necessary adjustments, such as editing group members, changing the group name, or deleting a group, select the relevant group and make the desired changes.
Automatically Create Groups
For a random assignment of students to groups, let ClassPoint auto-assign for you. This option is convenient if you are short on time or wish to diversify your techniques.
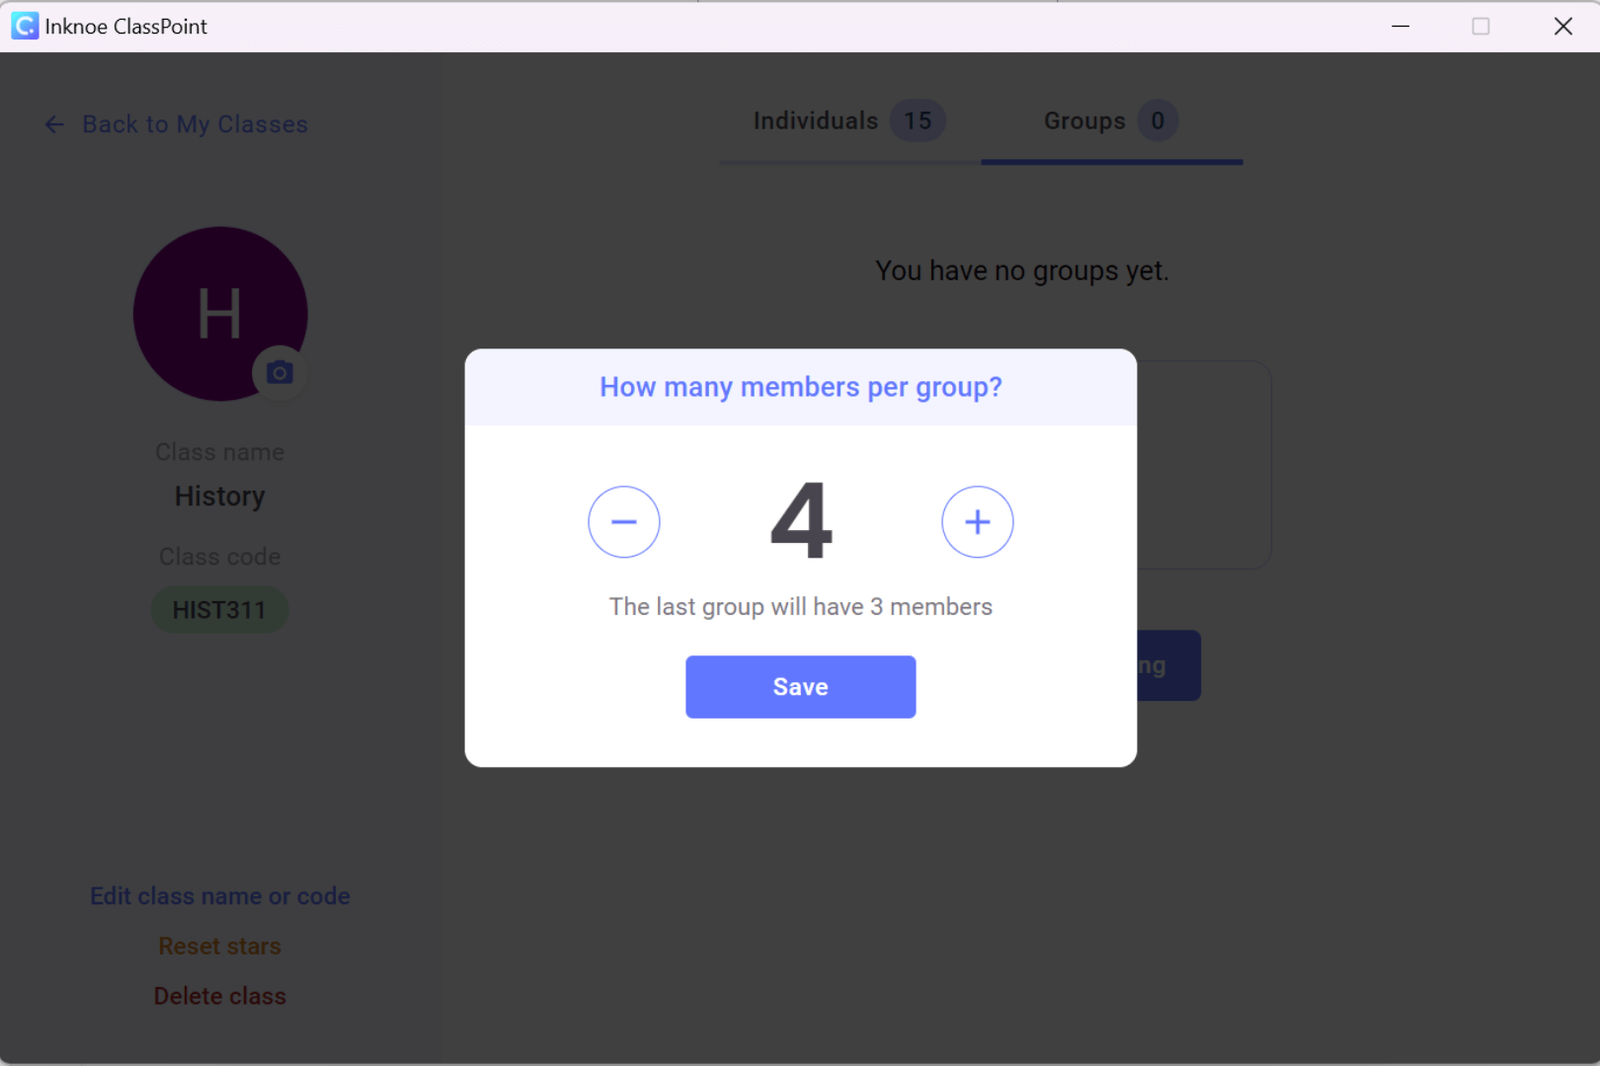
Select the “Automatic Grouping” button, then choose the desired number of students per group. ClassPoint will generate the required number of groups to ensure every student is assigned to a group. Please note that some groups may have more or fewer students depending on your specified numbers.
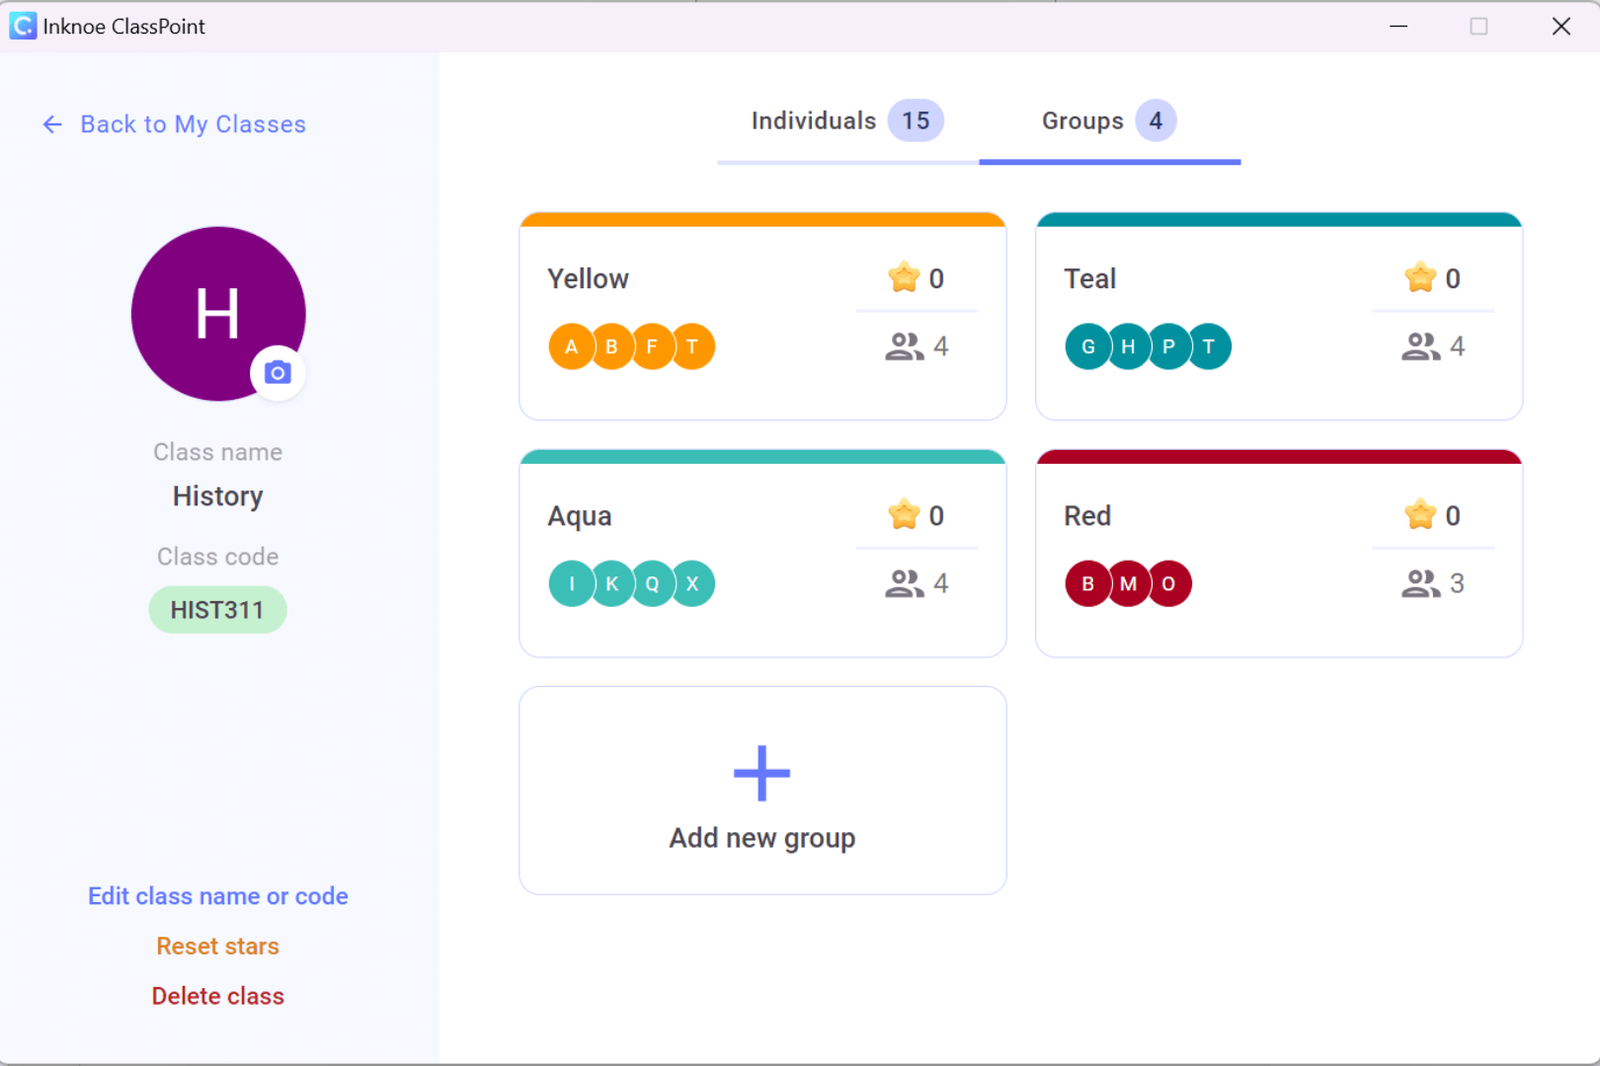
Once the groups are created, feel free to customize the names and the composition of students in each group by clicking on the respective group.
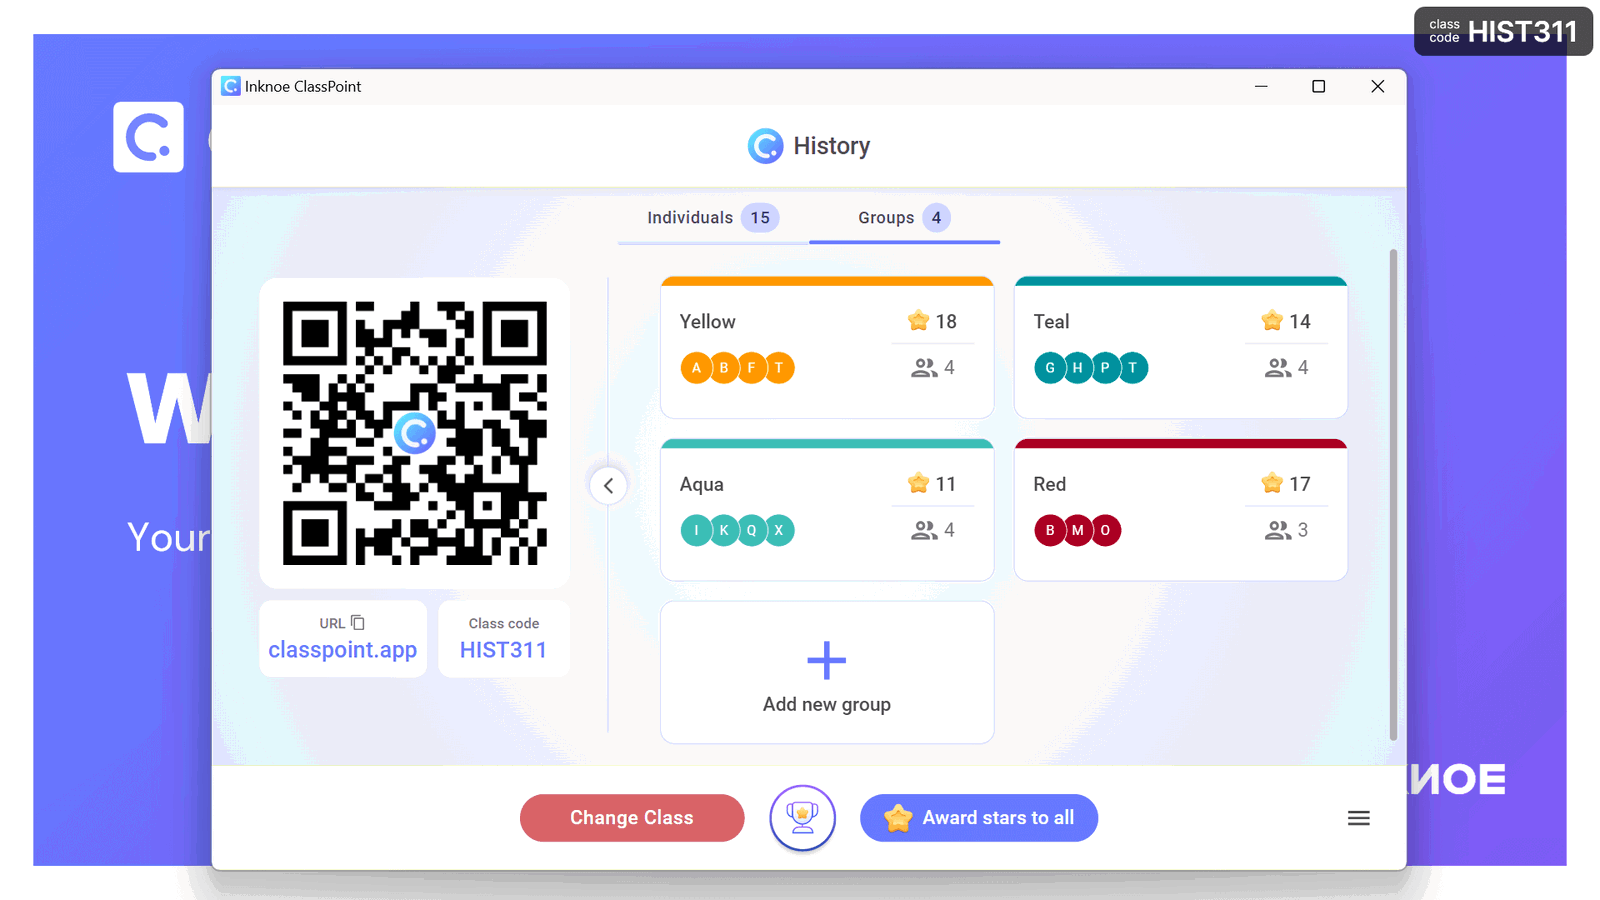
Step 3: Use the Groups You Created in a Presentation
Awarding Stars
Now, let the fun begin! During your presentation, you have the option to award stars to groups of students or to individual students. Stars can be granted for various reasons, such as participation, answering interactive questions, completing activities, and much more.
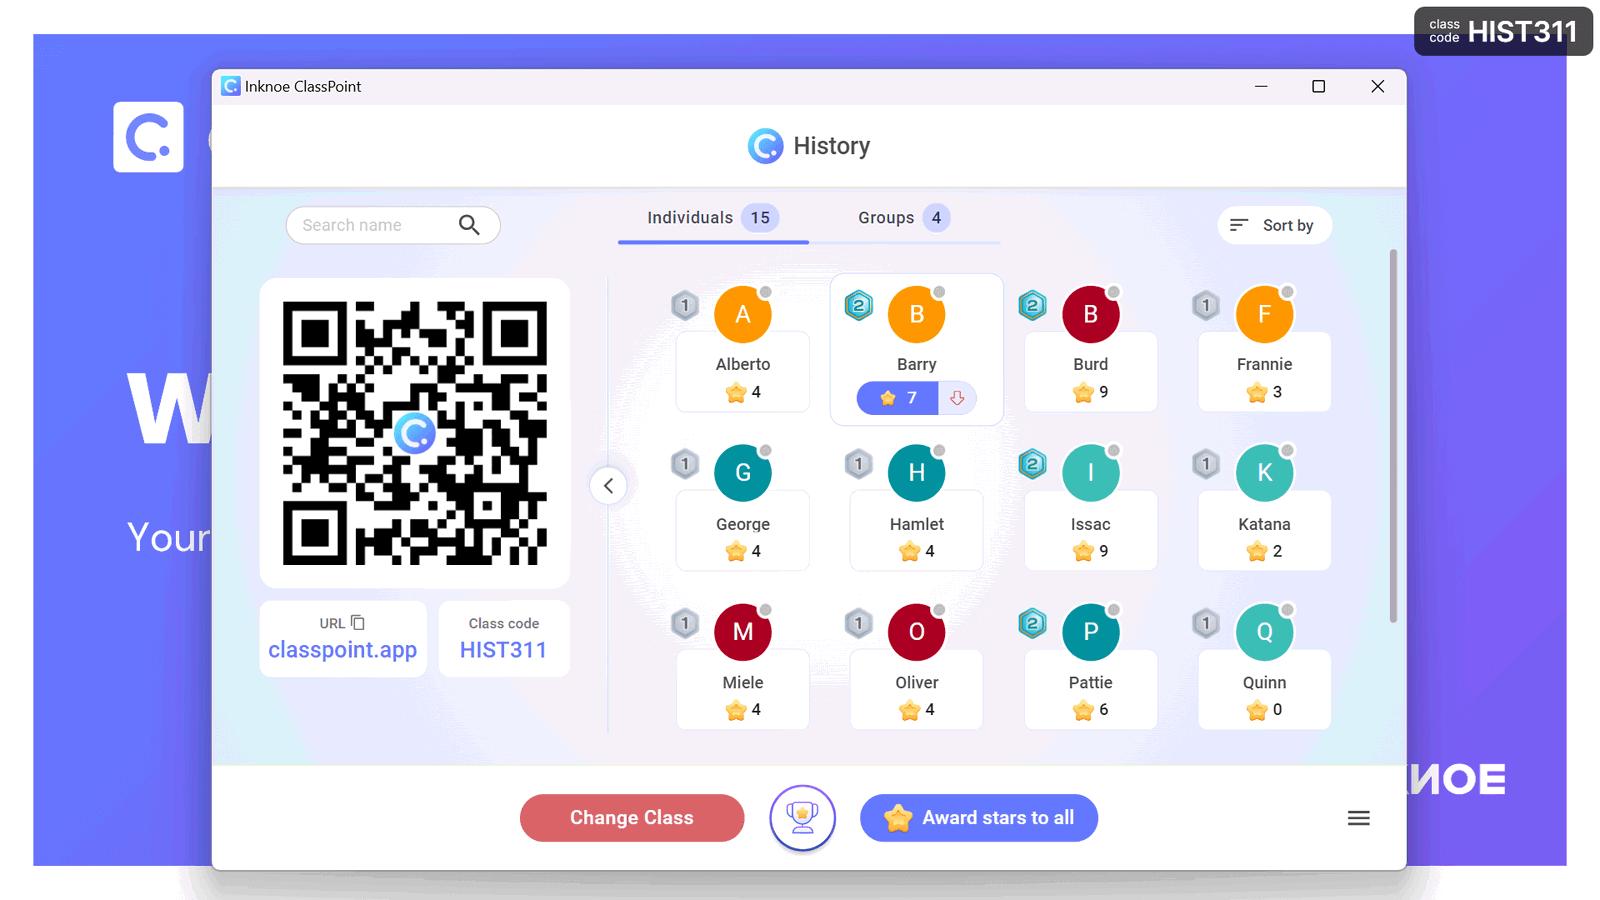
As students accumulate more stars, they progress through various levels and badges. These levels are customizable, allowing for a learning experience tailored to your teaching style.
Group Leaderboard
As students earn stars, you can keep them motivated by displaying the Group Leaderboard. This feature showcases the rankings of groups based on the number of stars each group has earned.
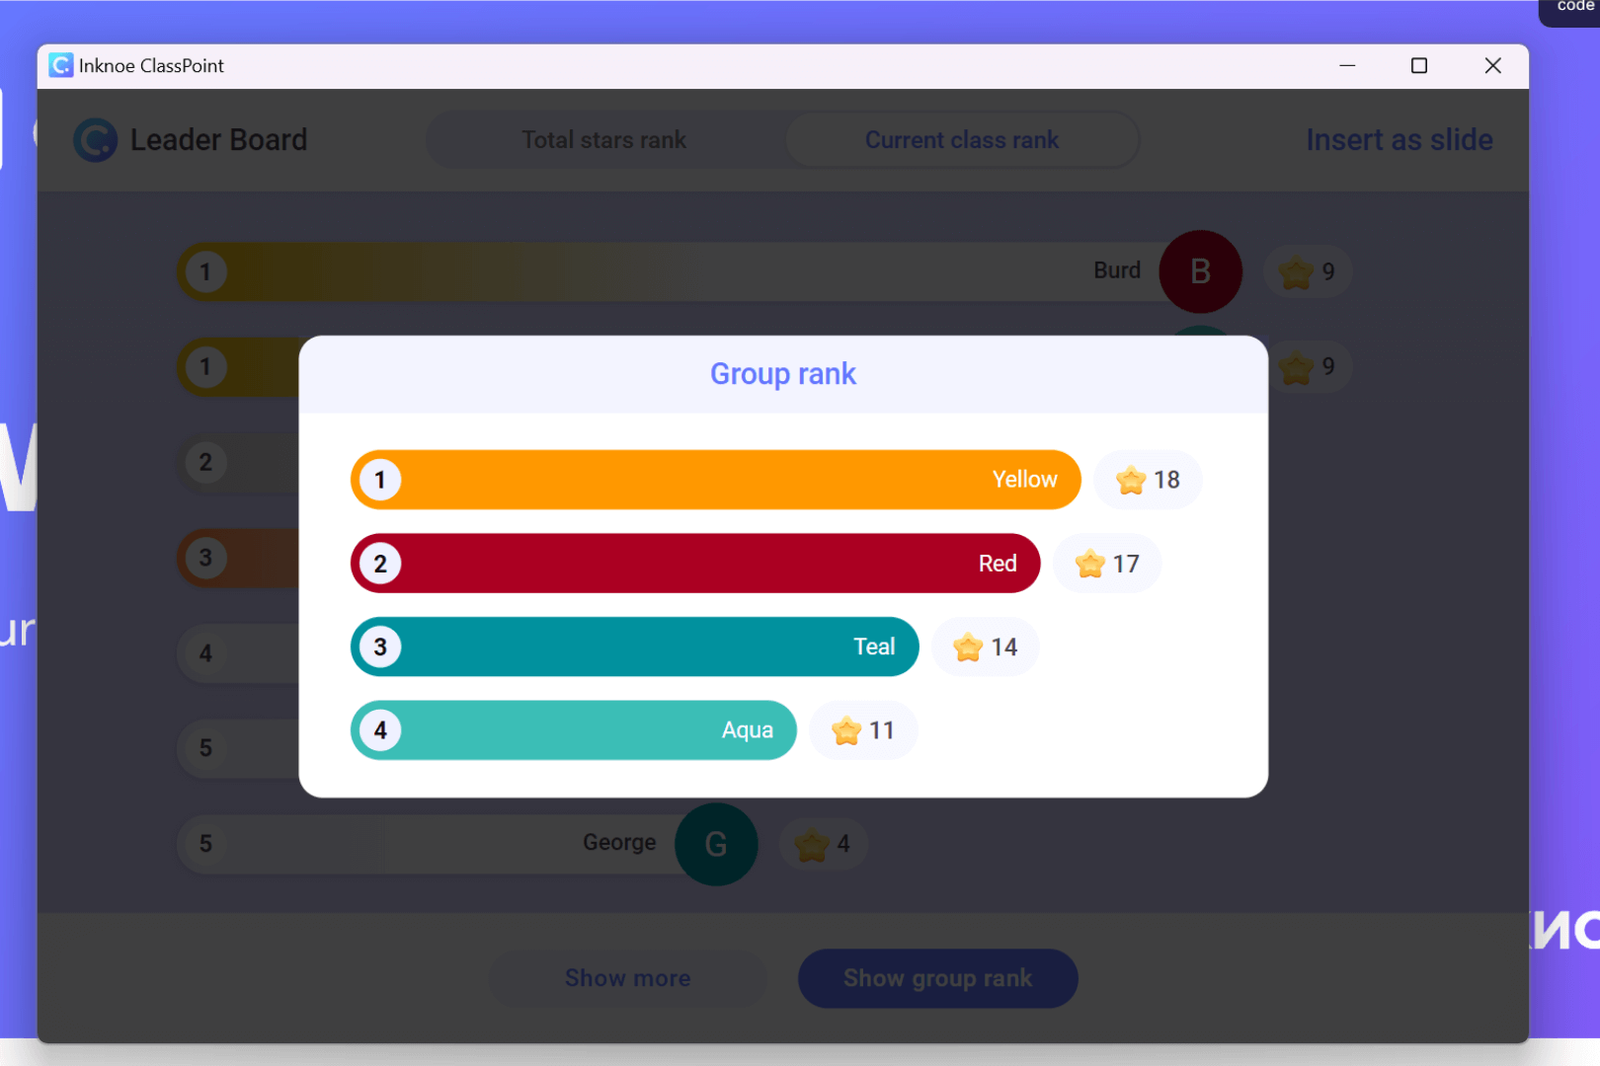
This creates a competitive learning atmosphere that can keep students focused and participating in the class effortlessly!
ClassPoint Student Grouping is a Premium Plan feature. Contact us if you are interested in getting ClassPoint for your school/organization.
Access the Interactive PowerPoint Playbook here to gain access to a wide range of tips and resources for creating interactive PowerPoint teaching.
Grouping of Students: 7 Proven Strategies that Work
To ensure the success of your group activities, consider the following strategies and tips:
1. Choose the Group Type Based on Your Goals
Consider the nature of the task before forming groups. Tailor them to the specific requirements of the assignment.
Example: In a literature class where your students work on a project analyzing a novel, group students based on themes or aspects they want to explore. Alternatively, to enhance communication skills, pair students with opposite strengths and weaknesses.

2. Determine the Optimal Group Size
Adjust group size based on objectives. Smaller groups encourage individual participation, while larger groups bring in diverse ideas.
Example: A brainstorming session may benefit from a smaller group of 3-5 participants, while a research project may thrive with a larger group of 6-8 students.
3. Adaptive Group Composition

Embrace flexibility in group composition. Use homogeneous groups when needed, and at other times, opt for heterogeneous groups to encourage collaboration and knowledge exchange.
Example: In a science experiment class, mix students with varying levels of expertise to facilitate peer-to-peer learning.
4. Define Roles and Expectations
Clearly define roles to establish responsibilities and expectations. This promotes accountability and ensures meaningful contributions from each student.
Example: Assign roles such as “researcher,” “presenter,” and “editor” for projects, to ensure an equal division of labor and tasks.
5. Facilitate Communication
Promote effective communication within groups by encouraging open dialogue, active listening, and constructive feedback. This cultivates a collaborative environment.
Example: During a group discussion, provide students with grounds rules and prompts that can guide them to express their opinions and respond to others respectfully.
6. Monitor Progress

Regularly check group progress to identify challenges early on. This allows for timely intervention and support, ensuring each group stays on course.
Example: Schedule periodic updates for long-term projects or be accessible during shorter-term groupings.
7. Prepare students for conflict
Equip students with conflict resolution strategies. Monitor for signs of conflict and coach them on handling conflicts respectfully. Encourage open communication, active listening, and collaborative problem-solving.
Example: In the event of a disagreement during a group discussion in a social studies class, encourage students to express their viewpoints calmly, actively listen to others, and collaborate to find common ground, fostering a constructive atmosphere that propels the discussion forward.
Check out this Conflict Resolution Guide for Teachers.
8 Really Fun Ideas and Examples of Using Groups in PowerPoint
Now that your groups of students are set up in PowerPoint, here are some ideas to take full advantage of them:
- Group Discussions:
- Integrate moments for group discussions during your presentations. Students can gather in their groups to share thoughts and opinions.
- Team Projects:
- Assign groups as teams for specific periods, such as the duration of a project. In addition to project tasks, they can collaborate during interactive questions and discussions.
- Quiz Competitions:
- Organize quiz competitions with questions related to the subject matter. Students earn stars for their groups as they provide correct answers.
Check out these exciting classroom games you can organise easily in PowerPoint.
- Problem-Solving Challenges:
- Present real-world problems and task each group with generating innovative solutions. This promotes critical thinking and teamwork.
- Role-Playing Exercises:
- Create scenarios for role-playing activities, utilizing groups to play out scenarios multiple times with full participation.
- Escape Room Challenges:
- Design educational “escape rooms” where groups must solve puzzles or answer questions to “escape” within a time limit.
- Simulations:
- Utilize simulations to recreate real-world scenarios, particularly effective in subjects like business, science, or history.
- Field Trips:
- Take students on educational field trips, either physically or virtually!, where each group collaborates to gather information or complete specific tasks.
The success of grouping of students learning lies in the deliberate consideration of students’ needs, the nature of the task, and the goals of the lesson. By implementing effective grouping strategies, educators not only enhance academic outcomes but also contribute to the holistic development of students—nurturing social skills, individualized learning, and preparing for real-world collaboration.
Ready to change up your classroom routine and bring student grouping into every lesson? Start by chatting with our team to access ClassPoint Premium!
