
Ever felt like your PowerPoint presentations could use a little magic? You’re not alone. Whether you’re a seasoned presenter or just getting started, there’s a world of PowerPoint tips and tricks waiting for you. In this guide, we’re diving into the nitty-gritty of Microsoft PowerPoint to uncover 30 hidden gems that’ll transform the way you create and deliver slides.
From making your designs pop to streamlining your workflow, these PowerPoint hacks are designed for real-world impact. No jargon, just practical insights that’ll have you presenting like a pro in no time.
Let’s cut through the noise and get straight to the good stuff – your next presentation is about to level up. Ready? Let’s get started.
27 PowerPoint Tips and Tricks That Put The Power in PowerPoint

Before we begin, we'll tell you a little secret. There's a direct add-in that you can use to supercharge your PowerPoint presentations! ClassPoint, the #1 audience engagement tool, lets you access a ton of interactive features with activities, slide show tools, gamification, and even AI. Boring presentations out, dynamic presentations in!
1. Morph Transition for Seamless Animation
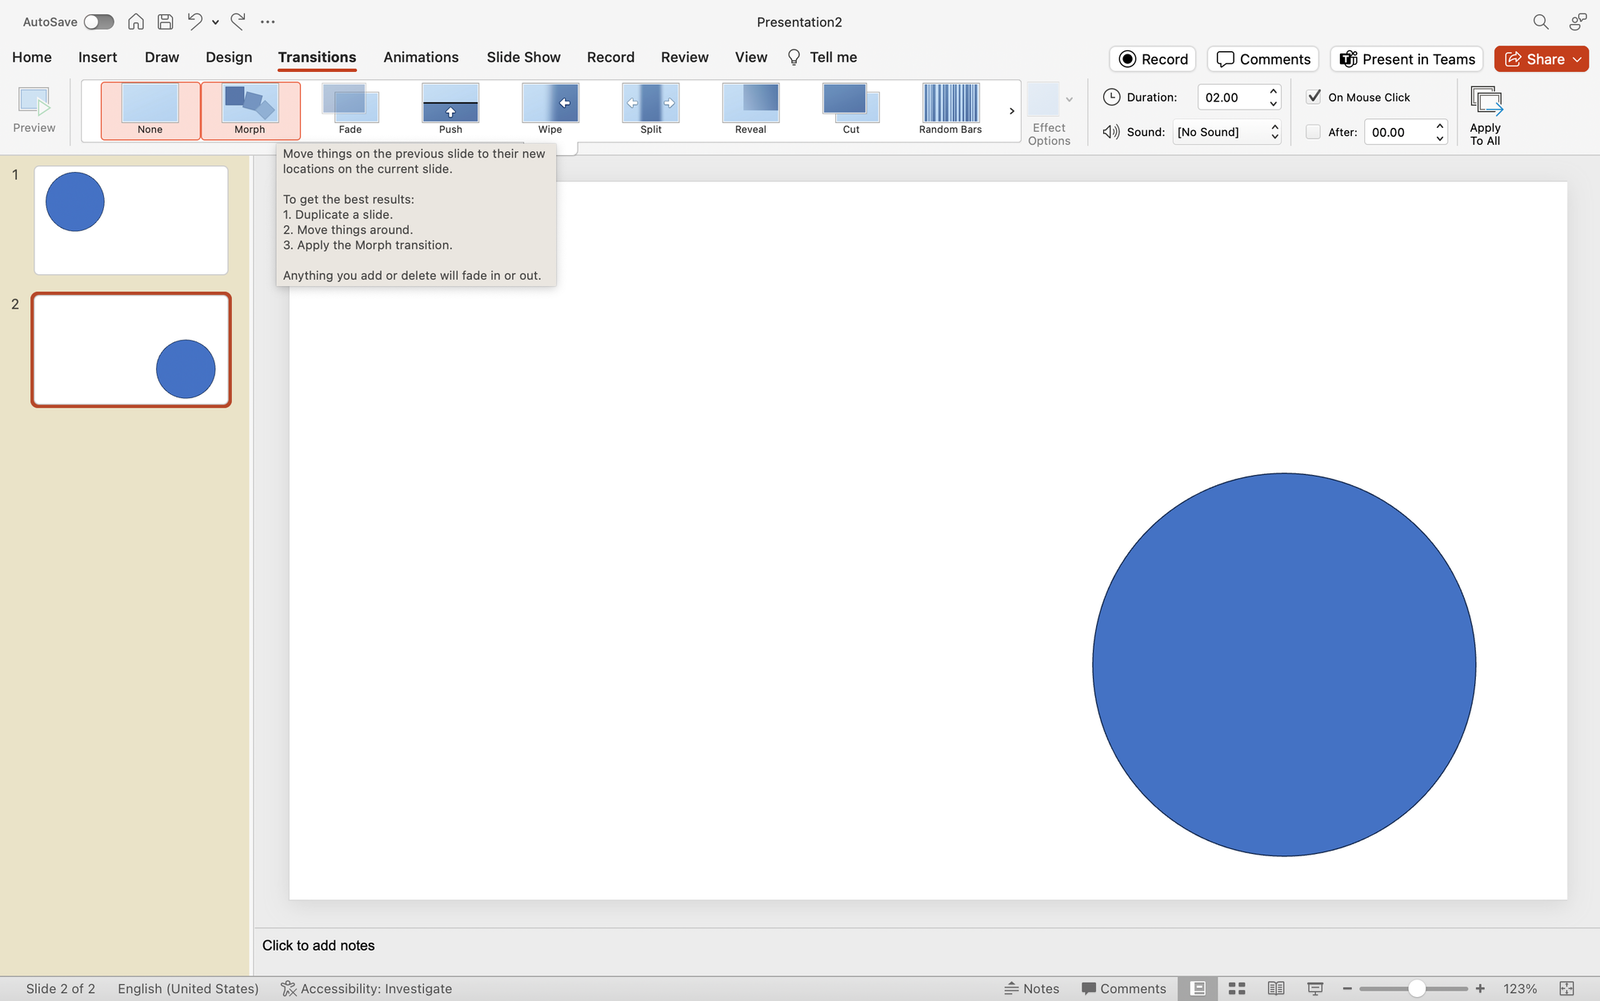
What’s it for: Elevate your presentation by seamlessly animating objects and creating smooth transitions between slides. Morph transition is your key to a dynamic and visually engaging storytelling experience, allowing you to captivate your audience effortlessly.
How to do it:
- Position the same object in different parts on multiple slides
- Select all slides, and go to the Transitions tab.
- Choose “Morph” as the transition effect.
More on how you can make your PowerPoint presentations pop here. Here's how to create 3D morph in PowerPoint.
2. SVG Image Integration
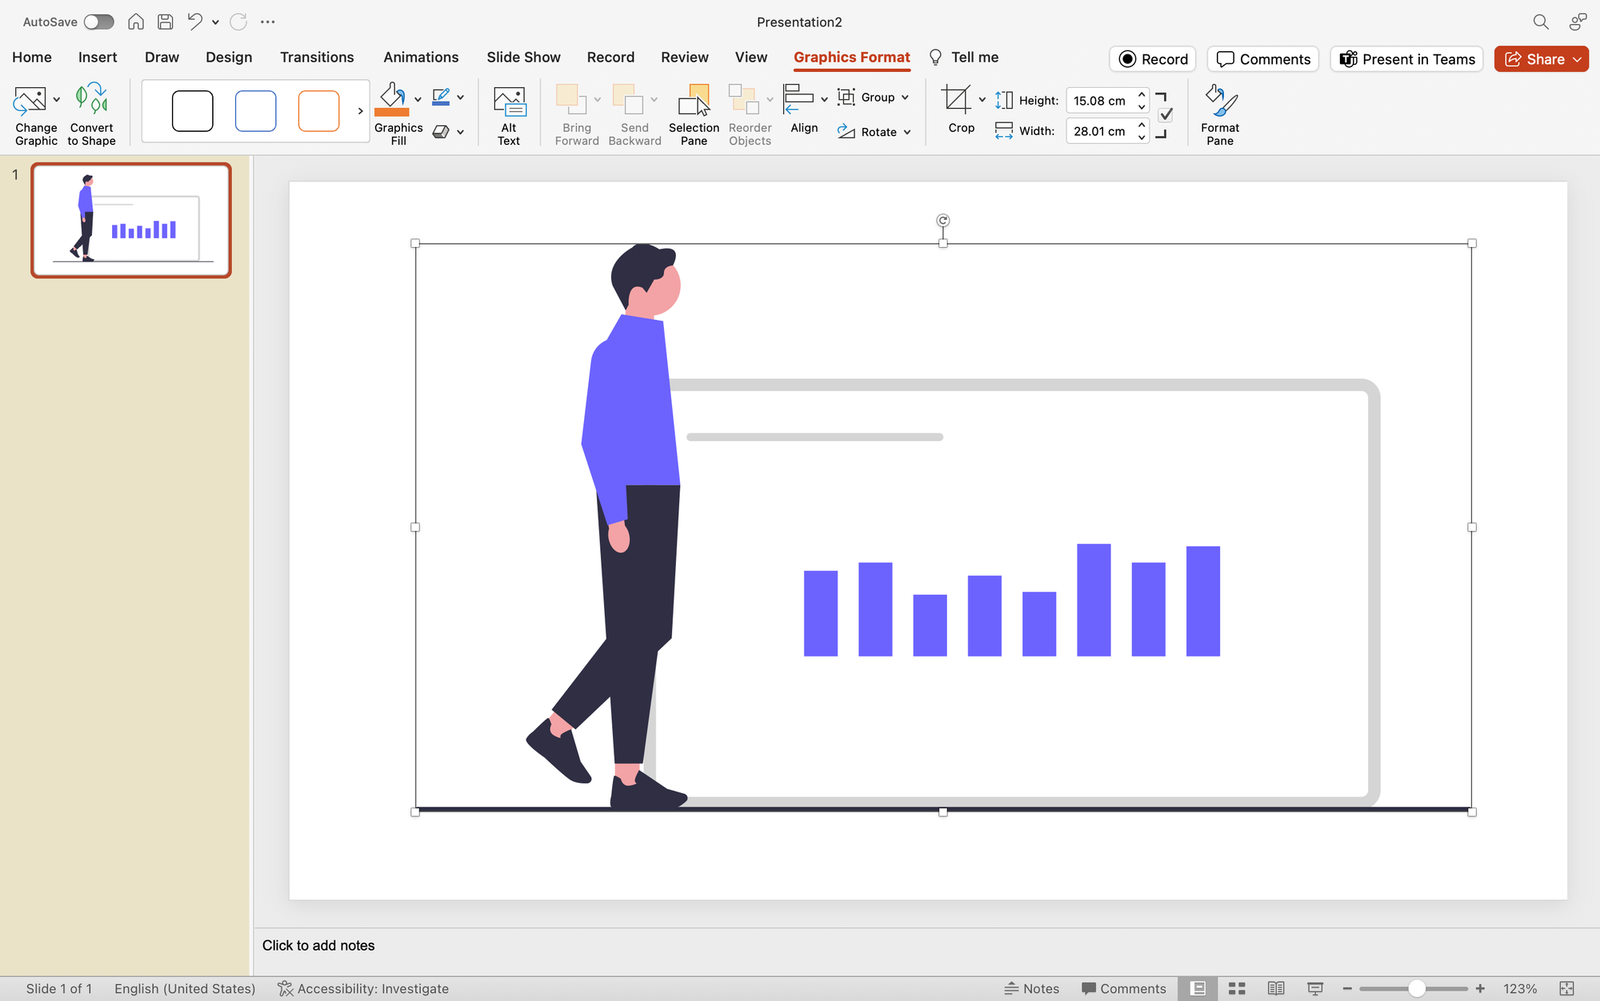
What’s it for: Did you think SVG’s only work for websites and professional photo editing tools? They do, too, in PowerPoint! Import high-quality Scalable Vector Graphics (SVG). Maintain image clarity, resize without loss, and enhance your presentations with crisp logos and icons.
How to do it:
- Save your chosen SVG on your device.
- Click on the Insert tab.
- Choose “Pictures” and select your SVG file.
- Adjust the size without compromising image quality.
3. Designer Feature for Quick Layouts
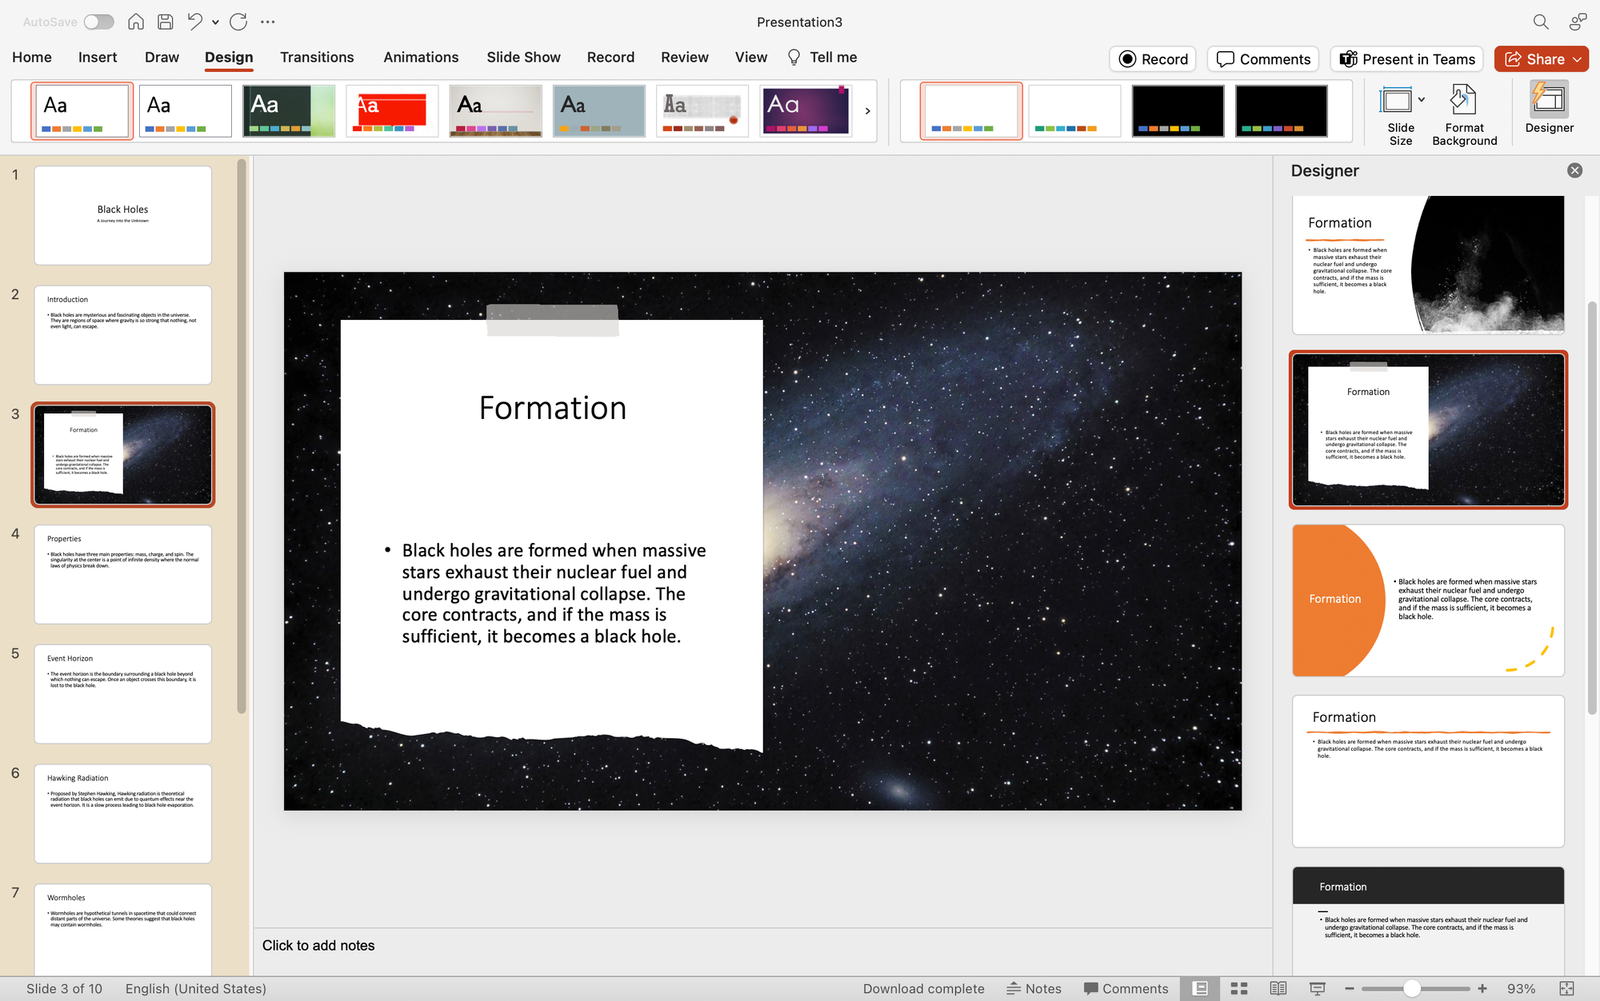
What’s it for: Effortlessly create professional-looking slides with the Designer feature. Receive instant layout suggestions based on your content, saving time and ensuring your presentation looks polished.
How to do it:
- Select a slide.
- Go to the Design tab and click Designer on the far right along the ribbon.
- Select through ready-made slide designs for instant layouts.
4. Insert 3D Models
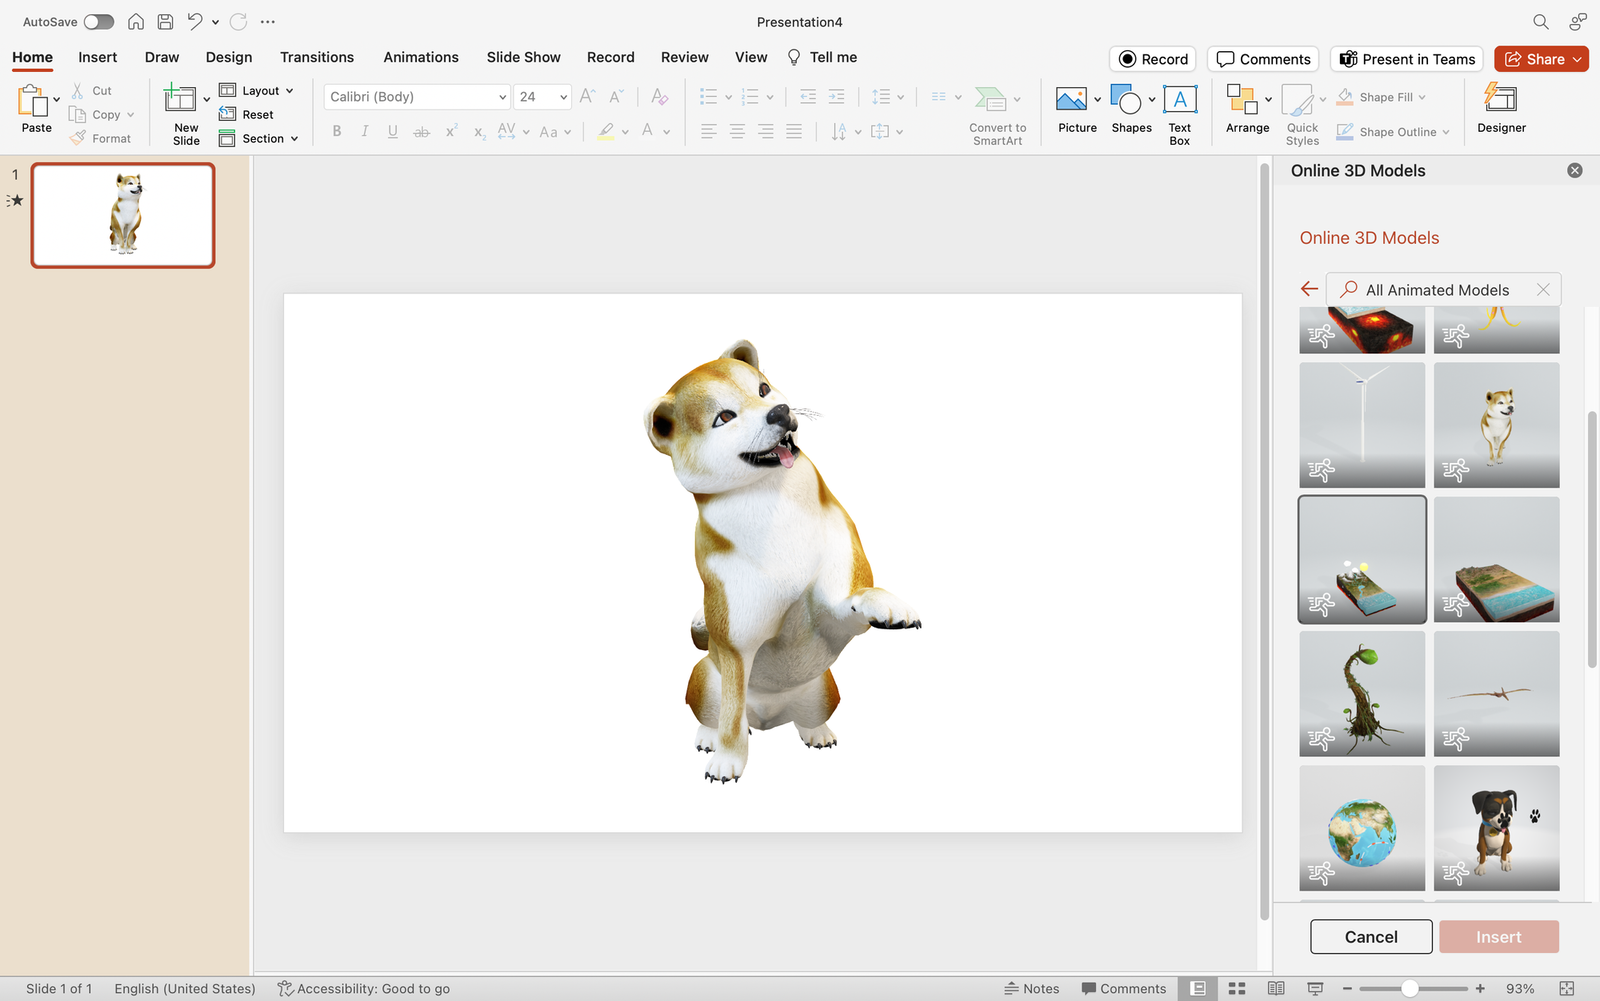
What’s it for: Amp up your presentations with manipulable 3D models, adding a dynamic dimension. Whether it’s showcasing products or visualizing data, 3D models bring your slides to life.
How to do it:
- Click on the Insert tab.
- Click on the “3D Models” dropdown and proceed to Stock 3D Models.
- Search for a 3D model of your choice and insert.
- Manipulate and customize as needed.
5. SmartArt Graphics for Visual Hierarchy
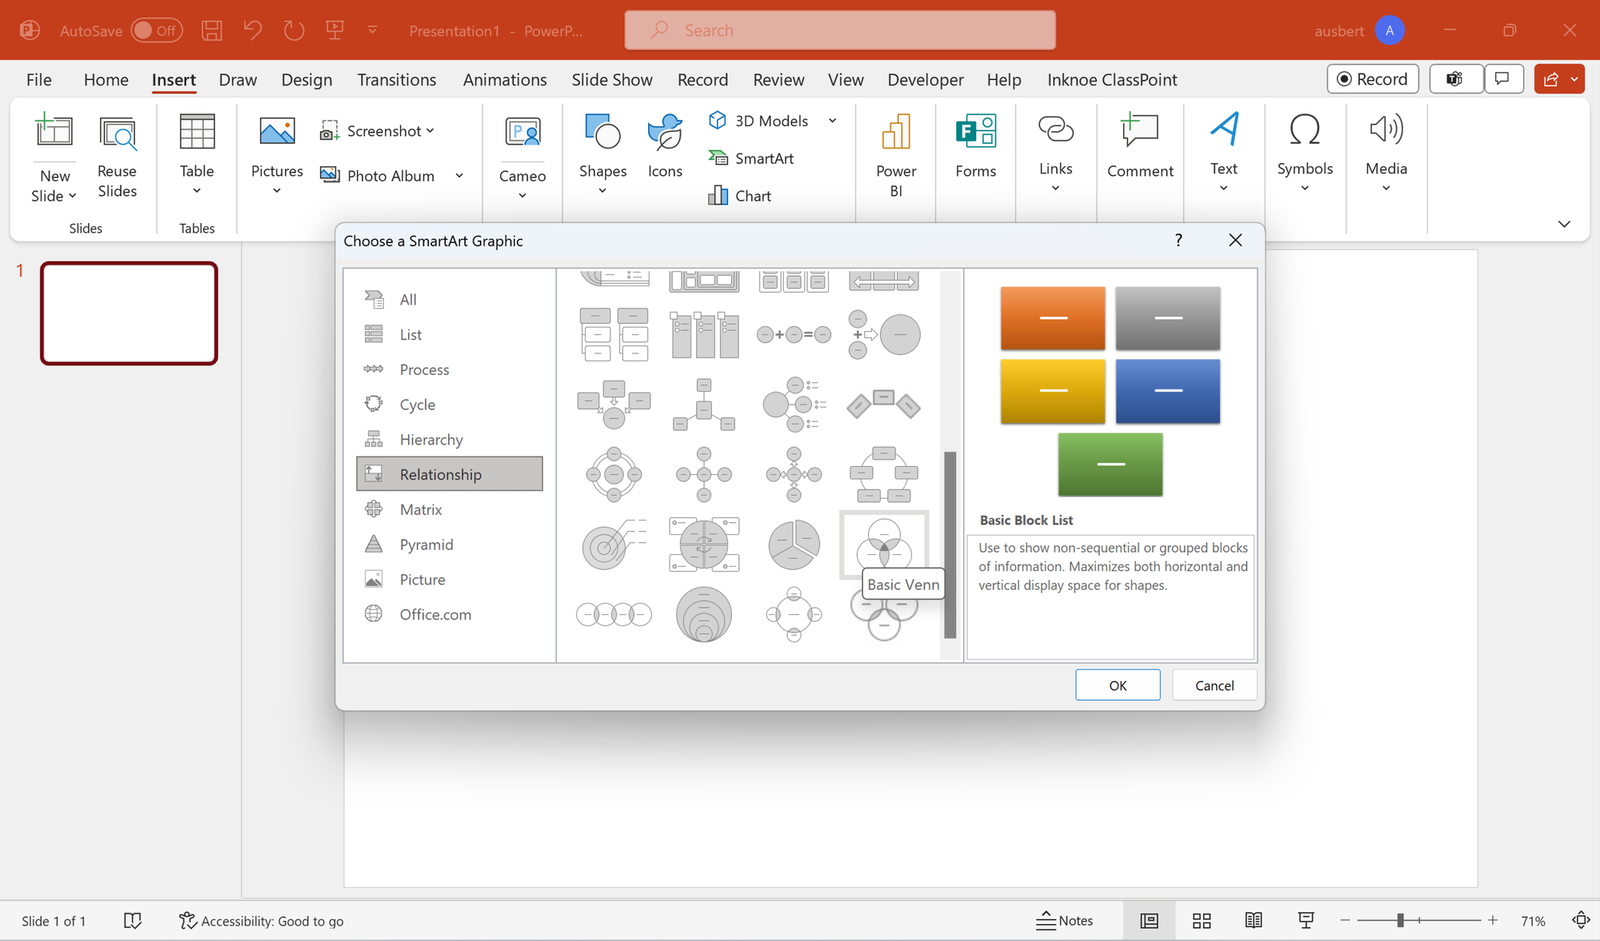
What’s it for: Convey complex ideas with visual hierarchy using SmartArt graphics. These graphics offer a structured and visually appealing way to organize information, making your content more digestible.
How to do it:
- Go to the Insert tab.
- Select “SmartArt” and navigate through the available categories.
- Select a graphic template that fits your presentation needs.
- Enter your content and customize as needed.
Looking for inspiration on using Smart Art? We've curated all the ways you can present a Venn diagram in PowerPoint.
6. Eyedropper Tool for Color Matching
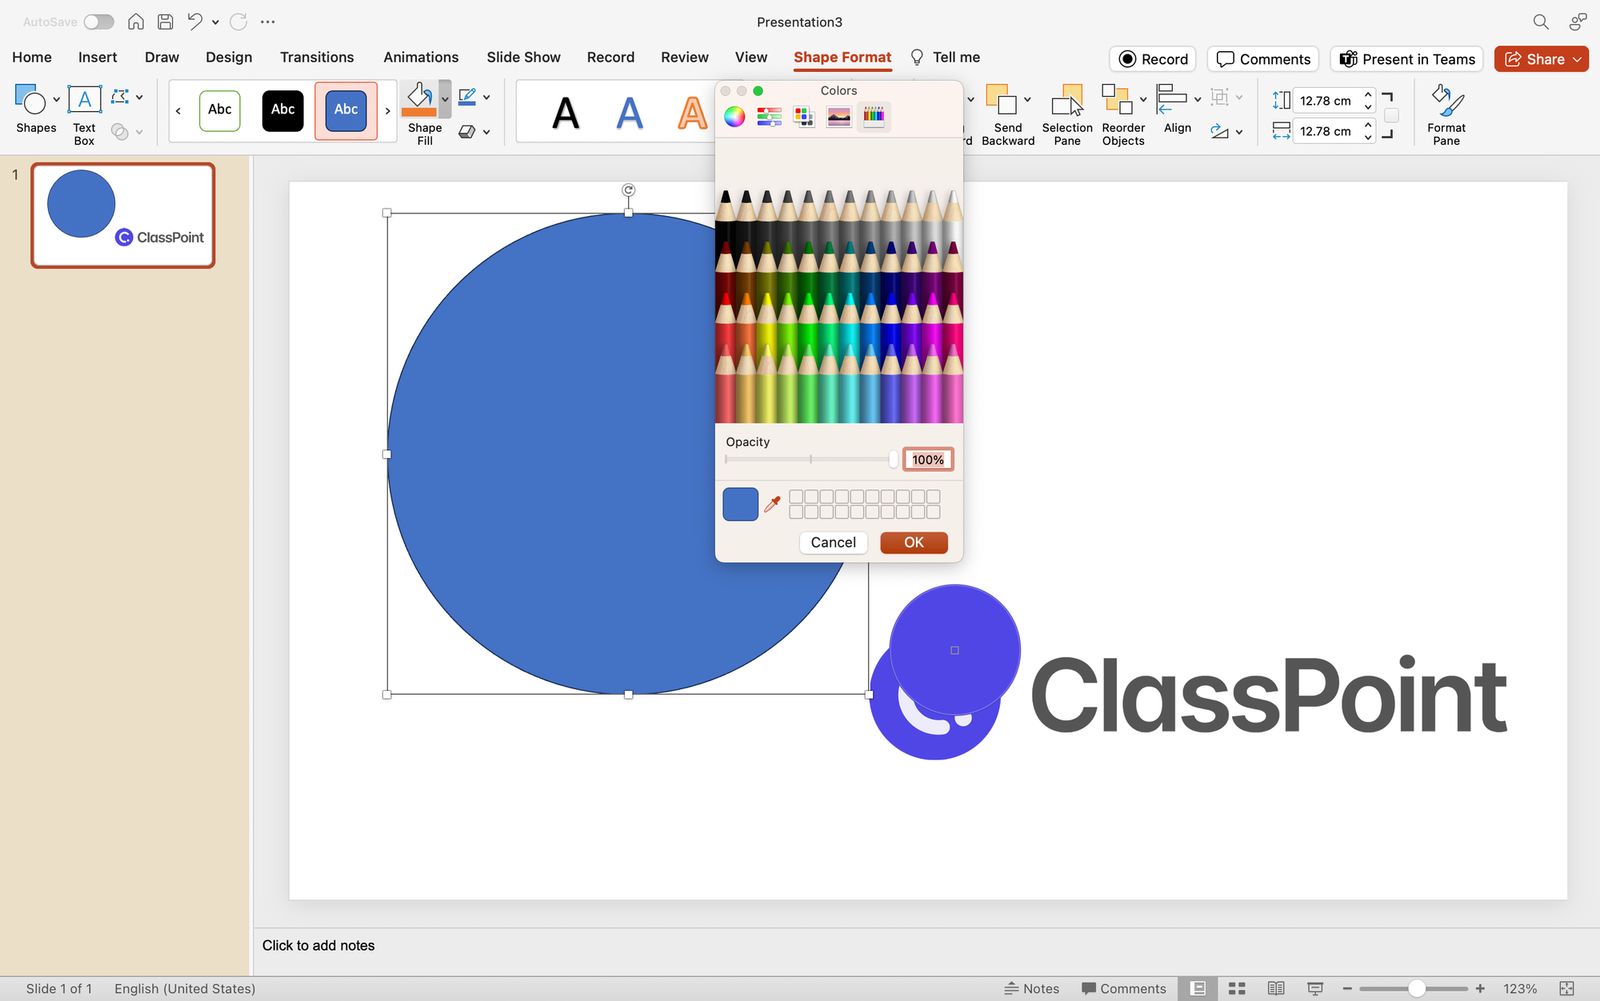
What’s it for: Maintain a cohesive design by using the Eyedropper tool to pick colors from images or elements within your presentation. Ensure consistency and professional aesthetics in every slide.
How to do it:
- Select the editable, native PowerPoint object you wish to customize.
- Go to the Shape Format tab and click on the Shape Fill dropdown.
- Select “More Fill Colors…” and click the eyedropper icon to begin color appropriating.
7. Record and Insert Audio
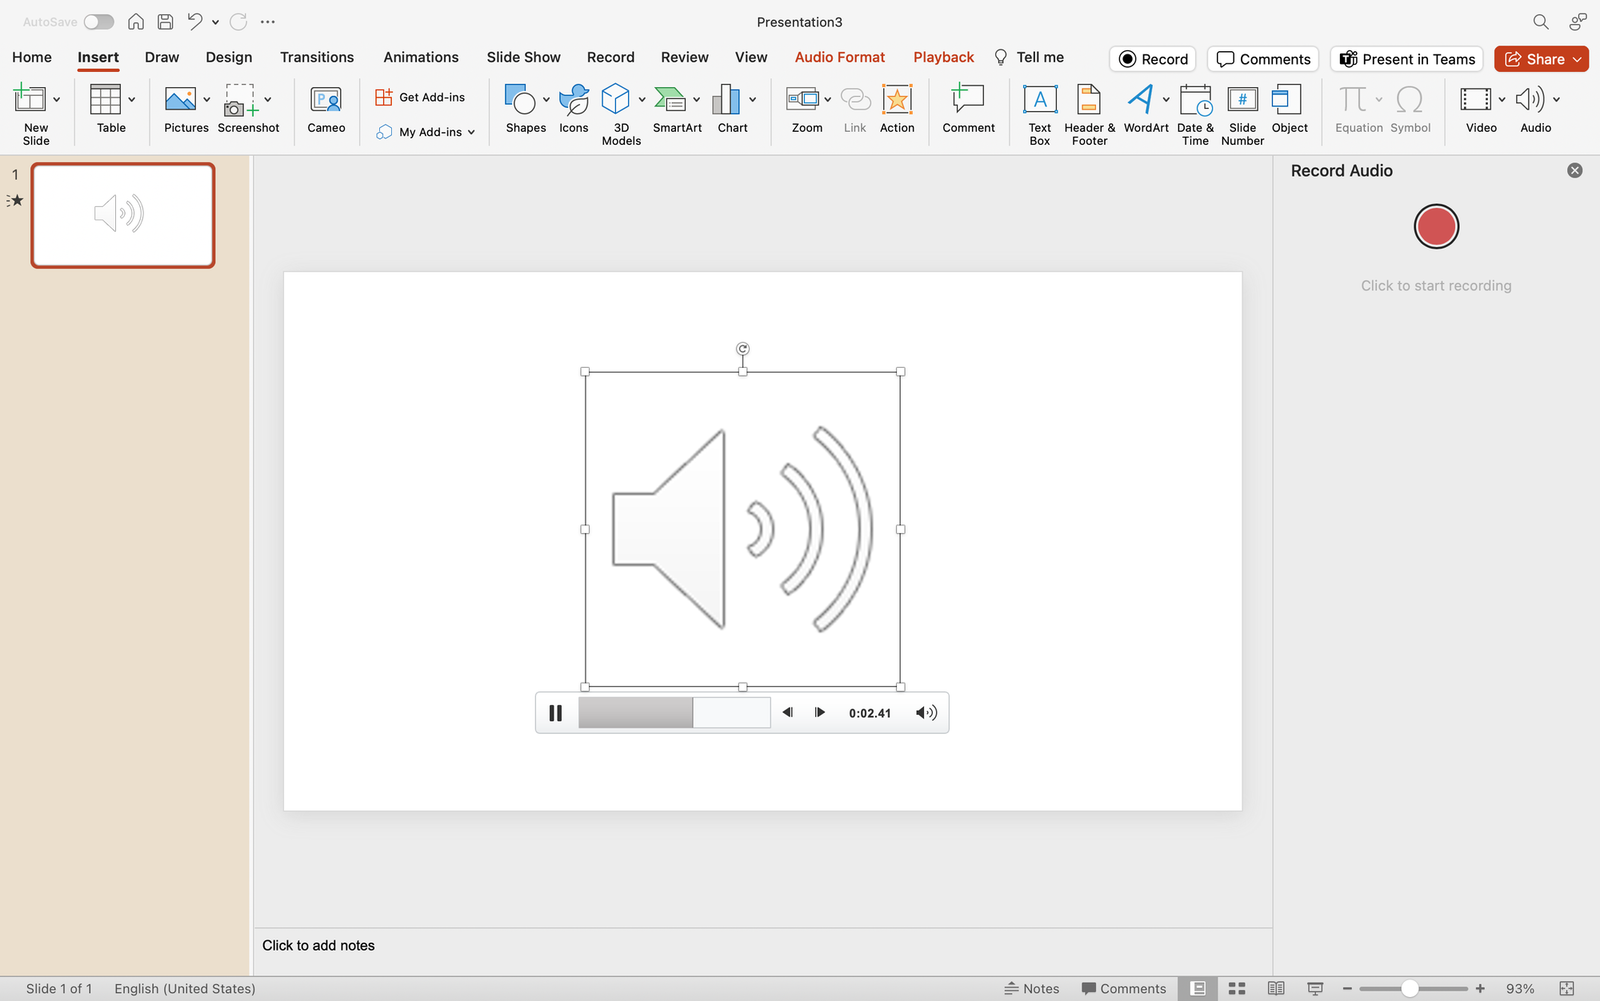
What’s it for: Infuse personality into your presentation by recording audio directly within PowerPoint. Ideal for adding voiceovers, explanations, or personal touches that enhance audience engagement.
How to do it:
- Go to the Insert tab.
- Click on “Audio” and choose “Record Audio.”
- Record your audio and insert it into the slide.
There's more to just recording audio in PowerPoint! Here are other ways you can add music to your PowerPoint slides.
8. Presenter Coach for Rehearsing
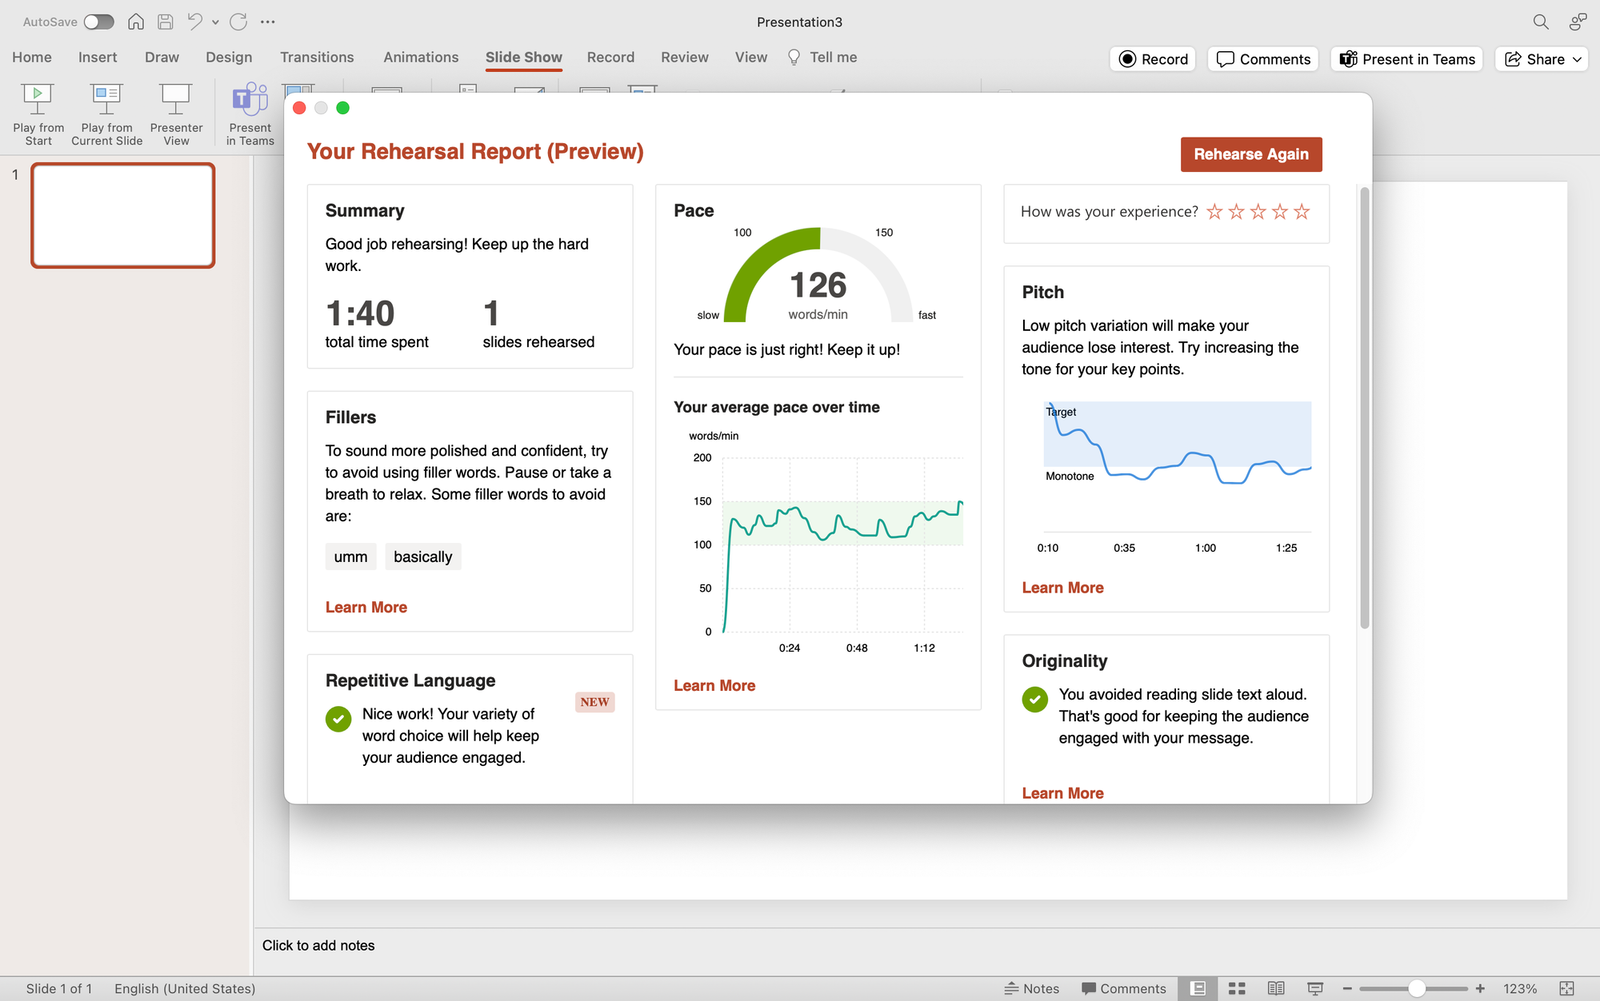
What’s it for: Elevate your presentation skills with Presenter Coach. Receive valuable feedback on pacing, filler words, and more, refining your delivery for a confident and impactful performance.
How to do it:
- Click on the Slide Show tab.
- Choose “Rehearse with Coach” to start practicing.
9. Hyperlink Navigation for Seamless Transitions
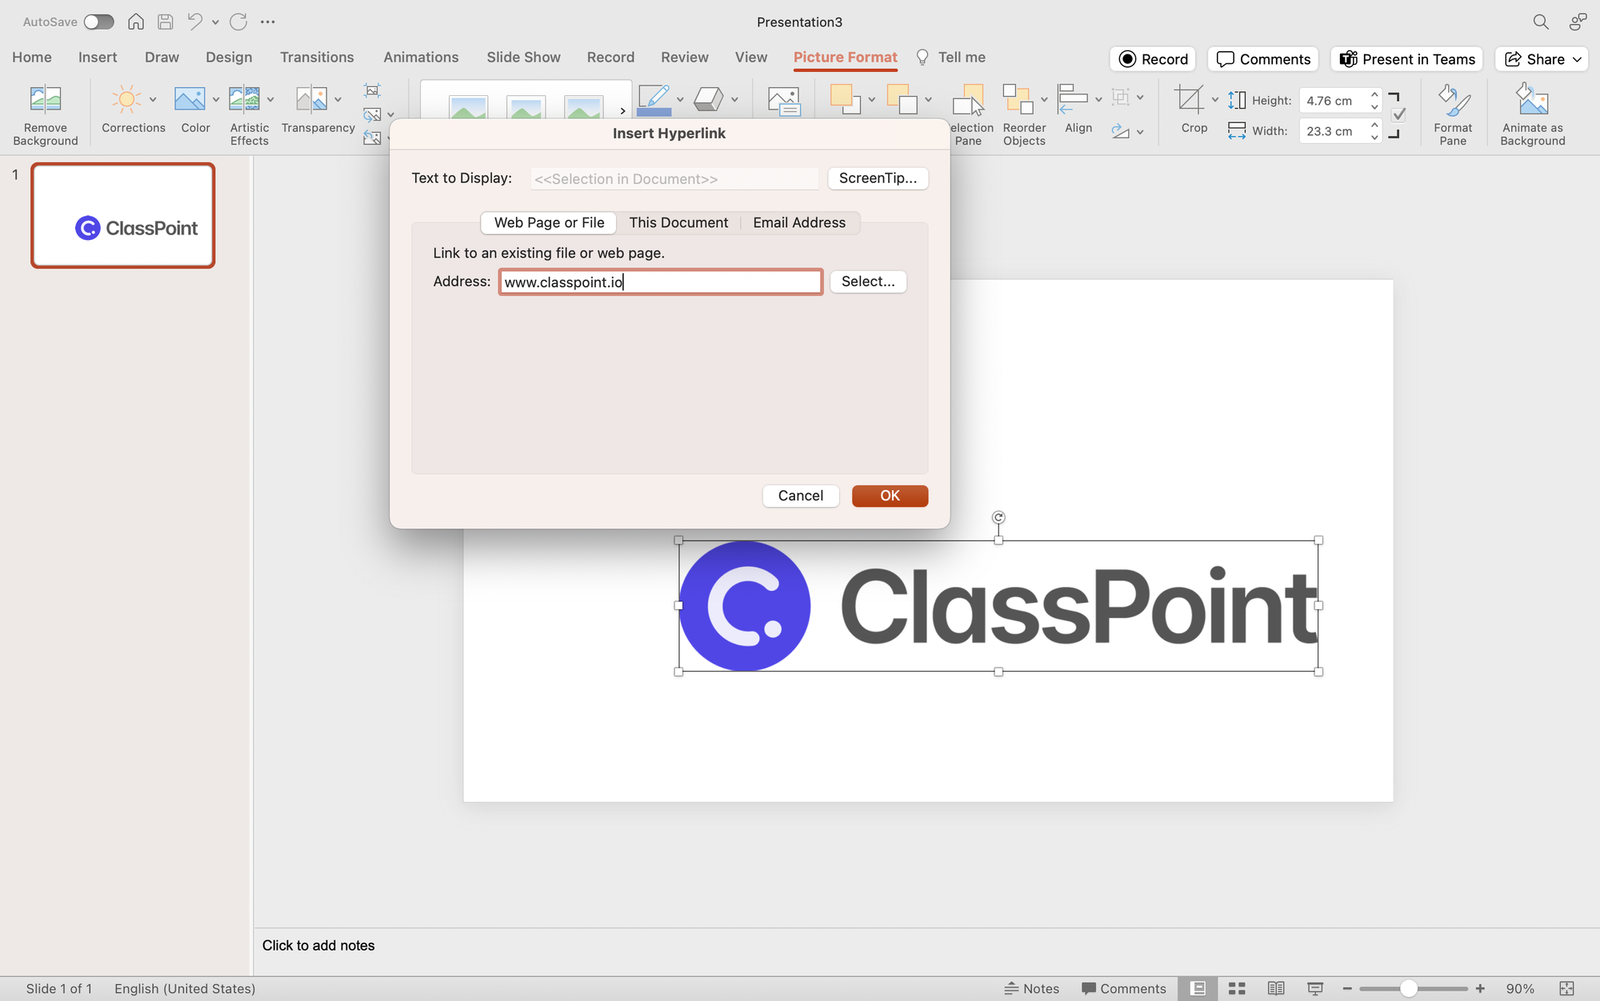
What’s it for: Streamline your presentation flow by implementing Hyperlink Navigation. This trick allows you to create clickable links within your slides, enabling effortless transitions between related content or external resources, enhancing the overall navigational experience.
How to do it:
- Select the text or object you want to hyperlink.
- Right-click and choose “Hyperlink” or use the Ctrl+K shortcut.
- Specify the destination, whether it’s another slide, a website, or a file, to create a seamless navigational experience.
10. Alt Text for Accessibility

What’s it for: Improve accessibility by adding descriptive alternative text to images and objects. Ensure inclusivity for visually impaired individuals, making your presentation accessible to a wider audience.
How to do it:
- Right-click on the image or object.
- Choose “Edit Alt Text” and enter a descriptive text.
11. Slide Zoom for Dynamic Navigation
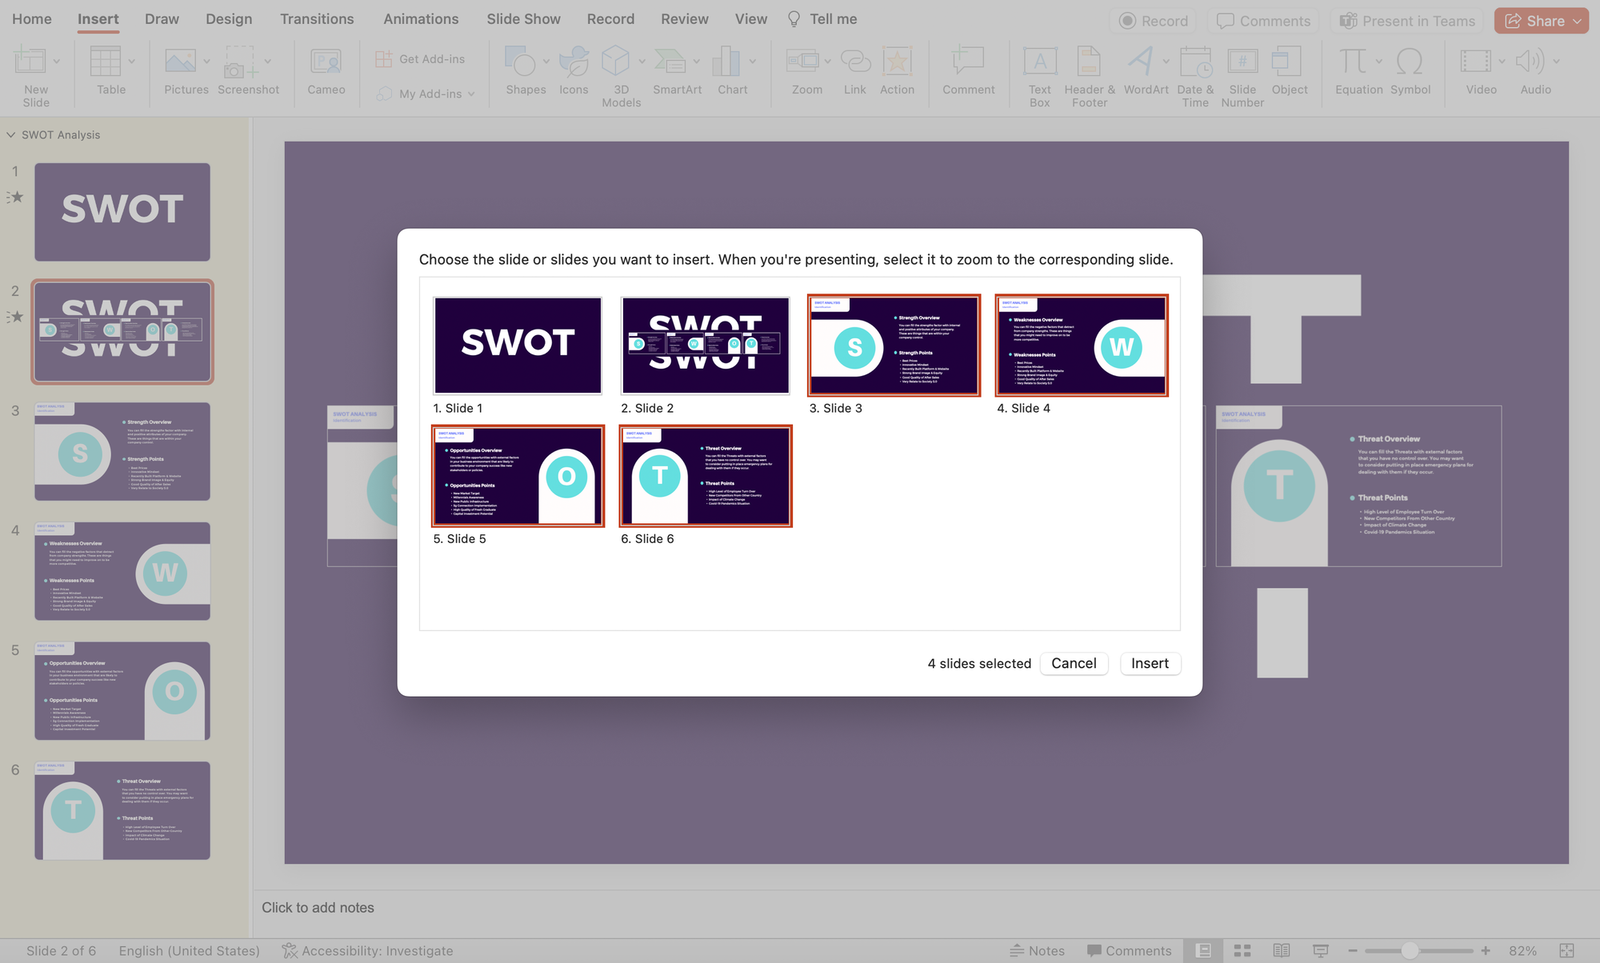
What’s it for: Elevate your presentation’s navigation with Slide Zoom, offering the flexibility to jump to specific slides during a presentation without adhering to a linear sequence. This dynamic feature ensures a more engaging and tailored audience experience.
How to do it:
- Set a master slide where you’d like to put your “mini slides” altogether.
- Navigate to the Insert tab > Zoom dropdown > Slide Zoom.
- Select the slides you want to link onto your master slide and insert.
Who would say no to free templates right? Check out our tutorial on how to use Slide Zoom with free downloadable templates.
12. Live Captions and Subtitles

What’s it for: Foster inclusivity by enabling live captions and subtitles in multiple languages. This feature enhances accessibility, making your presentation more engaging and comprehensible for a diverse global audience.
How to do it:
- Go to the Slide Show tab.
- Select “Always Use Subtitles” and choose your language.
13. Password Protection for Security
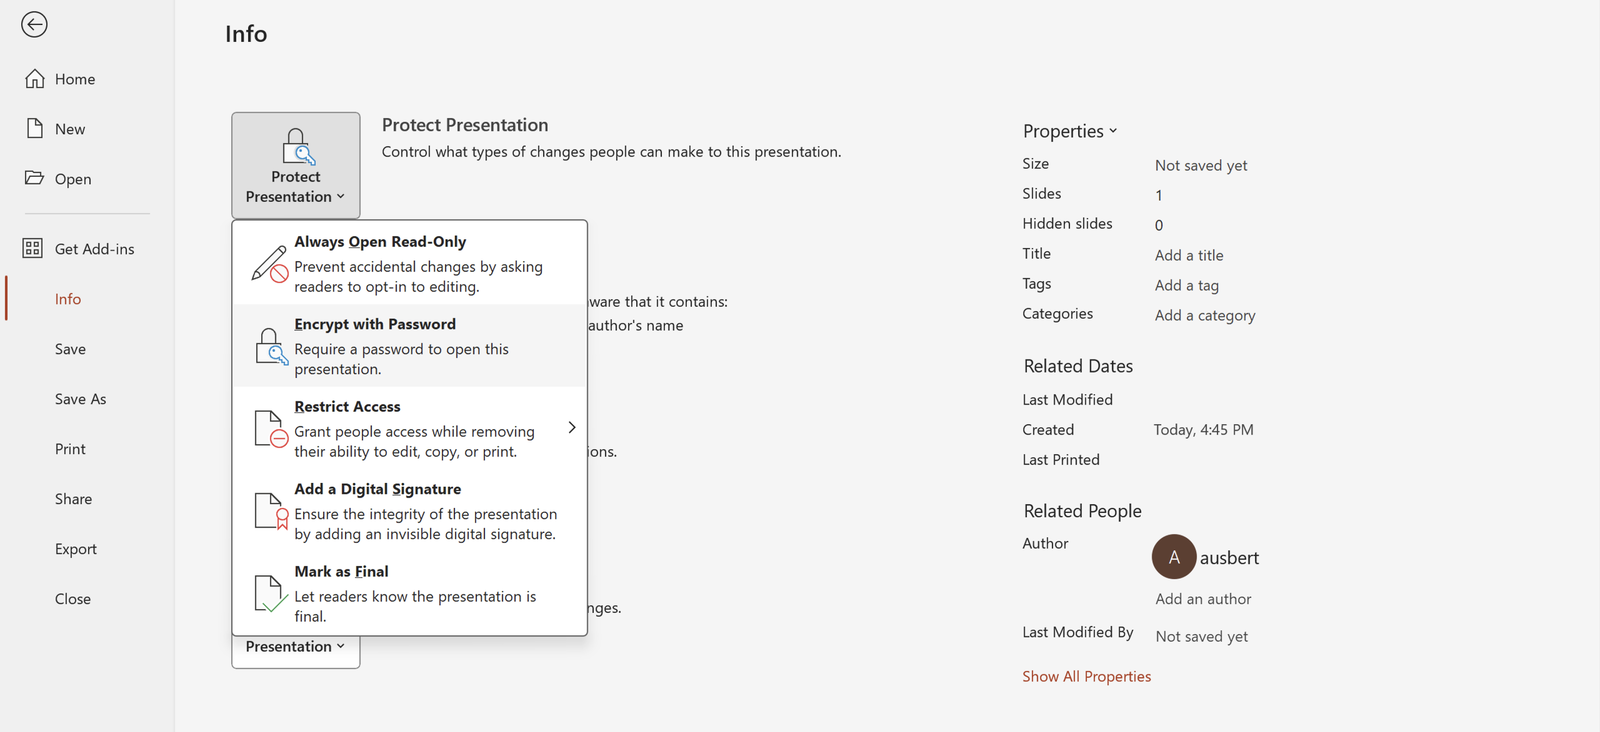
What’s it for: Safeguard your presentation’s sensitive content by adding a password. This security measure ensures that only authorized individuals can access and view the information, adding an extra layer of protection.
How to do it:
- Navigate to the File tab.
- Select “Info” and click on “Protect Presentation.”
- Choose “Encrypt with Password” and set your password.
14. Animation Painter for Consistent Animations

What’s it for: Maintain a polished and consistent look throughout your presentation by using the Animation Painter. Copy and apply animations across different objects with ease, ensuring a cohesive visual experience.
How to do it:
- Select the object with the same, desired animation as the others.
- Go to the Animation tab.
- Click on “Animation Painter” and apply to other objects.
15. Linked Excel Charts for Real-Time Updates
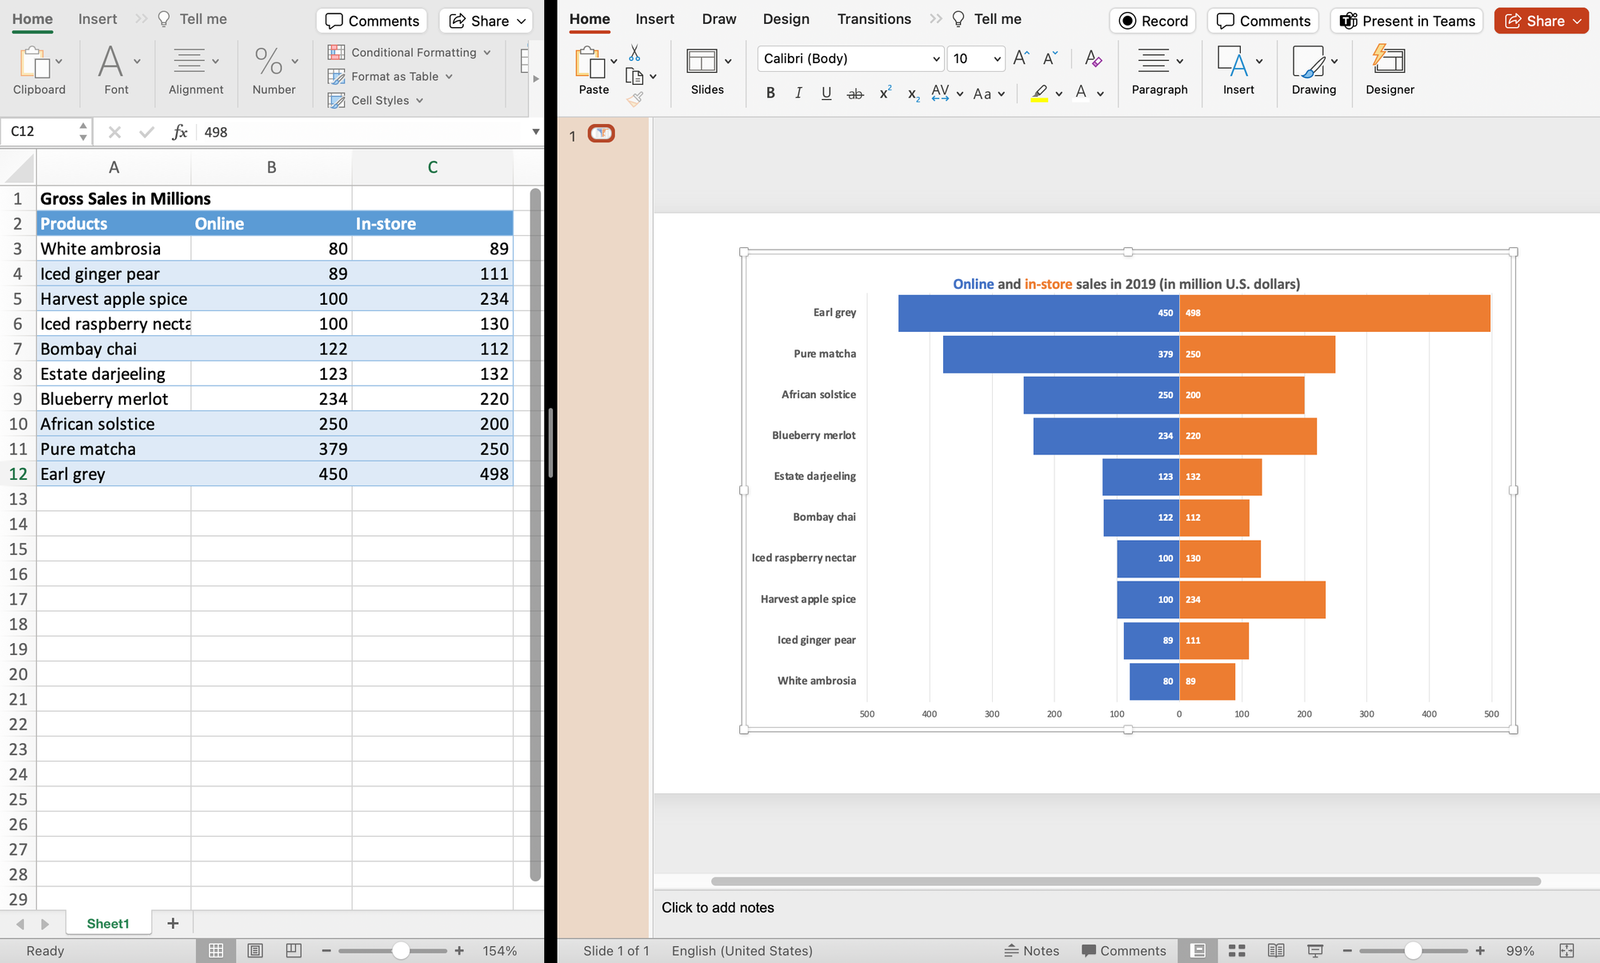
What’s it for: Integrate linked Excel charts for real-time updates in your PowerPoint presentation. Any modifications made to the linked Excel file automatically reflect in your slides, ensuring data accuracy.
How to do it:
- Copy your Excel chart.
- In PowerPoint, use “Paste Special” and choose “Microsoft Excel Worksheet Object.”
16. Custom Slide Sizes
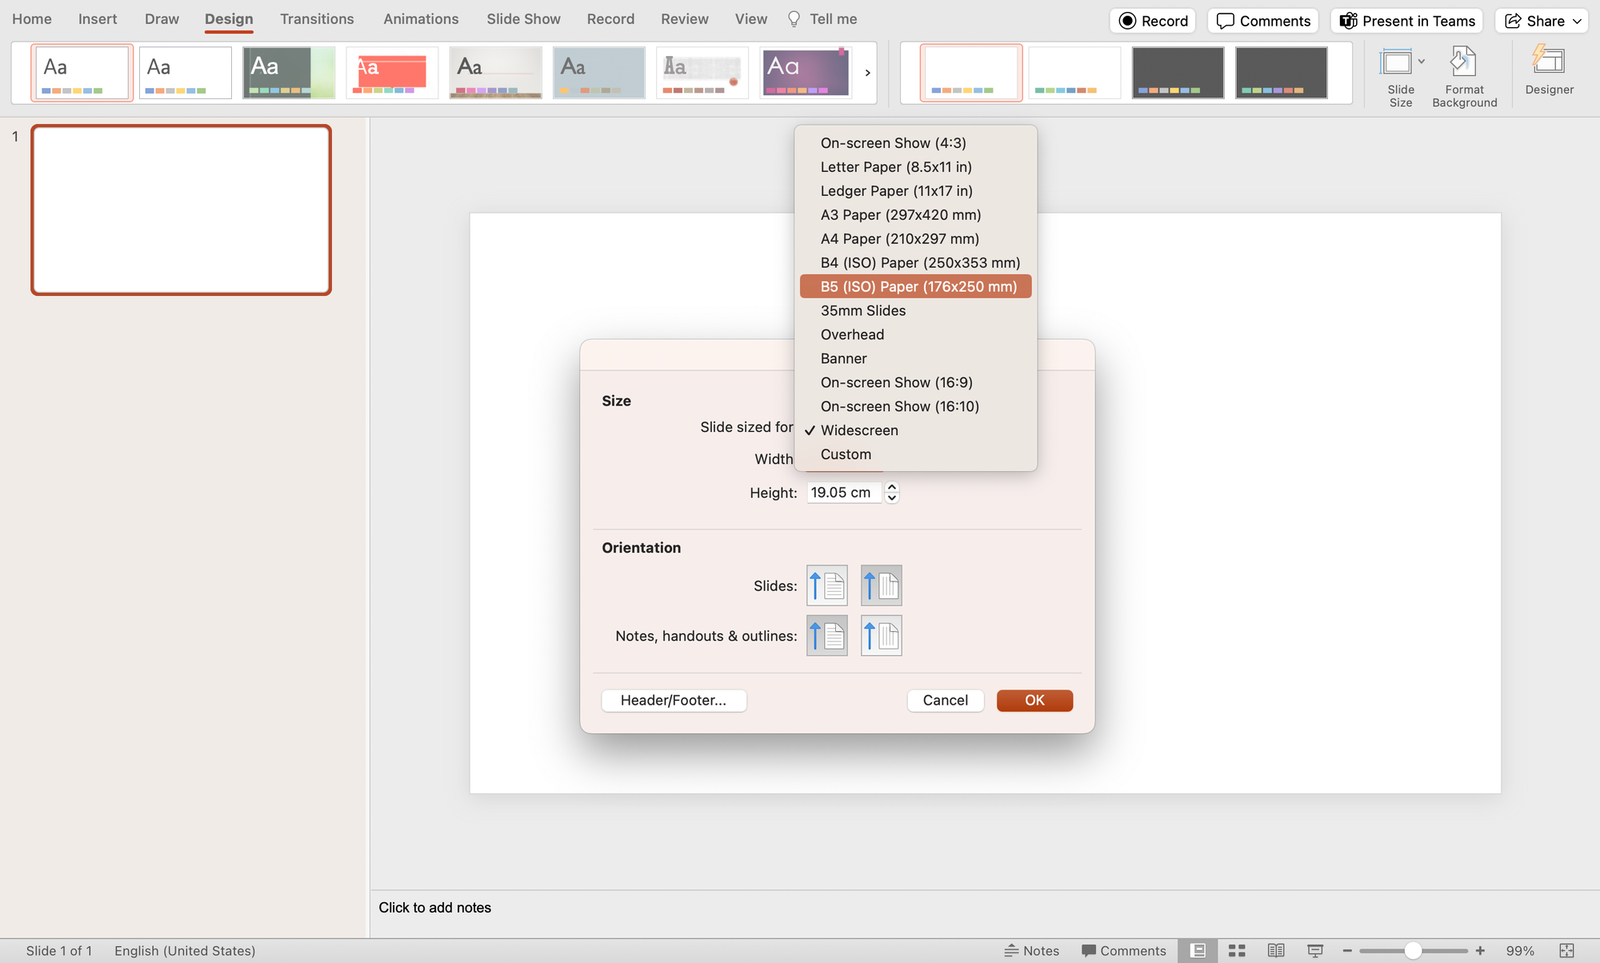
What’s it for: Tailor your presentation to various screen dimensions by customizing slide sizes. This feature, accessible through the Design tab, ensures your content fits seamlessly across different display settings.
How to do it:
- Navigate to the Design tab.
- Click on the “Slide Size” dropdown and choose “Page Setup”.
- Change “Slide sized for” to Custom.
17. Grid and Guidelines for Precision
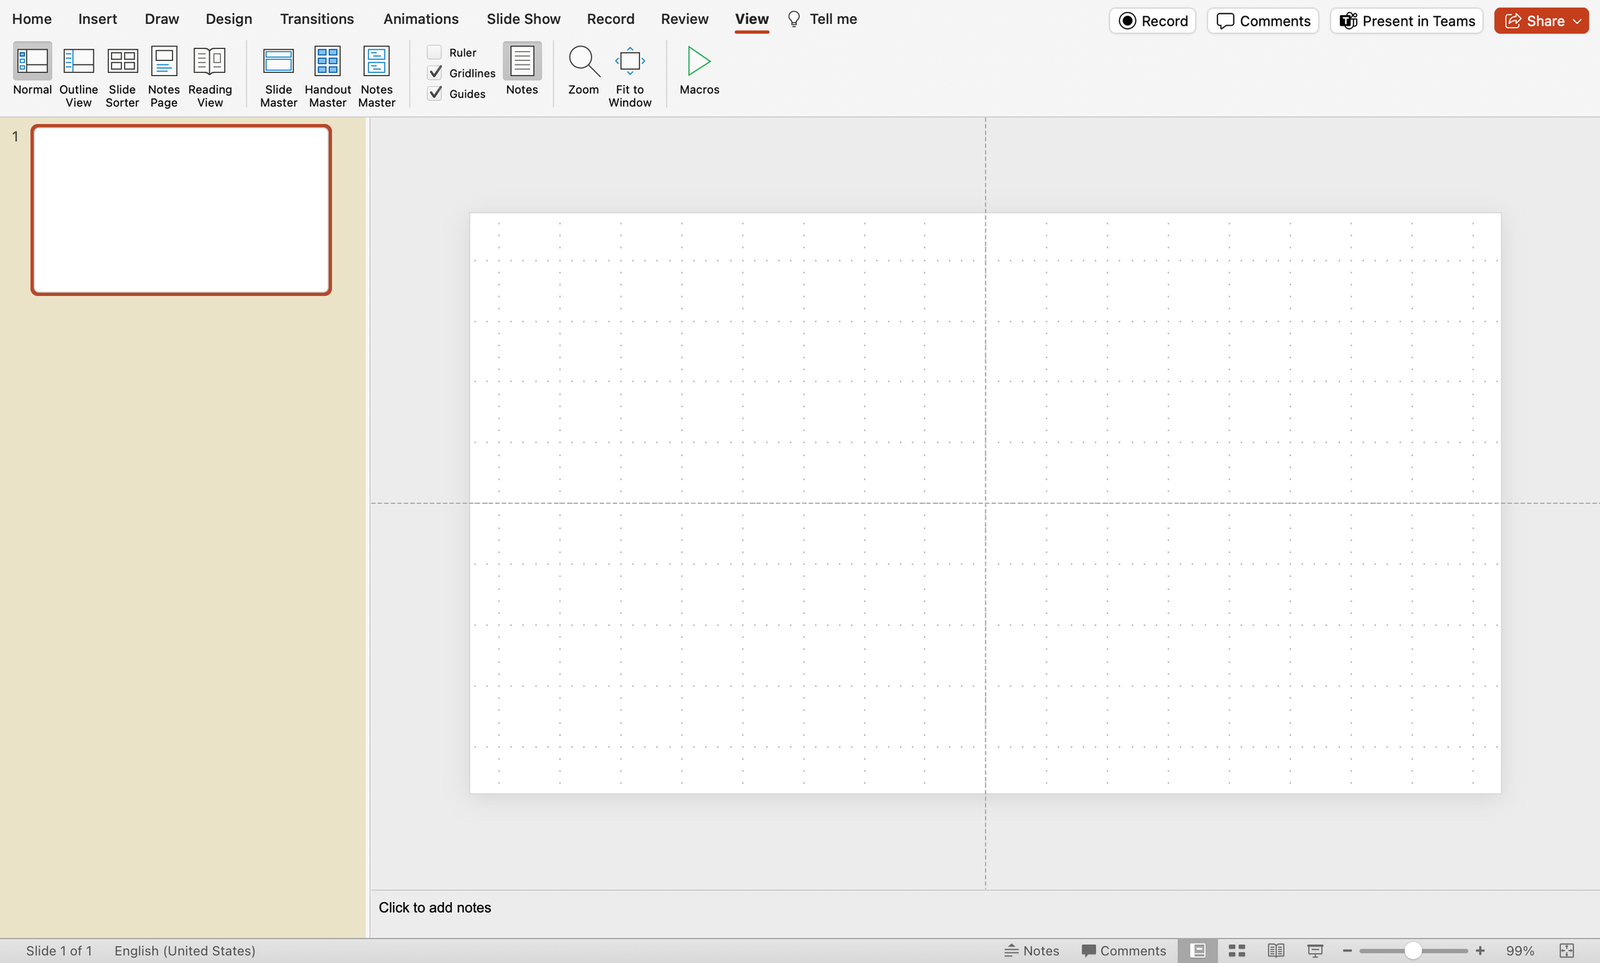
What’s it for: Achieve precise object alignment with gridlines and guides. This feature, essential for creating visually polished and organized presentations, ensures your content is visually appealing and professionally structured.
How to do it:
- Go to the View tab.
- Check the “Grids” and “Guidelines” toggles for display options and customization.
18. Slide Master for Consistent Design
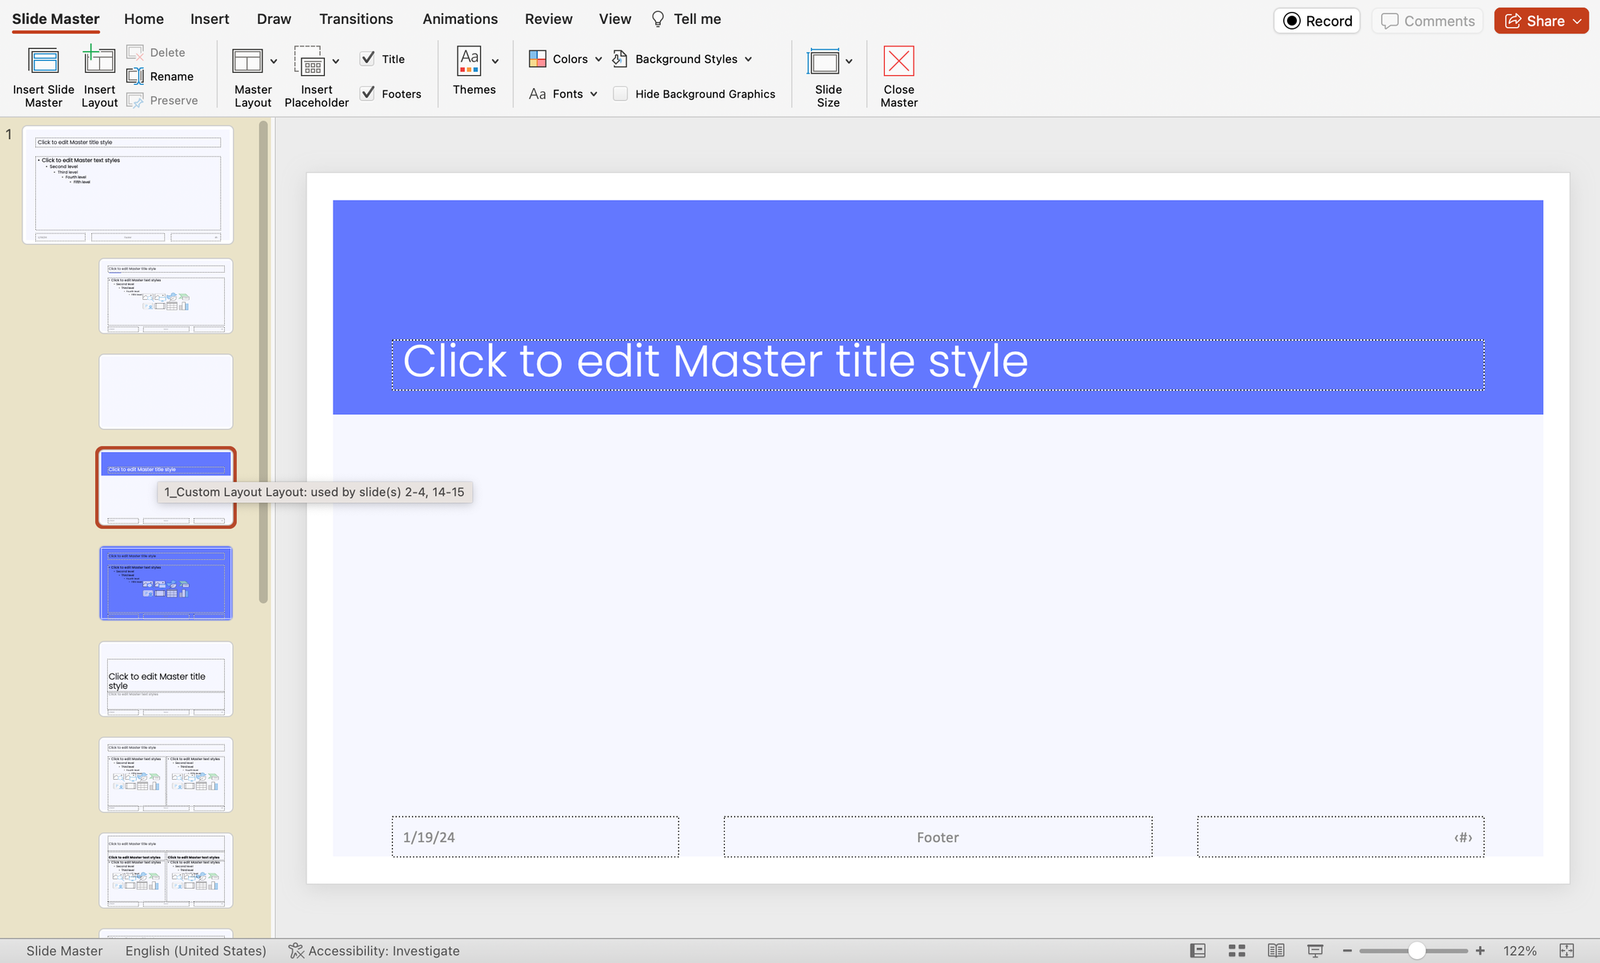
What’s it for: Establish a cohesive presentation design by utilizing the Slide Master. This time-saving feature enables you to set consistent layouts, fonts, and colors throughout your presentation.
How to do it:
- Go to the View tab.
- Click on “Slide Master” to access and customize master slides.
19. Quick Access Toolbar Customization
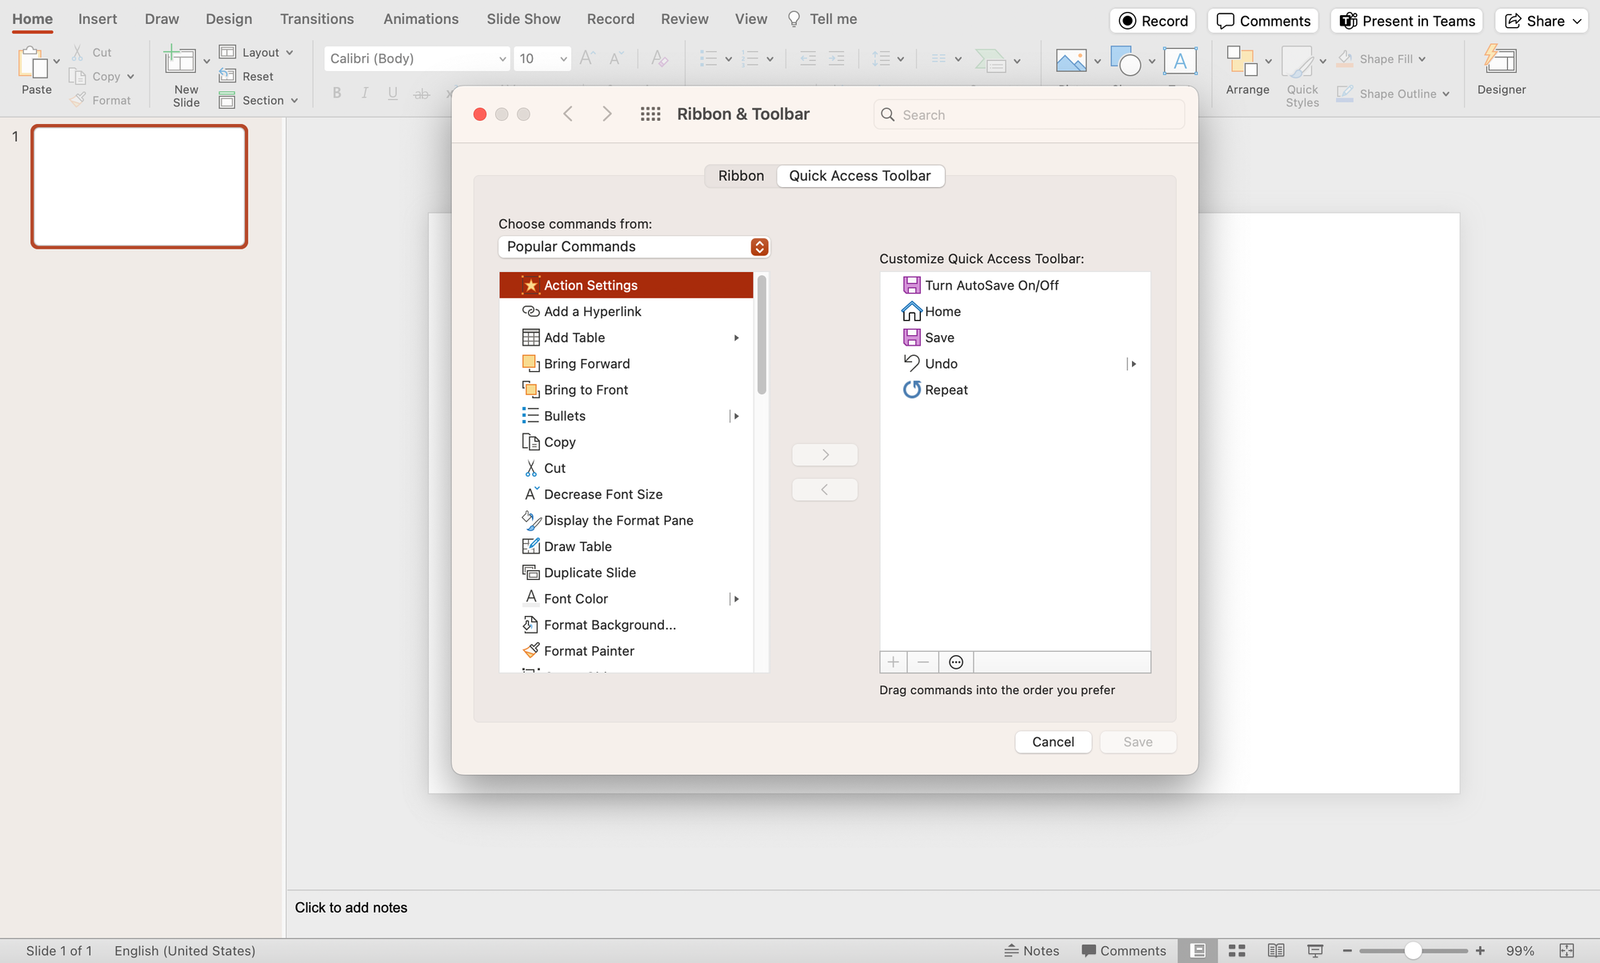
What’s it for: Streamline your workflow by personalizing the Quick Access Toolbar with your most-used commands. This customization ensures quick access to essential tools, enhancing efficiency during presentation creation.
How to do it:
- Click on the dropdown arrow on the Quick Access Toolbar.
- Select “More Commands” to customize your toolbar.
20. Ink Annotations for Handwriting
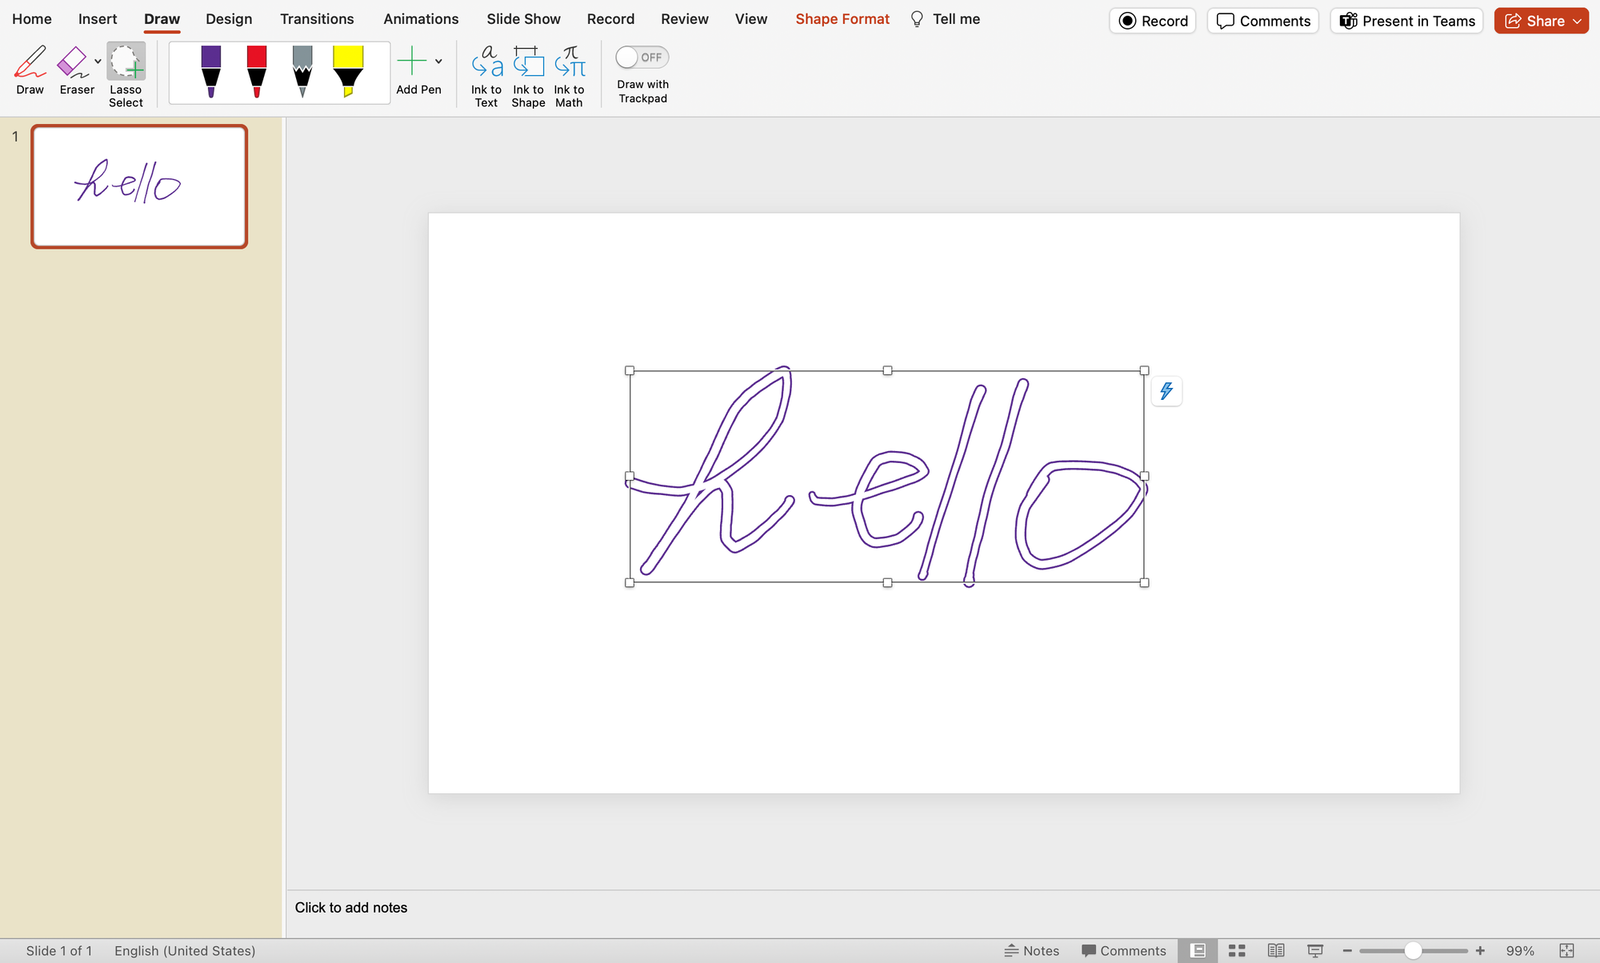
What’s it for: Personalize your presentations with a touch-enabled device using ink annotations. This feature allows you to draw or write directly on slides, adding a unique and handwritten touch to your content.
How to do it:
- Go to the Draw tab and click on Draw to begin drawing.
- Choose “Ink to Text” or “Ink to Shape” for handwriting annotations.
Drawing in PowerPoint Edit mode is old news. But, did you know you can do live annotations while in Slide Show? Thanks to ClassPoint's live annotation toolkit!
21. Crop to Shape for Image Customization
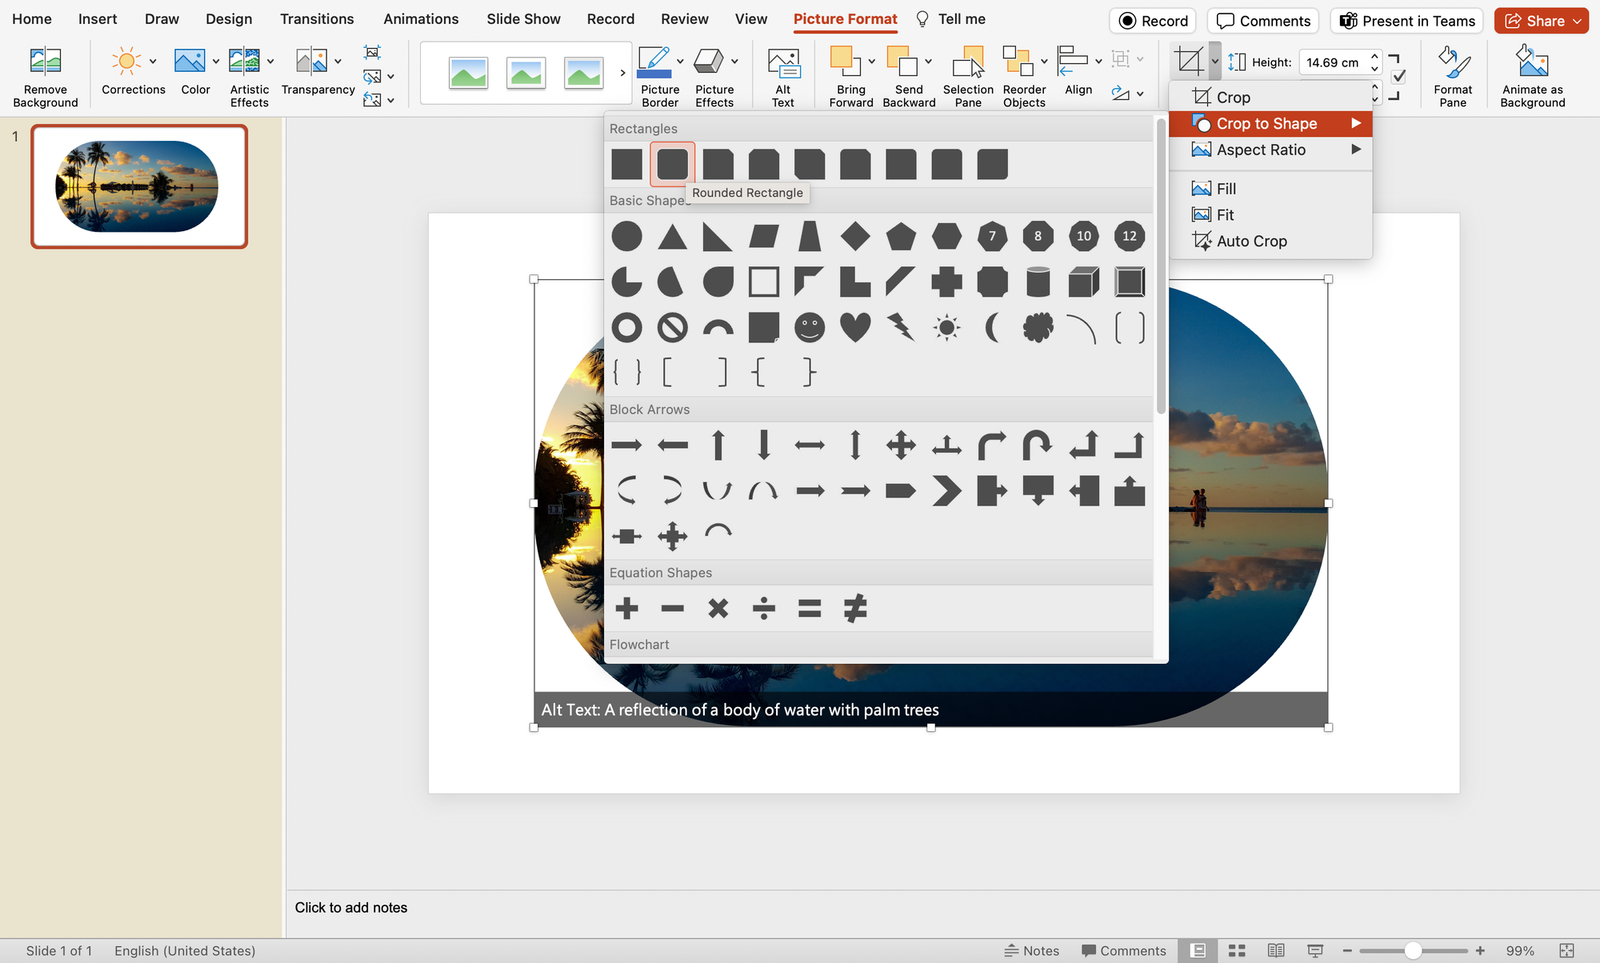
What’s it for: Unleash your creativity by utilizing the Crop to Shape feature, allowing you to create custom image shapes. This adds a distinctive flair to your presentation, providing a visually dynamic and engaging experience.
How to do it:
- Select the image.
- Navigate to the Picture Format tab.
- Click on “Crop” and choose “Crop to Shape.”
- Select the shape you want your image to have as frame.
22. Slide Show Recording with Narration
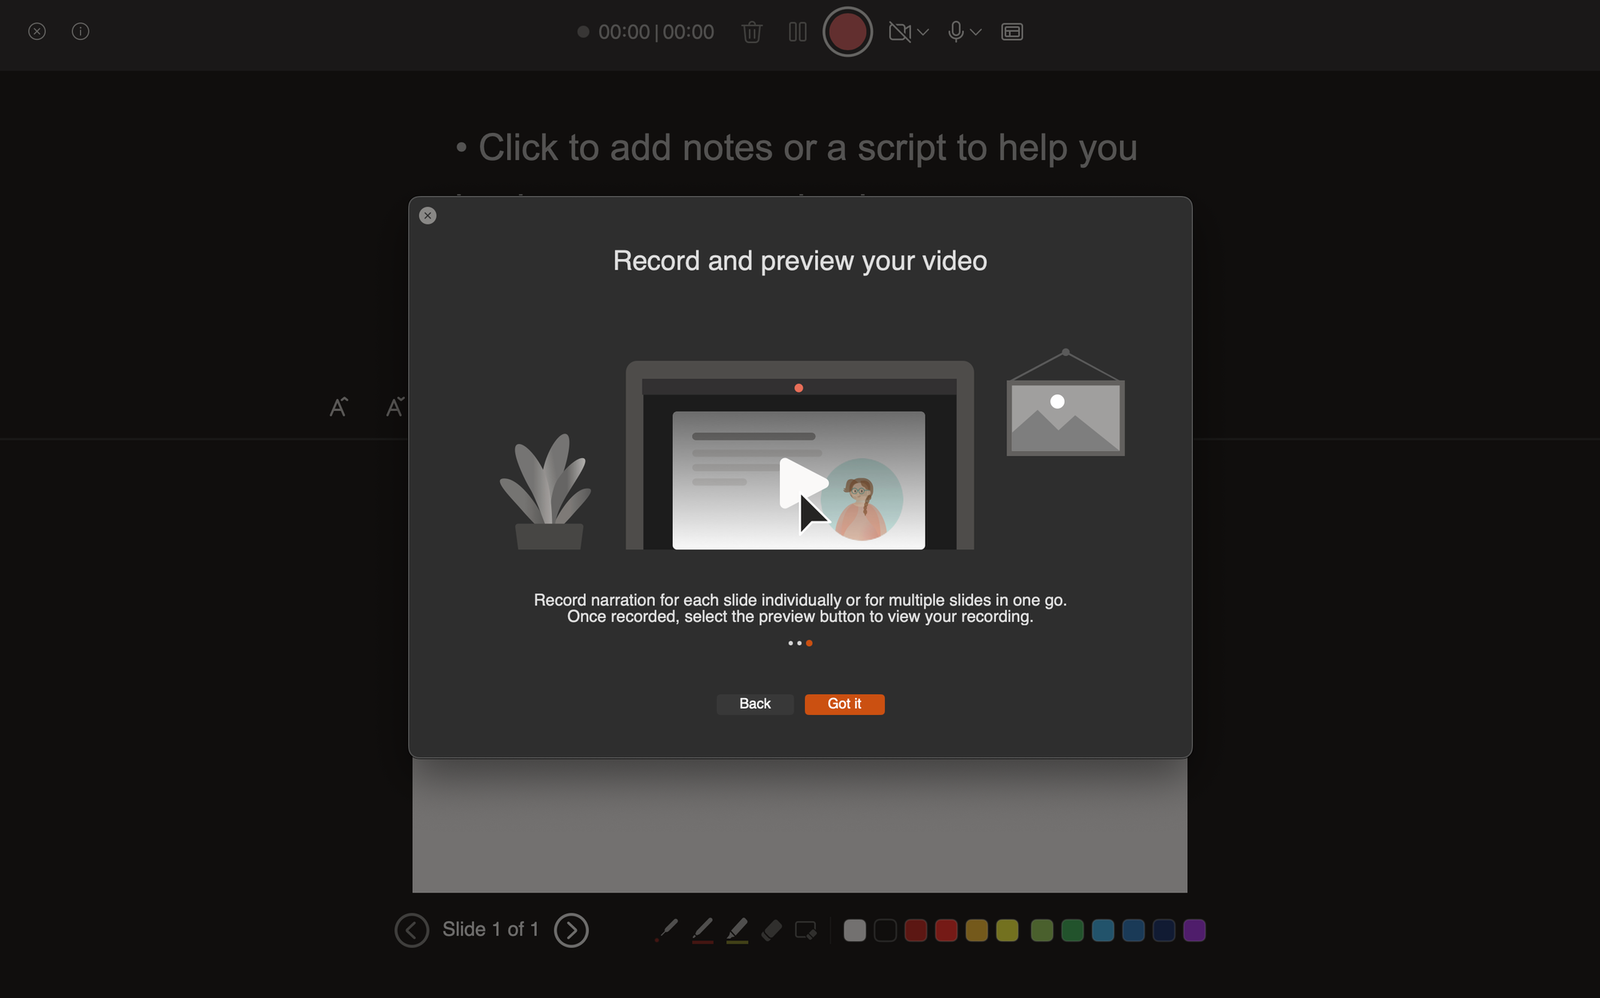
What’s it for: Capture your entire presentation, including narration and animations, by recording a self-running slideshow. This feature is invaluable for sharing presentations with a wider audience, ensuring a consistent and engaging delivery.
How to do it:
- Go to the Slide Show tab.
- Click on “Record Slide Show” and choose recording options.
23. Dynamic Color Scheme Switch for Vibrant Slides
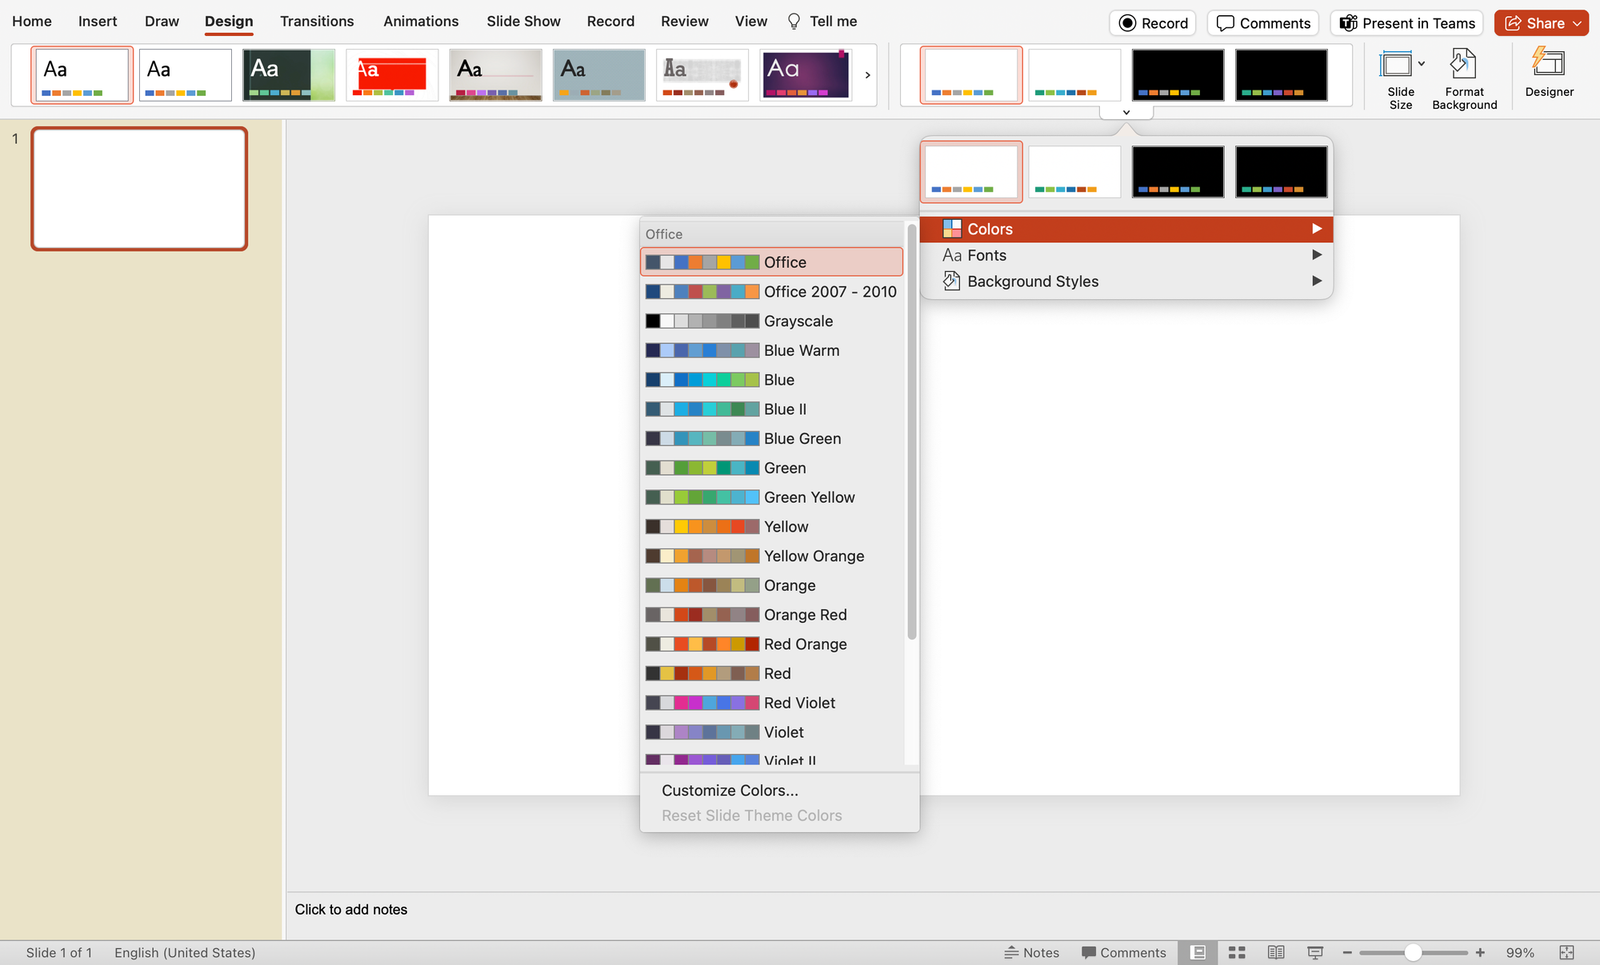
What’s it for: Infuse energy into your presentation by dynamically switching color schemes. This handy trick allows you to quickly experiment with various color palettes, giving your slides a vibrant and fresh appearance in just a few clicks.
How to do it:
- Navigate to the Design tab.
- Explore different color options by selecting “Colors” and experimenting with the available palettes. Instantly transform the look of your presentation to match your desired mood and style.
24. Smart Alignment and Distribution for Pixel-Perfect Precision
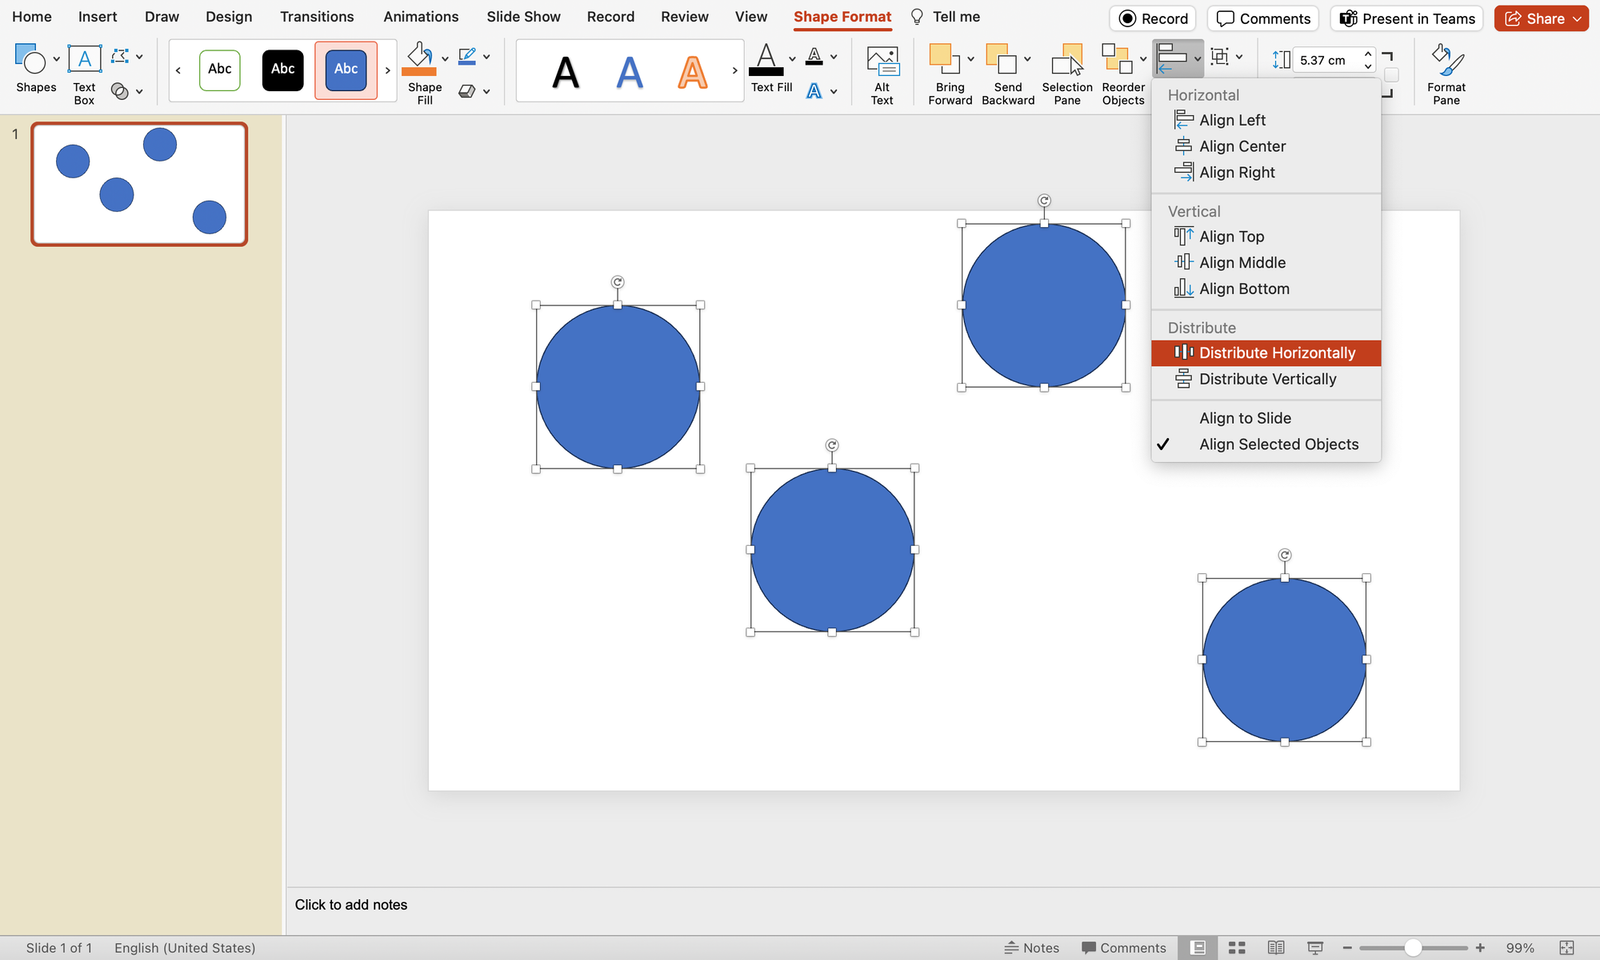
What’s it for: Attain pixel-perfect precision in your presentation design with the Smart Alignment and Distribution trick. This technique allows you to not only align objects with accuracy but also evenly distribute them horizontally, ensuring a polished and visually appealing layout.
How to do it:
- Select the objects you want to align.
- Navigate to the Format tab.
- Click on “Align” to access options like Align Left, Center, or Right for precise alignment.
- Further refine your layout by choosing “Distribute Horizontally,” ensuring equal spacing between objects and achieving a professional design.
25. Insert Online Videos
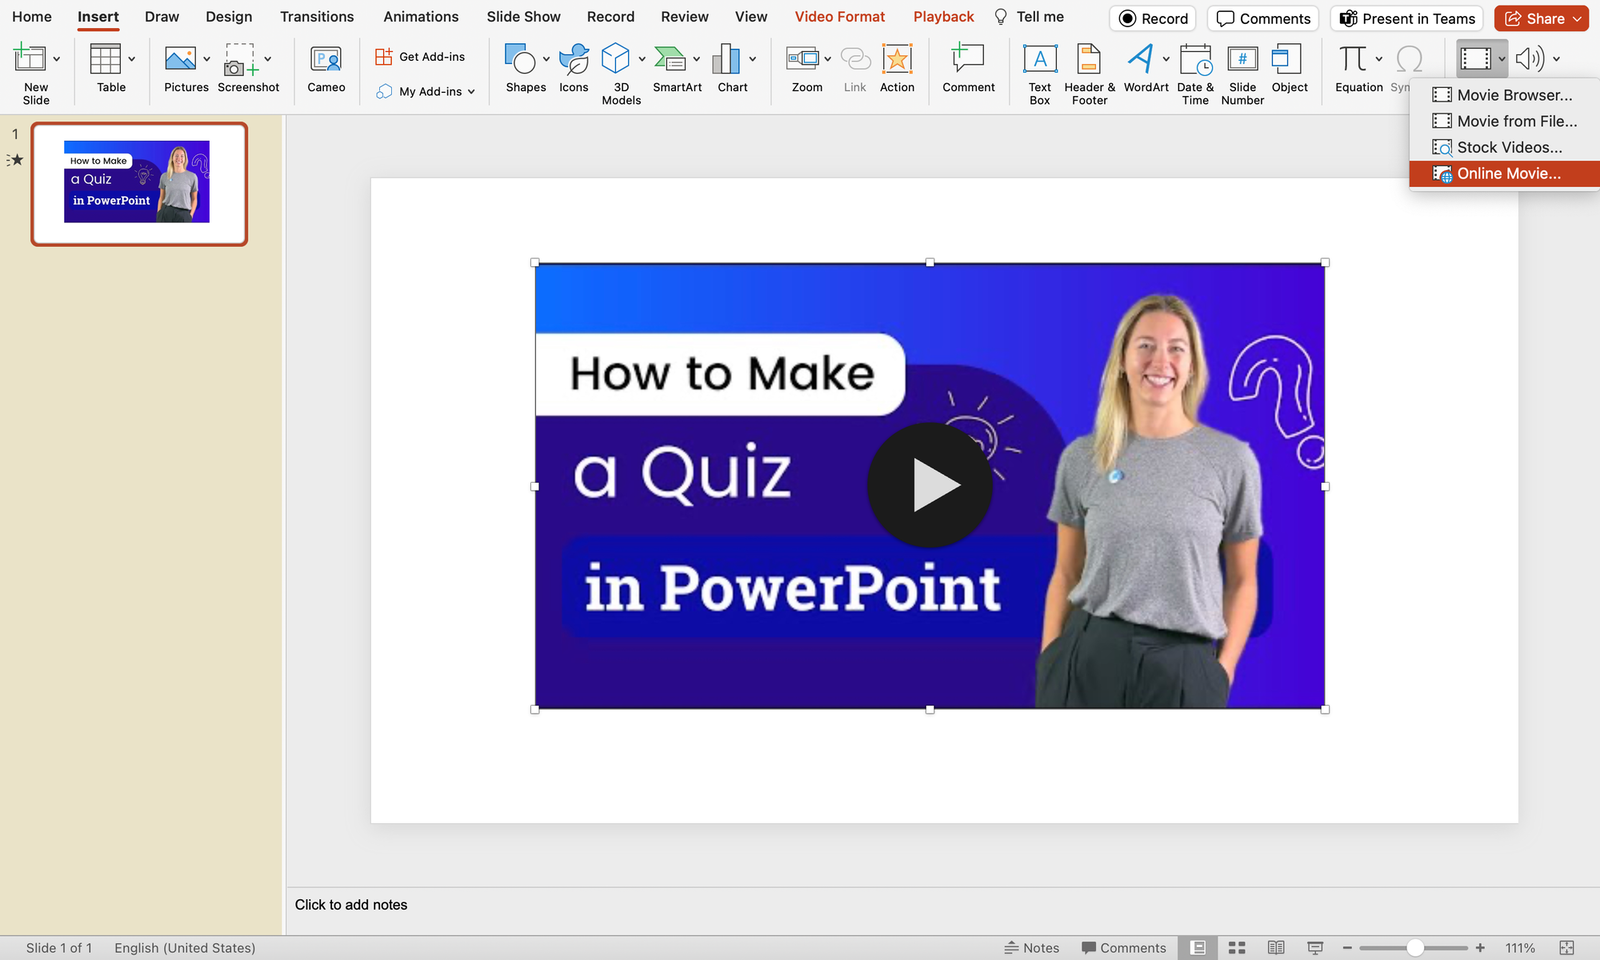
What’s it for: Seamlessly integrate online videos directly into your presentation. This feature eliminates the need for external players, offering a smooth and immersive viewing experience for your audience.
How to do it:
- Go to the Insert tab.
- Click on the “Video” dropdown and select Online Movie.
- Paste the video link and your video should be embedded onto your PowerPoint slide.
Read here for 3 ways to watch and insert videos in PowerPoint.
26. Embed Fonts for Portability

What’s it for: Ensure consistent visual appeal on any device by embedding fonts in your presentation. This is particularly useful when sharing your work with others who may not have the same fonts installed, enhancing portability.
How to do it:
- Go to the File tab.
- Select “Options” and go to the Save tab from the window popup.
- Check “Embed fonts in the file” as well as “Embed all characters”.
27. Text Transformation
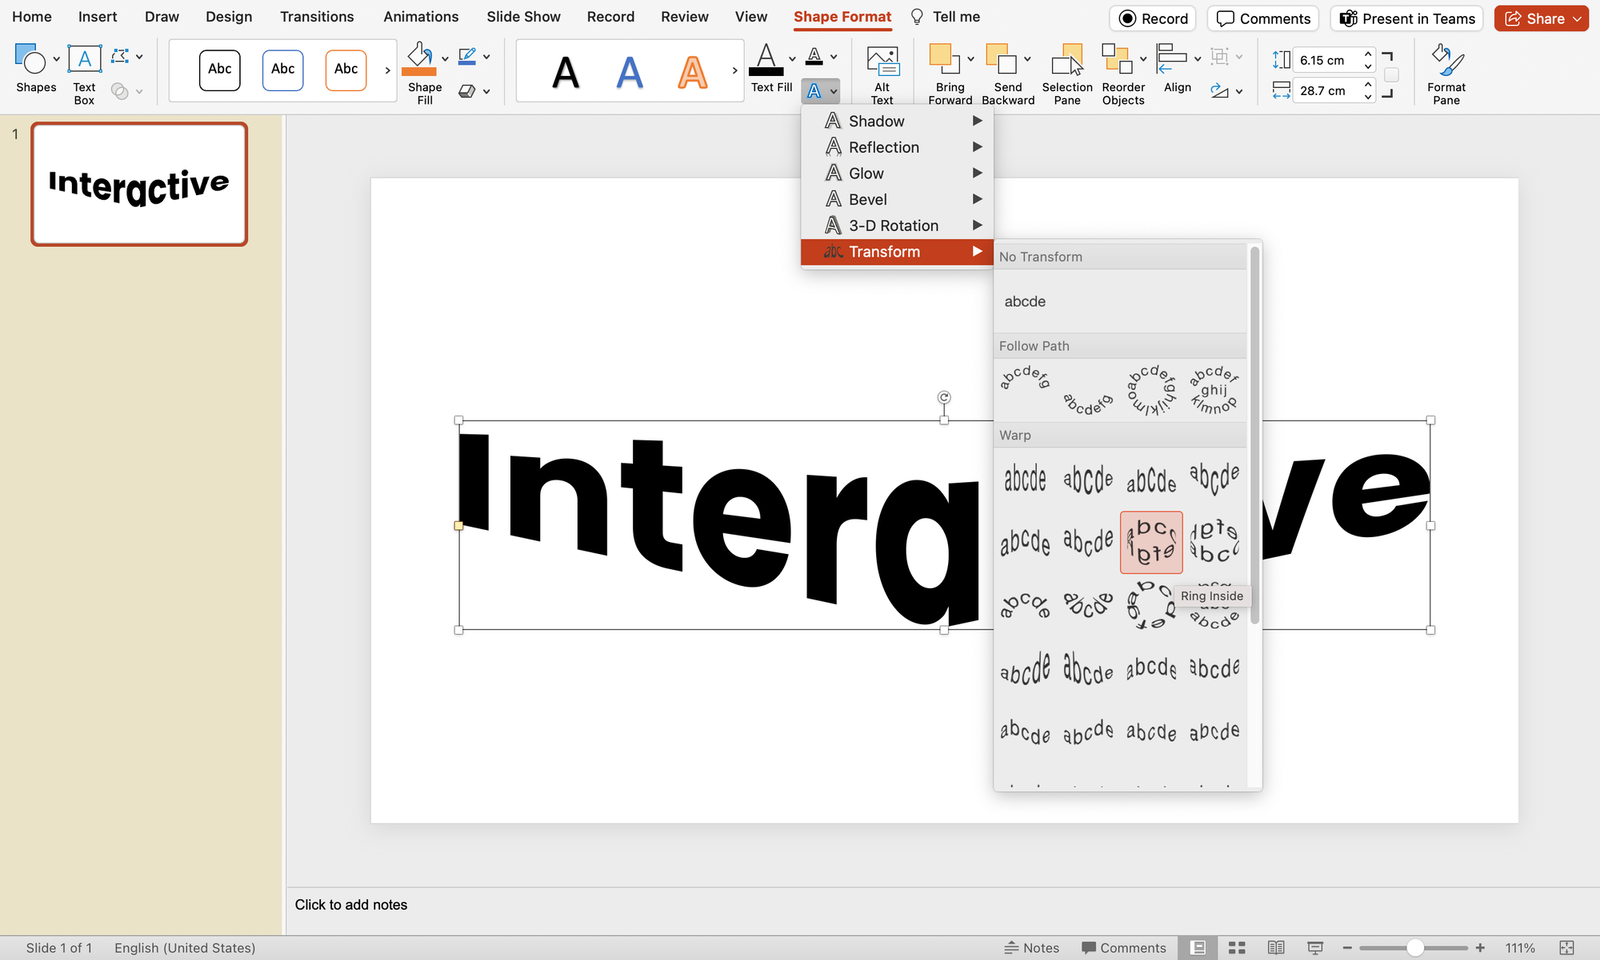
What’s it for: Uncover the elegance of text transformation with the Shape Format trick. This hack allows you to access a myriad of text transformation designs, offering a swift and sophisticated way to elevate the visual appeal of your presentation.
How to do it:
- Select the text you want to transform.
- Navigate to the Shape Format tab.
- Click on “Text Effects” and explore the “Transform” options for a variety of stylish text designs. Instantly apply a transformation that suits the tone and style of your presentation.
Download this free Interactive PowerPoint Playbook for more cool PowerPoint tips and tricks for effortless engaging presentation.
5 Critical Best Practices to Implement These Pro PowerPoint Tips and Tricks for a Technically Proficient Presentation
Enhance the technical brilliance of your presentation by focusing on these crucial best practices:
1. Streamlined Font Selection
- Practice: Limit your font styles to a maximum of three per slide.
- Why: Simplifying fonts enhances readability, maintains visual consistency, and prevents distraction, ensuring your message is clear and impactful.
2. High-Resolution Images
- Practice: Source HD images from reputable free resource websites like Freepik or Unsplash.
- Why: High-resolution images prevent pixelation, ensuring clarity and professionalism. Crisp visuals contribute to a visually appealing presentation.
3. Cohesive Color Palette
- Practice: Stick to a consistent color palette throughout your slides; use the eyedropper tool for precise color matching.
- Why: A unified color scheme enhances visual harmony, reinforces brand identity, and elevates the overall aesthetics of your presentation.
4. Efficient Data Visualization
- Practice: Use charts and graphs for data-driven slides, choosing appropriate chart types for different data sets.
- Why: Visualizing data through charts improves comprehension, making complex information more accessible and engaging for your audience.
5. Transitions with Purpose
- Practice: Apply slide transitions judiciously. Choose transitions that complement the content and avoid excessive animations.
- Why: Subtle transitions maintain audience focus, while excessive animations may distract from the core message.
Want more features for your PowerPoint? Consider these best 20 PowerPoint add-ins. If you're looking for an all-in-one intuitive presentation add-on for PowerPoint, try ClassPoint.
Final Thoughts
In presentation-making, technical practices harmonized with thoughtful design is the key to delivering an impactful message. Whether it may be as simple as considering font choices, to incorporating high-resolution visuals, you do not only get to enhance the aesthetics but also ensure your audience’s undivided attention.
Remember, a technically proficient presentation is not just a showcase of information, but also one that leaves a rather immersive experience for those who will see. But at the end of the day, it comes down to your delivery. So, no sweat! You’re doing amazing, rockstar!
Find them useful? Save them, or share these PowerPoint tips and tricks with others to make their day!
