
What if going backwards could actually be the smarter way to move forward? That’s the guiding ethos behind backward design. It’s an innovative approach to lesson planning that goes beyond covering a checklist of topics. The agenda? It’s to make learning purposeful, focused, and meaningful for your students.
Instead of starting with what to teach, you begin by identifying the learning outcomes you want your students to achieve. From there, you select the topics, lessons, and activities that will help them get there. I know: it’s a 180 degree shift!
But don’t get overwhelmed. In just 3 easy-to-follow steps, you get started with backward design by:
- Identifying desired results
- Determining acceptable evidence
- Planning learning activities
If this sounds a little unconventional, stick around! It might just be the new perspective you need to rethink and improve your lesson planning. Let’s delve deeper into that in the next section.
Why Use Backwards Design in Your Lesson Planning
This is a mistake often overlooked: when we plan lessons by focusing only on the content, we risk alienating our students. As a result, it begins to feel like the goal is confined to memorizing and repeating facts without knowing why it matters. After all, the last thing we want to happen is to treat learning as another chore to get through rather than something that builds toward understanding.
Enter backward design. It shifts the focus away from what we teach to what students should learn. In a nutshell, it begins with the end in mind. It asks us what do we want our students to truly understand and carry with them? From there, we build the lesson with intention. This line of thinking helps us reconnect teaching with purpose.
Looking for more compelling reaons to adopt this in your classroom? Here’s what backward design can do differently:
- It centers the students: You are no longer just delivering information. Rather, you are creating experiences that help your students think, apply, and reflect.
- It gives direction to your lessons: Each activity and assessment is clearly tied to the learning goals. Lo and behold, it now becomes something not just added for the sake of having something to do.
- It increases relevance: Students are more likely to engage when they see how each lesson connects to a bigger picture or a real-life situation.
- It helps you assess better: You are not just testing for recall. This time around, you are checking for your students’ overall understanding, application, and growth.
Now that we’ve covered how you and your students can benefit from this framework, let’s look at the specific strategies you can use to incorporate backward design in your lesson planning.
1. Begin Every Lesson with Clear Learning Objectives
First things first, you have to identify what your students should know, do, or understand by the end of the lesson. Learning objectives anchor your entire lesson plan and keep both teaching and assessment aligned.
Key characteristics of effective objectives are:
- Student-centered and measurable
- Aligned with curriculum standards or unit goals
- Written using action verbs such as explain, evaluate, identify, compare, or construct
Instead of: “Introduce persuasive writing,”
Use: “Students will write a paragraph using persuasive language and at least one supporting reason.”
Clear objectives ensure instructional time is purposeful and focused. They also provide a reference point for selecting assessments and learning activities.
Want better lesson objectives? Here are 5 Steps on How to Write an Objective for a Lesson Plan (AI-Assisted).
2. Plan the Assessment Before You Plan the Lesson
Once you have a clear objective, determine how students will demonstrate their learning. In backward design, the assessment comes first, guiding how the rest of the lesson unfolds.
Choose an assessment format that aligns with the level of thinking your objective requires. For deeper outcomes like analysis or application, your assessment should go beyond recall.
For teachers using PowerPoint, ClassPoint is an all-in-one teaching tool you can use to make classroom activities more interactive. It offers eight built-in question types, helping you assess understanding in real time including:
- Multiple Choice: Great for checking understanding quickly. You can offer up to eight choices with either a single correct answer or multiple correct answers, making it flexible for both recall and reasoning-based questions.
- Word Cloud: Encourages your students to contribute short responses as a group. This format is ideal for displaying collective ideas, identifying common misconceptions, or generating curiosity at the start or end of a lesson.
- Slide Drawing: Enables yout students to interact visually with a slide by drawing, labeling, or illustrating directly on it. Perfect for demonstrating understanding in science diagrams, math problem-solving, or brainstorming processes.
- Image Upload: Students can submit images from their devices to show physical work such as handwritten notes, models, real-world observations, or creative representations of a concept.
- Fill in the Blanks: Provides a structured way to check for specific knowledge such as definitions, formulas, or factual information. This is especially useful for language, science, and content-heavy subjects.
- Audio Record: Captures verbal responses from your students. It is a great fit for oral practice, language fluency, or when students may express themselves better by speaking rather than writing.

Each format offers flexibility and alignment across grade levels and subject areas. Planning assessments early ensures the rest of the lesson builds toward meaningful, measurable evidence of learning.
3. Sequence the Lesson Around the Assessment
With your assessment now set in place, it’s time to outline the path your students will follow to reach that goal. A well-sequenced lesson builds knowledge progressively, moving from initial understanding to independent application.
Consider the following pointers:
- What background knowledge students need before the lesson
- What scaffolds or models will support skill development
- What order of activities best supports the learning progression
Trying out scaffolding? Here are 8 Ideas To Master Scaffolding in Education And Boost Learning.
Example: If students will write an argumentative paragraph, the sequence might include analyzing a model text, identifying persuasive techniques, brainstorming arguments, and drafting with peer feedback.
A thoughtful sequence helps your students build confidence, stay engaged, and understand how each part of the lesson fits together.
4. Choose Learning Activities that Support the Goal
In backward design, there is no such thing as a filler. Each one should directly support the learning objective and prepare your students for the assessment.
When selecting activities, keep in mind to:
- Match the activity to the skill or thinking level required
- Provide a balance of modeling, guided practice, and independent work
- Use formats that are varied but aligned to the learning goal
Pro Tip: If students are comparing characters in a novel, the lesson might start with a discussion, move into a comparison chart, and conclude with a short written analysis.
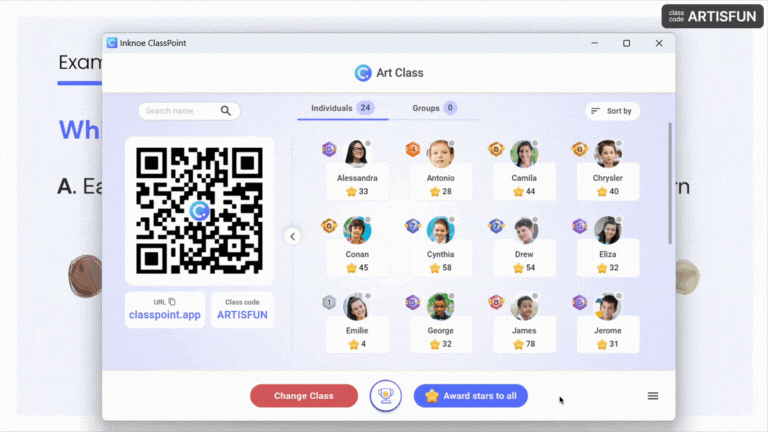
To reinforce desired behaviors and incentivize effort, consider using ClassPoint’s Award Star feature. You can award stars during a lesson for correct answers, thoughtful participation, or collaboration. For added bonus, gamify your students’ learning experience by letting them level up and earn badges, and climb the leaderboard.
5. Build in Opportunities for Feedback and Reflection
Last but not least, no lesson is complete without space for feedback and reflection. Throughout your lesson, use formative checks to gauge understanding and adjust your instruction accordingly.
This might include:
- Exit tickets
- Think-pair-share
- Quick polls or comprehension checks
- Peer or self-assessment tasks
Put a creative spin to your exit tickets! Check out these 30+ Fun Ways to Use Exit Tickets for Instant Feedback.
After teaching, allocate some time to reflect on the lesson’s effectiveness:
- Did your students meet the learning objective?
- Were the activities and assessment aligned?
- Did your students struggle with any part of the sequence?
Use this insight to revise your upcoming lessons or reteach key points. If your students grasped the concept quickly, consider adding an enrichment task or challenge. Otherwise, build in review or alternate approaches next time.
In the long term, reflection turns backward design into a continuous improvement cycle. The more intentional you are about reviewing your lessons, the stronger your planning becomes over time.
FAQs
What is backward design in lesson planning?
Backward design is a planning method where teachers begin with the desired learning outcomes, then determine how to assess those outcomes, and finally plan instructional activities. It ensures that every part of the lesson serves a clear purpose.
How is backward design different from traditional lesson planning?
Traditional planning often starts with content or activities and adds assessments later. Backward design flips the process by starting with the end goal, making the entire lesson more focused, intentional, and aligned with student learning objectives.
Why is backward design important for effective teaching?
Backward design helps teachers prioritize what students need to understand and ensures that lessons build toward that understanding. It prevents wasted time on disconnected activities and leads to stronger, more meaningful learning outcomes.
How do I use backward design in a single lesson?
Start by identifying a clear learning objective for the lesson. Next, decide how students will demonstrate their understanding. Then plan activities that help them build toward that assessment. This approach keeps your teaching focused and your students goal-oriented.
Can backward design be applied across different subjects and grade levels?
Yes. Backward design is flexible and can be applied in any subject or grade. Whether you’re teaching primary math or high school literature, starting with the desired result helps ensure that instruction, assessment, and activities are all aligned to support learning.
