
Enhance your PowerPoint presentations by incorporating music and adding your own narration or unique sound bites. This not only keeps your audience engaged but also complements your written content. Learning how to add and record audio in PowerPoint is a valuable skill, enabling you to create compelling presentations for professional, educational, and personal purposes.
Recording audio in PowerPoint offers significant advantages, especially when delivering remote or asynchronous presentations. You can:
- Record yourself giving the presentation and share the recording for viewers to access at their convenience, or
- Include audio clips to emphasize transitions, key points, or significant moments within your presentation.
Continue reading to discover how to record audio live in PowerPoint on Windows devices, add pre-recorded audio, and find useful tips for editing!
Step-by-step guide: How to Record Audio on PowerPoint
In PowerPoint, you have the capability to record two types of audio:
- Recording for exporting as a video: This method is ideal for narrating your presentation, making it perfect for sharing with others to watch at their own pace.
- Recording short audio clips: This method allows you to incorporate audio into your live presentation.
Let’s walk you through both methods of recording audio directly within PowerPoint:
Before recording, check your computer settings to ensure PowerPoint has permission to record audio and you have your microphone enabled. For the best audio clarity, try using an attached, external mic, instead of a built-in mic.
Option 1: Record Narration for All Slides
Step 1: Open Your PowerPoint Presentation
Launch PowerPoint and open a new or existing PowerPoint file. If your are starting from scratch, make sure to complete the slides with design and interactive elements (make sure your presentation is engaging!) before adding your audio.
Step 2: Choose the Starting Position
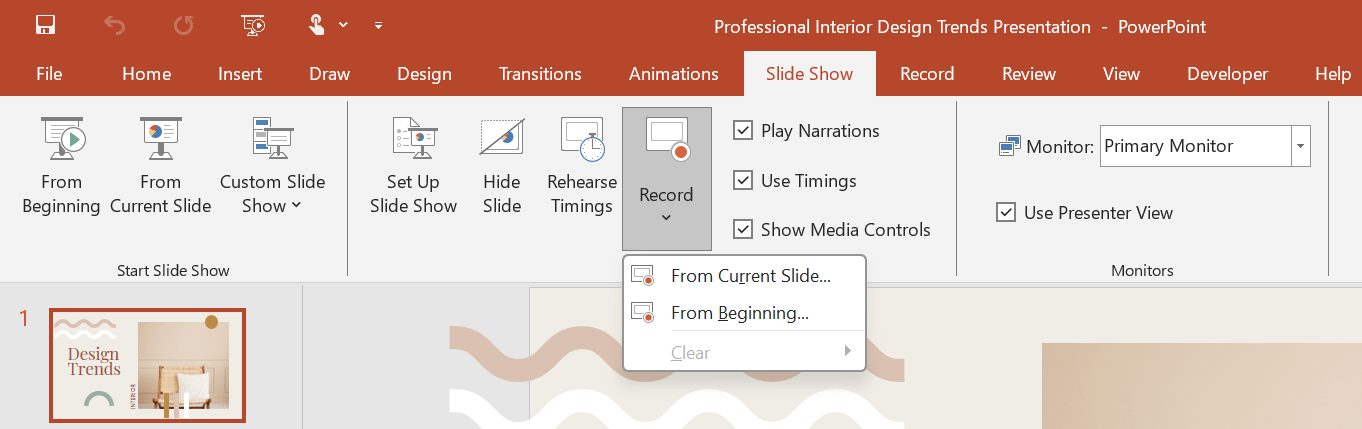
- Go to the ‘SlideShow’ tab and click on the arrow next to ‘Record Slide Show.’
- Choose between ‘From Current Slide’ or ‘From Beginning’ based on your requirements.
- This will open the recorder window, where you can make necessary adjustments to the settings.
Step 3: Adjust Settings
You can select the microphone, view your notes, and toggle your camera on or off.
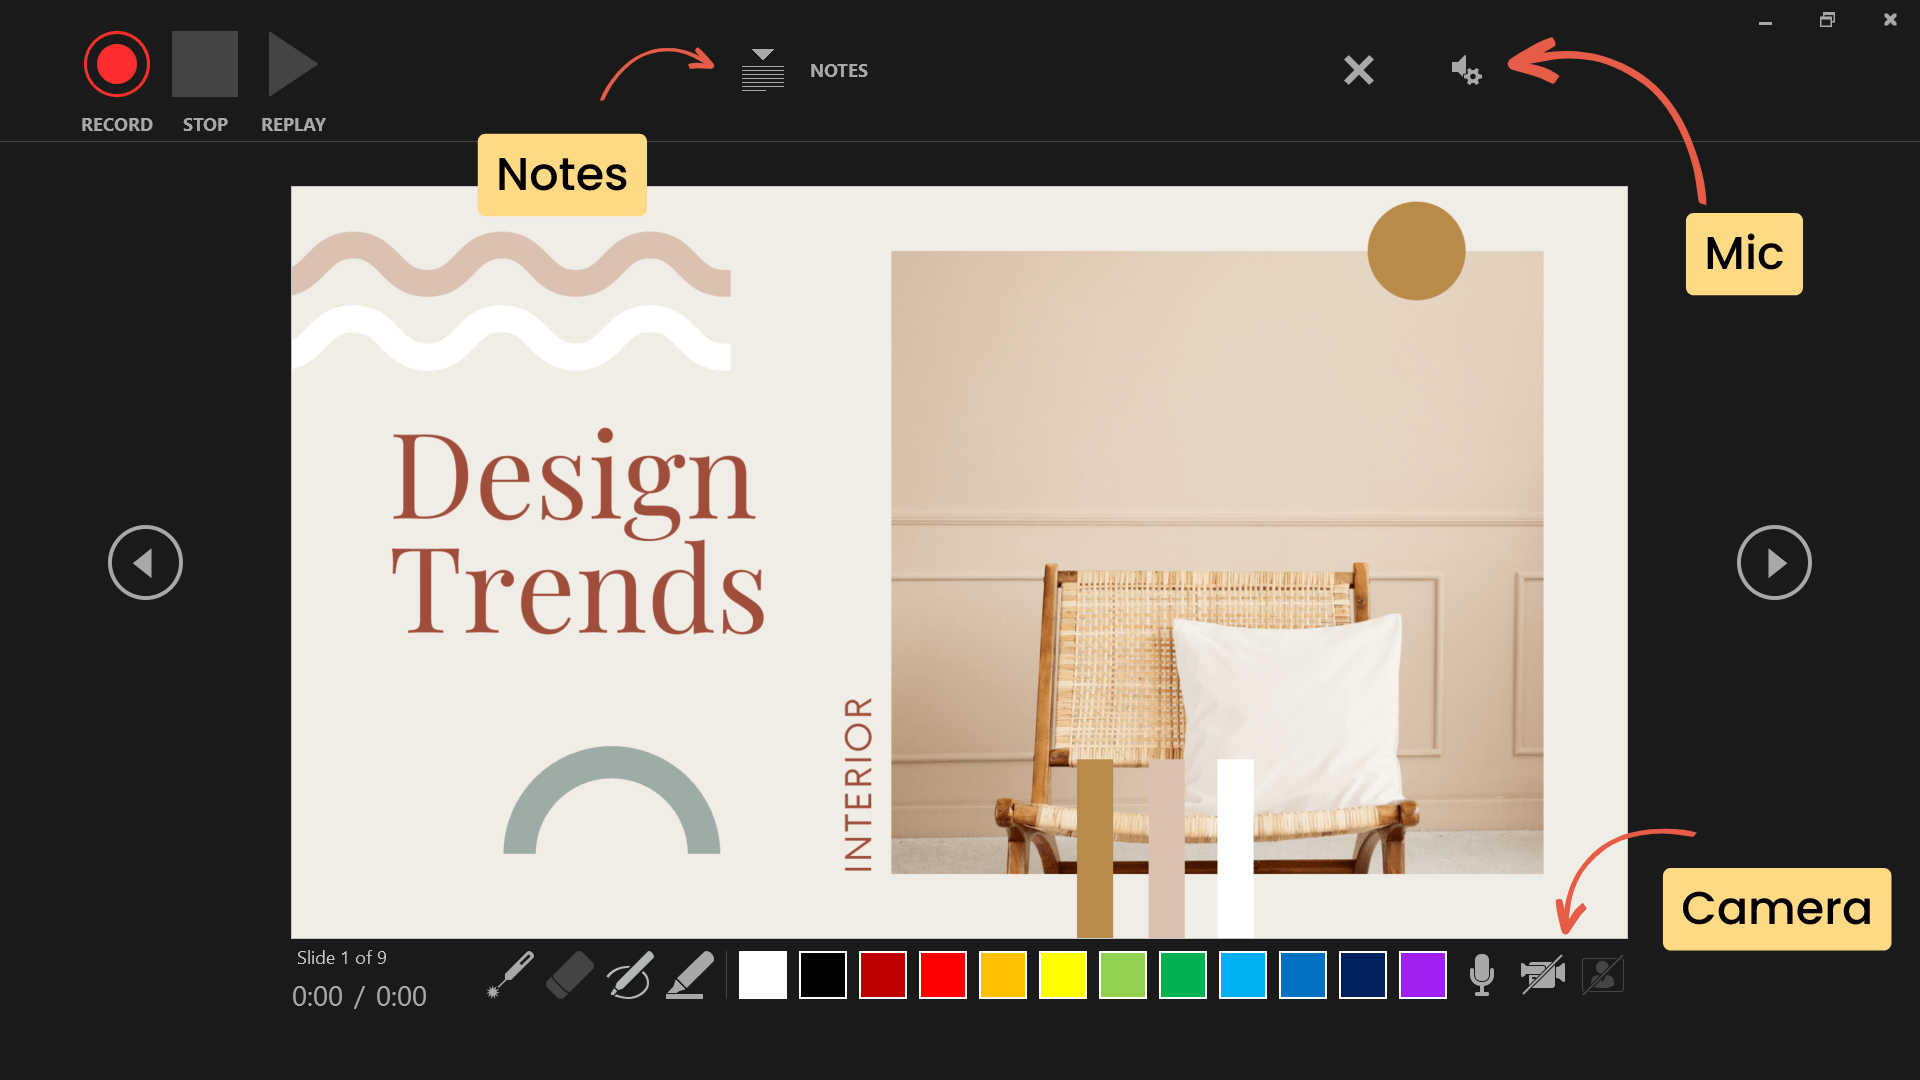
Step 4: Begin Recording
When you are ready, click the ‘Play’ button to begin recording. You will see a 3-second countdown, then the recording will start and you can begin speaking.

Use the side arrows for smooth navigation through your presentation while recording. Pause or stop the recording at any point. To review the recorded audio, click ‘Replay.’ To delete any recordings, click the ‘x’ next to the speaker icon.
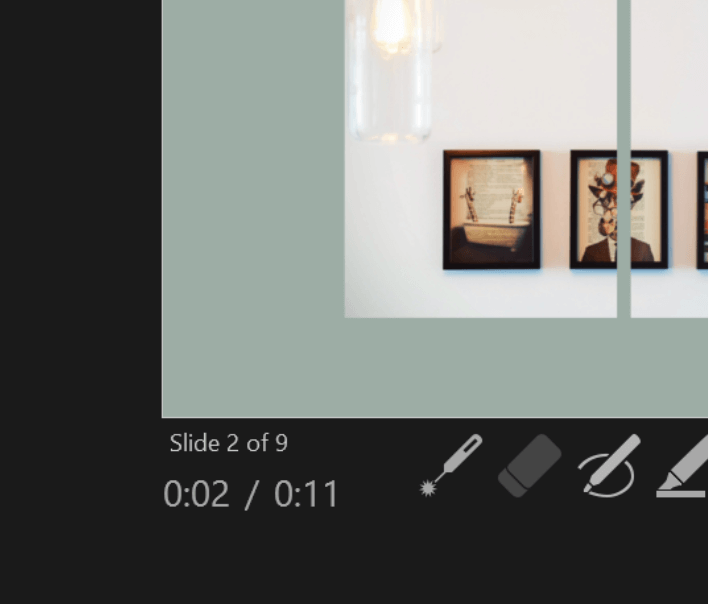
At the bottom left, you’ll find two timers: one for the entire presentation and one for the specific slide, helping you keep track of the recording length.
Step 5: Stop Recording
When done, click the ‘X’ in the top right-hand corner. Your audio recordings will be saved to each slide, indicated by the speaker icon at the bottom right corner of your slide.
Step 6: Share Recording
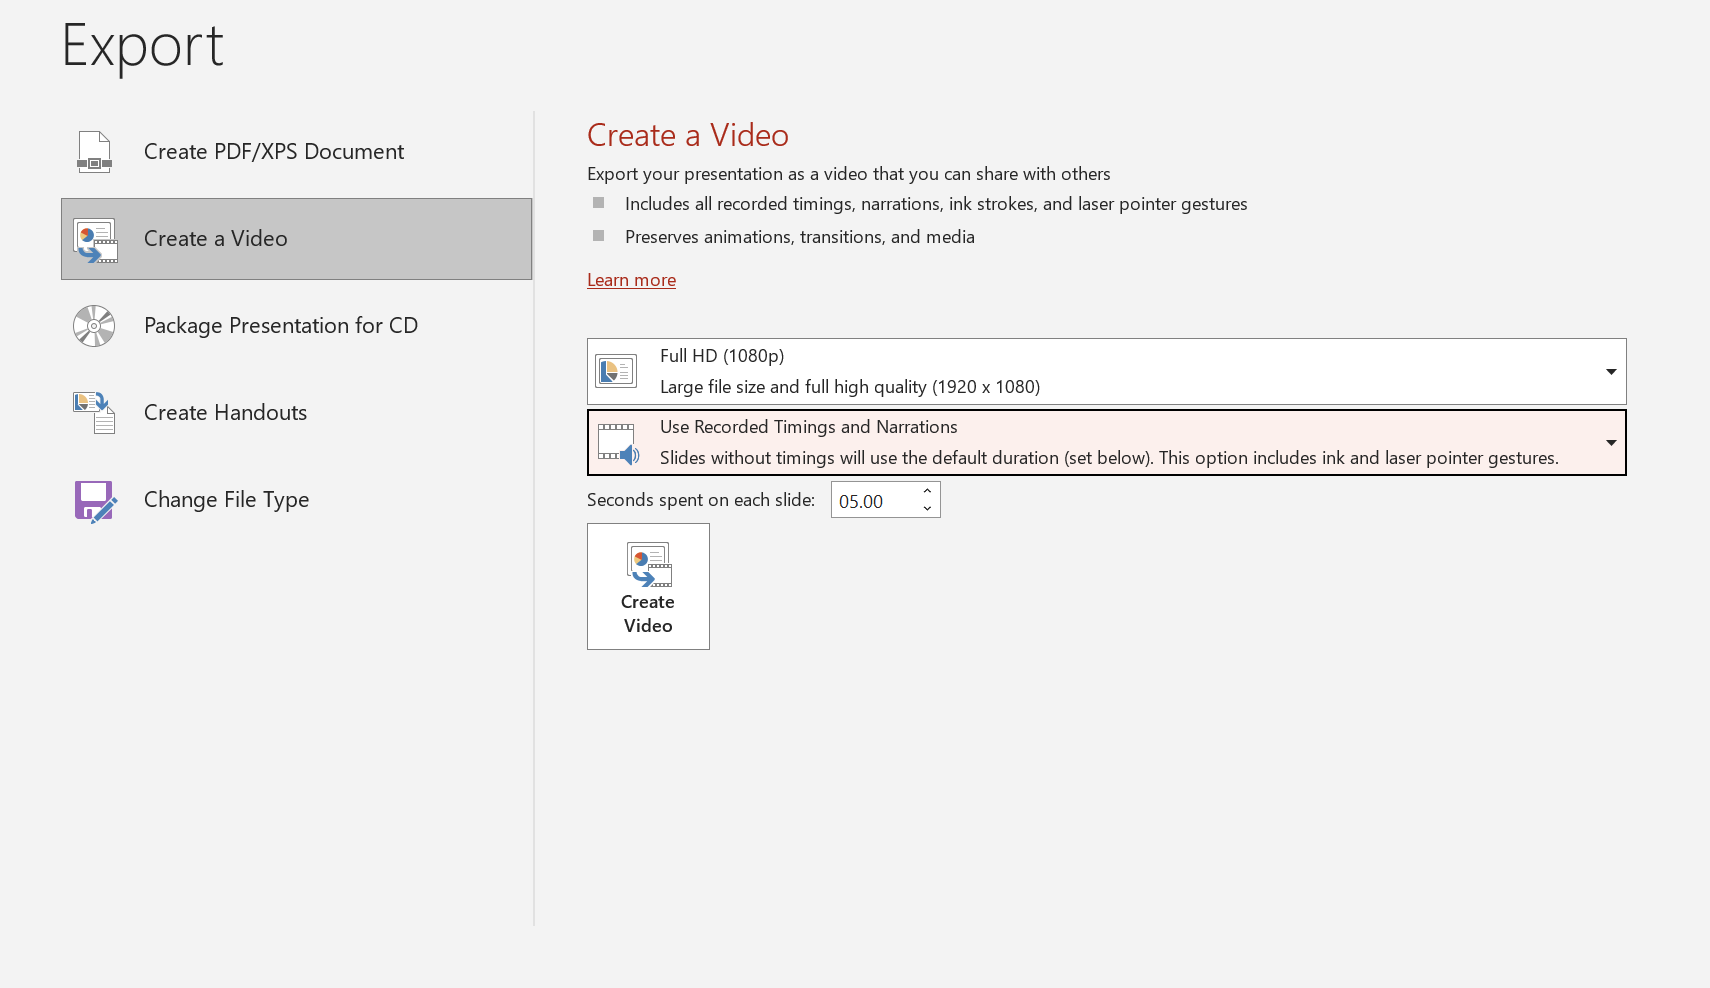
To share your recording, export the PowerPoint file as a video, selecting ‘Use Recorded Timings and Narrations.’ Then, easily share it via email or add it to a Learning Management System for convenient viewing.
Option 2: Record Audio for Specific Slides
Step 1: Navigate to the Desired Slide
Select the specific slide where you want to record audio. This could be for narration, background music, or sound effects, depending on your presentation’s needs.
Step 2: Insert Audio
To add audio, click the ‘Insert’ tab on your PowerPoint ribbon. Then in the Media section, select ‘Audio’ then ‘Record Audio’.
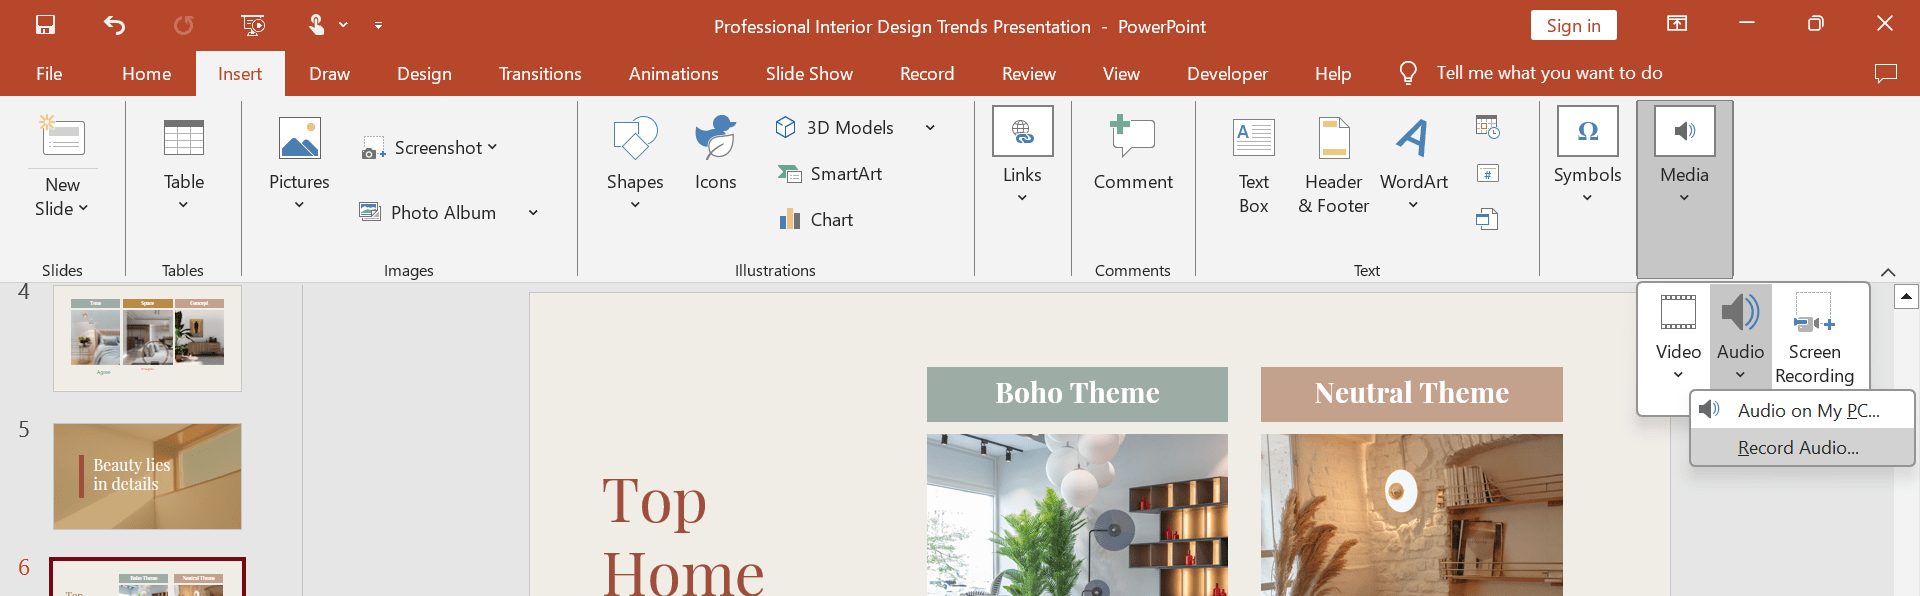
Step 3: Name Audio Sound
Name the sound uniquely for easy future retrieval.

Step 4: Begin Recording
- Click the red ‘Recording’ button to start.
- Use the green ‘Play’ button to review the audio.
- If it’s satisfactory, click ‘OK.’
- The speaker icon will be added to your slide, and you can reposition it as needed.
Step 5: Set Audio Playback Options
After adding audio to your slide, you can specify how and when you want it to play. Click on the Audio icon and select the ‘Playback’ tab in the PowerPoint ribbon.

In PowerPoint, utilize editing tools to refine your audio. Trim, adjust volume, and apply fade-in or fade-out effects for a professional touch. You can also set the start and stop points for the audio and save it for future use.
Step 6: Test Your Audio
Before your important presentation, test the audio to ensure it works smoothly. Play through your presentation to confirm that everything sounds and plays correctly.
Option 3: Adding Pre-Recorded Audio to PowerPoint
Already have the audio you want to use? No problem! Adding audio to your PowerPoint can be done in 4 simple steps:
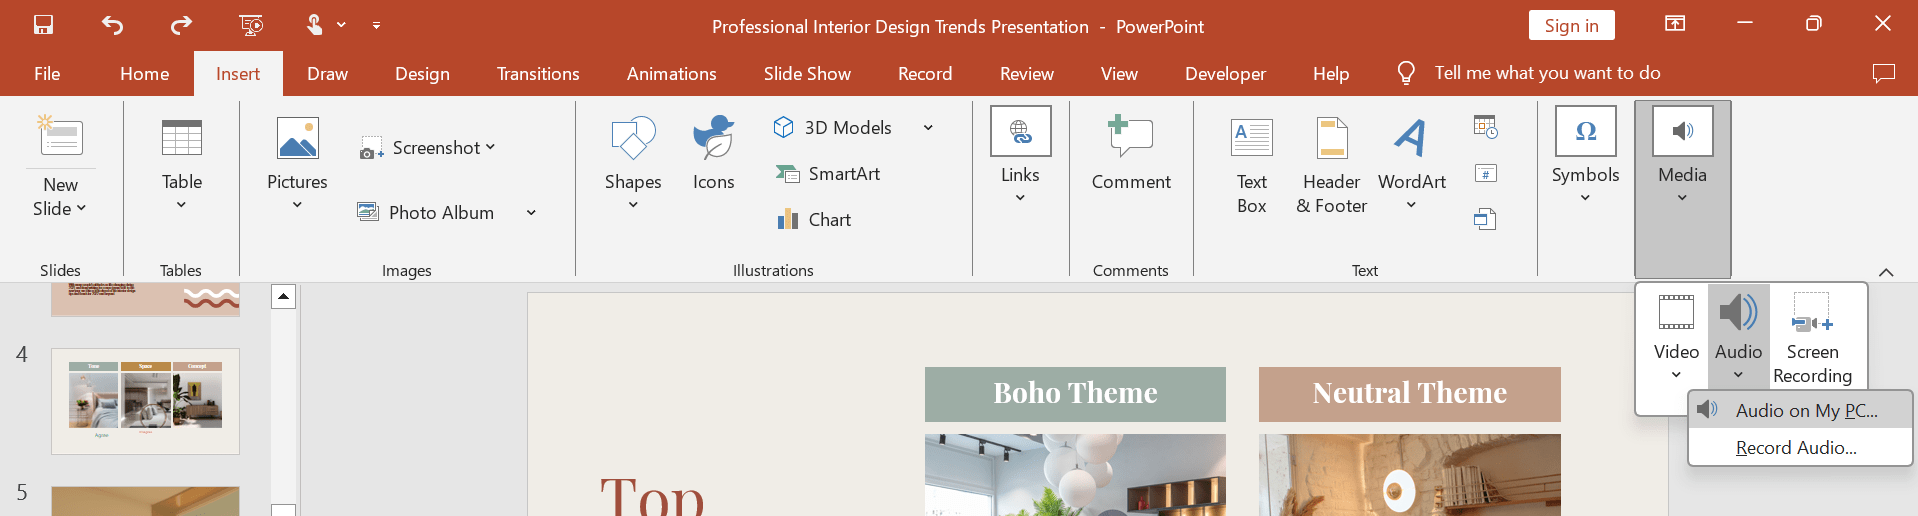
Step 1: Navigate to the Slide
Select the slide where you want to addyour pre-recorded audio.
Step 2: Insert Audio
Click the ‘Insert’ tab and choose ‘Audio’ from the Media Section. Select ‘Audio on My PC’ and search for your pre-recorded audio to be uploaded.
You can also insert notes and videos to your PowerPoint slides easily.
Step 3: Configure Playback Options
Customize your playback settings to suit your needs, such as when the audio should start and how it should play.
Step 4: Test it out
Ensure that the audio plays well and syncs up with your slide transitions and animations for a seamless presentation.
Expert Tips for the Best Recording
Use these tips to get the best recording in PowerPoint:
- Choose the Right Microphone: Opt for a high-quality microphone for clear and professional audio. For frequent recordings, consider an external microphone.
- Minimize Ambient Noise: Record in a quiet space to reduce background noise. Close doors and windows, and use noise-canceling software if necessary.
- Prepare Your Narration: Outline your narration to ensure a structured delivery, preventing pauses or monotony. Avoid reading line by line.
- Practice Your Delivery: Practice your narration multiple times for improved flow and clarity. Utilize PowerPoint’s Speaker Coach for help with pace, tone, and filler words.
- Edit Minor Mistakes: Don’t worry about small errors during recording; you can edit them out later using PowerPoint’s editing tools.
- Enhance Accessibility: When recording the entire presentation, add closed captions or subtitles to make it accessible to a broader audience, including those with hearing impairments.
Bonus: Recording Interactive PowerPoint Presentations
Want to take your PowerPoint recordings to the next level? Include interactive elements in your PowerPoint recordings to engage your audience more effectively with ClassPoint.
ClassPoint is an interactive teaching tool that integrates directly into PowerPoint, Coffering live presentation engagement features such as interactive questions, gamification, and presentation tools!
When recording your presentation, use third-party recording software like Zoom, Teams, Loom, or Screencast-O-Matic, and incorporate ClassPoint features alongside your audio narration, like so:
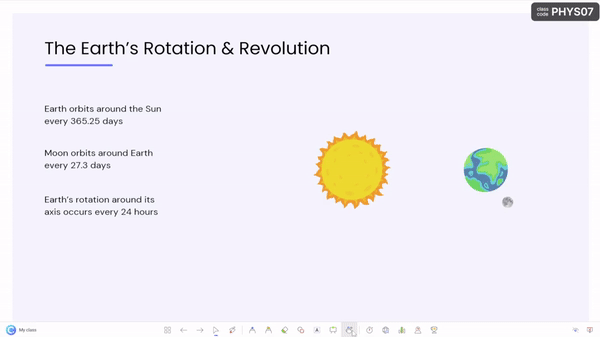
1. Live Annotations
Use Pens, Highlighters, Shapes, and even Text Boxes to add notes and highlight the important information on your slides while recording.

2. Added Whiteboard Slides
Add variety to your presentation by annotating on a blank whiteboard slide of your choosing.
3. Laser Pen
ClassPoint’s laser can be used as a pen with disappearing ink and a spotlight when you press the ‘S’ key on your keyboard, allowing you to guide your audience’s attention more effectively.
4. Draggable Objects
Enhance audience understanding by moving objects on your slide as you explain, emphasize key concepts, and create visual associations.
Here are 8 exciting ways you can use Drag and Drop in your PowerPoint presentation.
5. Embedded Browser
If you need to search the web to emphasize a key point or show a video, simply open a browser within your presentation without interrupting your seamless presentation and recording.
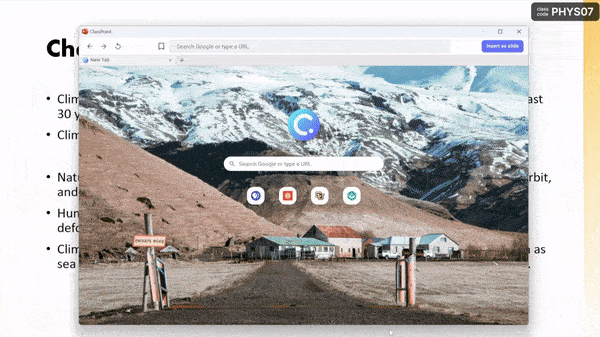
Learn how you can embed a website in your PowerPoint presentation in a few clicks.
6. Timer or Stopwatch
If you want your audience to reflect on a question or complete an activity independently, use the timer or stopwatch to create a brief pause before resuming your recording.
Here are 10 effective ways you can incorporate a Timer in your classroom.
To instantly elevate student enegagement in your classroom, consider encouraging students to contribute using audio submission using ClassPoint's audio record.
Final Thoughts
Whether you’re narrating a presentation for asynchronous viewing or incorporating audio into a live session, you’re now equipped with the knowledge of how to record audio on PowerPoint in the best way.
With added audio, you can engage your audience in a way that ensures your message resonates, no matter where or when they access your content.
Begin experimenting with these techniques, and see how recording audio on PowerPoint and leveraging ClassPoint can transform your PowerPoint presentations, both live and virtually.
Recommended Readings
