
Blended learning, an innovative educational approach that combines traditional face-to-face instruction with digital learning, is revolutionizing classrooms worldwide.
This method ensures flexibility, promotes student engagement, and enhances learning outcomes. In this blog post, we delve into specific blended learning examples, showcasing how ClassPoint seamlessly integrates into these activities. We will cover:
- Flipped classrooms and interactive lectures
- Station rotation and collaborative projects
- Blended learning for assessment and feedback
Dive in to discover how blended learning can transform your teaching experience and significantly benefit your students.
Table of Contents
What is Blended Learning?
Blended learning is an educational approach that combines traditional face-to-face classroom teaching methods with online digital media, allowing for a more flexible and personalized learning experience.
Top 6 Blended Learning Models and Practical Examples for Each
Blended learning is an educational approach that combines traditional classroom teaching with digital media and online instructional methods. This method ensures a balance between teacher-led instruction and student-centric learning, fostering an environment where students can progress at their own pace.
ClassPoint is an innovative tool that significantly enhances the blended learning experience, seamlessly integrating with PowerPoint to create an interactive and engaging classroom setting.

1. Flipped Classroom Model
In the flipped classroom model, students are introduced to learning material before class, with classroom time then being used to deepen understanding through discussion and problem-solving activities.
ClassPoint transforms this model by:
- Pre-Class Engagement: Teachers can share interactive presentations with students before class, ensuring they come prepared.
- In-Class Interaction: Utilize live quick polling and interactive quizzes to gauge understanding and encourage participation.
- Immediate Feedback: ClassPoint provides instant effective feedback to both students and teachers, identifying areas that need further attention.
Create interactive quizzes in PowerPoint with this tutorial and 50 use cases.
2. Station Rotation Model
This model breaks the classroom into different learning stations, each designed to focus on a particular skill or topic.
ClassPoint enhances station rotation by:
- Interactive Stations: Create stations with interactive quizzes and activities, making learning fun and engaging.
- Timed Actitivities: With ClassPoint’s timer, teachers can effectively track the duration of each of the stationed activities.
- Student Grouping: Group students in random with ClassPoint’s Name Picker to keep the class engaged.
- Real-Time Monitoring: Teachers can monitor student progress in real-time, providing assistance as needed.
- Data-Driven Decisions: Use ClassPoint’s analytics to assess student performance and tailor future stations to their needs.
3. Lab Rotation Model
Similar to the station rotation model, but with a dedicated computer lab time.
ClassPoint’s role includes:
- Pre-Lab Preparation: Share presentation materials and quizzes with students before lab sessions to ensure students are ready.
- Lab Engagement: Use interactive presentations and annotations to guide lab activities, ensuring students stay on track.
- Post-Lab Review: Utilize ClassPoint’s analytics to review lab results, discuss findings, and solidify learning.
Here're expert tips and guides on how you can make an interactive PowerPoint teaching presentation.
4. Flex Model
This model allows students to move on their own through a digital curriculum with teacher support as needed. ClassPoint supports the flex model by:
- Self-Paced Learning: Share interactive content that students can navigate at their own pace.
- Teacher Support: Utilize ClassPoint’s automated grading and feedback features to provide personalized support and feedback.
- Assessment and Tracking: Monitor student progress and assess their understanding through interactive quizzes and quick polling.
5. Online Lab Model
In this model, students take their entire course online but in a school setting, with teachers available for support.
ClassPoint’s contribution includes:
- Online Interaction: Create a virtual classroom environment with interactive presentations.
- Teacher Facilitation: Utilize ClassPoint’s interactive quizzes to facilitate discussions, answer questions, and provide guidance.
- Assessing Understanding: Use quizzes and polls to assess student understanding and adjust instruction as needed.
6. Individual Rotation Model
Students rotate through stations, but on personalized schedules set by a teacher or software algorithm.
With ClassPoint, this is enhanced by:
- Personalized Schedules: Share tailored interactive content based on each student’s schedule.
- Focused Interaction: Use ClassPoint’s tools for personalized quizzes and activities.
- Gamified Learning: Reward positive behaviours and progress with stars, levels and badges to encourage individual achievements.
Learn how you can use the help of AI like ChatGPT to personalise learning experiences in the classroom.
5 Effective Blended Learning Examples and Activities in Action
Blended learning thrives when educators seamlessly integrate digital tools with in-person teaching. Below are ten specific blended learning examples, each tied directly to a ClassPoint feature, showcasing the versatility and impact this tool can have in enhancing educational experiences.

1. PowerPoint Puzzles
Interactive and educational puzzles in PowerPoint can adapt to various topics and subjects. They can be tailored to fit different lessons and adjusted for different learning levels, making them versatile educational tools. Interactive puzzles can also encourage collaborative learning. By utilizing PowerPoint’s features in combination with ClassPoint, a powerful add-in, you can transform static images into dynamic interactive PowerPoint puzzles that encourage student interaction and critical thinking, making it an ideal activity for blended learning.
Here is a comprehensive guide to help you create and elevate your PowerPoint puzzle templates:
Creating a PowerPoint Puzzle Template
- Choose Your Main Image: Start by selecting the main image that you want to turn into a puzzle. This image will serve as the base for your interactive puzzle.
- Place a Square Over the Image: Overlay a square shape onto the area of the image that you want to transform into a puzzle piece.
- Merge the Image and Square: Select both the image and the square, then use the ‘Merge Shapes’ function to combine them into a single shape.
- Create Puzzle Pieces: Use the ‘Fragment’ option under ‘Merge Shapes’ to break the combined shape into individual puzzle pieces.
- Repeat for All Pieces: Repeat the process of overlaying squares and merging them with the image until you have created all the desired puzzle pieces for your template.
Elevating Your PowerPoint Puzzle Template: Make It Interactive!
- Make Puzzle Pieces Draggable: Select the puzzle pieces that you have created, navigate to the ClassPoint tab, and enable the ‘Drag’ function for these selected pieces.
- Start the Slideshow: Begin your PowerPoint slideshow to move into presentation mode.
- Enter Draggable Objects Mode: Click on the ‘Draggable Objects’ icon to activate the drag and drop functionality for your puzzle pieces.
- Interact with Your Puzzle: Now, you and your students can interactively move and place the puzzle pieces, turning a static image into a dynamic learning tool.
2. Scavenger Hunt
By integrating scavenger hunts into blended learning, educators can craft dynamic and interactive experiences that are suitable for both in-person and online learning. These activities not only boost enjoyment in learning but also help solidify learning goals in a way that sticks with students.
You can easily create a digital scavenger hunt using ClassPoint’s Draggable Objects feature. Hide items within slides and have students move objects around to find them. This hands-on activity promotes problem-solving skills and adds an element of fun to learning.
Setting up your scavenger hunt:
- Choose Your Theme: Begin by selecting a theme for your scavenger hunt. This could be anything from a virtual tour of a city to uncovering hidden artifacts in a museum.
- Craft Your Background: Design or choose a background that aligns with your theme. This will serve as the playing field for your scavenger hunt.
- Select Objects for Your Hunt: Identify the items or clues that participants will search for. These could be objects, icons, or even words.
- Make Objects Draggable: Using the ClassPoint tool, select the items you’ve chosen for the hunt and enable the ‘Drag’ functionality. This will allow participants to move the items around during the scavenger hunt.
- Create Clues or Tasks: Design hints or tasks that guide participants in finding the draggable objects. This can be in the form of riddles, questions, or straightforward hints.
- Embed Feedback Mechanisms: Consider using ClassPoint’s feedback features to inform participants when they’ve found an item correctly or if they need to keep searching.
- Test Your Scavenger Hunt: Before rolling it out, make sure to test your scavenger hunt to ensure everything works seamlessly.
- Play and Engage: Launch your scavenger hunt, either in-person with a projector or share it online for remote participants. Encourage everyone to interact, explore, and most importantly, have fun!
3. Collaborative Brainstorming

By leveraging collaborative brainstorming in blended learning, educators can create an environment where active learning, teamwork and collaboration thrive, fostering a rich and interactive learning experience that transcends physical boundaries.
You can foster teamwork and idea sharing with ClassPoint’s Whiteboard Backgrounds. During group activities, transform your slides into whiteboards, allowing students to jot down ideas and collaborate in real time. This feature encourages creativity and collective learning.
Here’s how you can do it:
- Prepare Your Whiteboard: Set up your PowerPoint slides with a Whiteboard Background. This ensures that the focus remains on the ideas being shared.
- Create Sections for Different Topics: If your brainstorming session covers multiple topics, divide your whiteboard into sections, assigning a specific area for each topic.
- Use Sticky Notes or Drawing Tools: Utilize the sticky notes or annotation tools in ClassPoint to jot down ideas. These tools mimic the experience of a physical whiteboard, making the transition to digital brainstorming seamless.
- Encourage Real-Time Collaboration: Invite participants to join the session through Slide Drawing and encourage them to add their thoughts and ideas directly to the whiteboard.
- Facilitate the Discussion: As the host, guide the discussion, ensuring that every participant has an opportunity to contribute.
- Capture and Save the Session: Ensure that you save the contents of the whiteboard at the end of the session as slides to your PowerPoint. This ensures that all the ideas generated are captured and can be referred to later.
- Follow Up with a Summary: After the session, send out a summary of the ideas generated, along with the saved whiteboard image, to all participants. This helps to keep the momentum going and ensures that the ideas are acted upon.
4. PowerPoint Trivias

Engaging students can be a challenge, but with tools like PowerPoint and ClassPoint, creating an interactive trivia game has never been easier. Plus, trivias are ideal activities to spice up student engagement be it in online or in-person teaching. Here’s a comprehensive guide on how to bring trivia excitement to your classroom using these platforms.
Here’s how you can do it:
- Download and Install ClassPoint: Ensure that you have ClassPoint installed on your system and that you’ve created an account to access all its features.
- Prepare Your PowerPoint Presentation: Open PowerPoint and create a new presentation, dedicating each slide to a different trivia question.
- Utilize the Inknoe ClassPoint Tab: Go to the Inknoe ClassPoint tab in PowerPoint and start adding interactive quiz questions to your slides.
- Configure Quiz Settings: Customize your quiz settings according to your preferences. You can set time limits, choose the question type, and more.
- Enter Slideshow Mode: Once your trivia slides are ready, enter the slideshow mode to start the game.
- Participants Join the Game: Instruct participants to go to classpoint.app on their devices and enter the class code provided to join the game.
- Start the Trivia Game: Click on the ClassPoint quiz buttons to initiate the game and display questions to participants.
- Collect Answers: Participants submit their answers through classpoint.app, and you can view their responses in real-time.
- Showcase Top Participants: Utilize ClassPoint’s leaderboard feature to display the top participants and create a competitive yet fun atmosphere.
- Engage and Discuss: Take the time to discuss the correct answers and provide additional information if necessary, turning the trivia game into an educational moment.
5. Classroom Quests
Classroom Games & Quests
Classroom games and quests can easily inject an element of fun and competition into the classroom, and turn traditional sleep-inducing lectures into dynamic, immersive experiences, both online and in-person.
Below are 3 examples of classroom quests you can set up easily in PowerPoint and play with your students:
#1 Current Event Question Hunt
Engage students and test their current event knowledge by posing questions related to current events or topics in the form of interactive quizzes in PowerPoint. Correct answers can earn students points and a higher position on the leaderboard. For extra credit, teachers can introduce bonus questions on learning management systems or social media, encouraging students to answer outside of class.
#2 Mission QR Codes
You can also turn classroom quests into exciting missions using mission QR codes linked to quiz questions in PowerPoint. You can easily set this up by first creating quiz question sets in your PowerPoint, and then taking a screenshot of your ClassPoint class QR code. Finally, scatter these QR codes throughout your classroom and you will soon witness your students eagerly engaged and on the edge of their seats.
#3 Drag and Drop
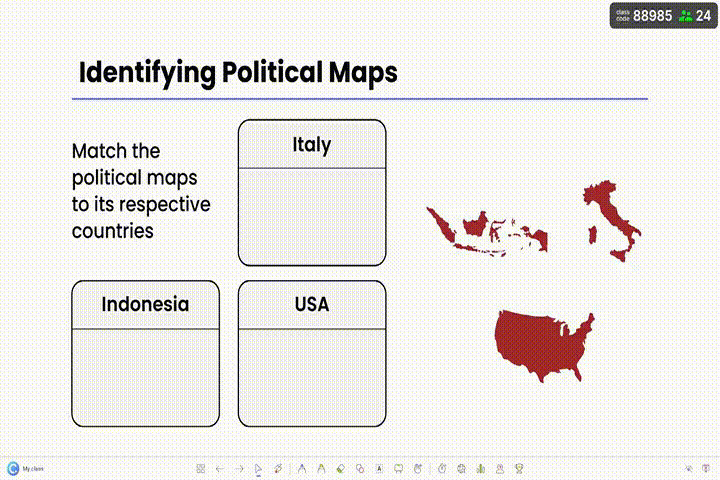
Utilizing drag and drop features in classroom quests adds a dynamic and interactive dimension to the learning experience. Trust us, utilising drag and drop in PowerPoint is like adding magic to your slides content when you can move things freely anytime during your presentation! We recommend integrating your classroom quests with this interactive puzzle using Draggable Objects. That way, you can add more anticipation and suspense when you reveal the clues or hidden information to any of the quest games you created. We bet your students cannot wait for you to reveal the next piece of clue or task!
Here are 8 exciting ways you can teach with drag and drop in your next lesson.
Take Your Teaching to the Next Level with Blended Learning and ClassPoint
Ready to revolutionize your classroom with blended learning examples and ClassPoint? Dive into this innovative teaching approach and watch as student engagement and understanding soar. Start your journey today by trying ClassPoint for free, and unlock the full potential of your teaching experience!
